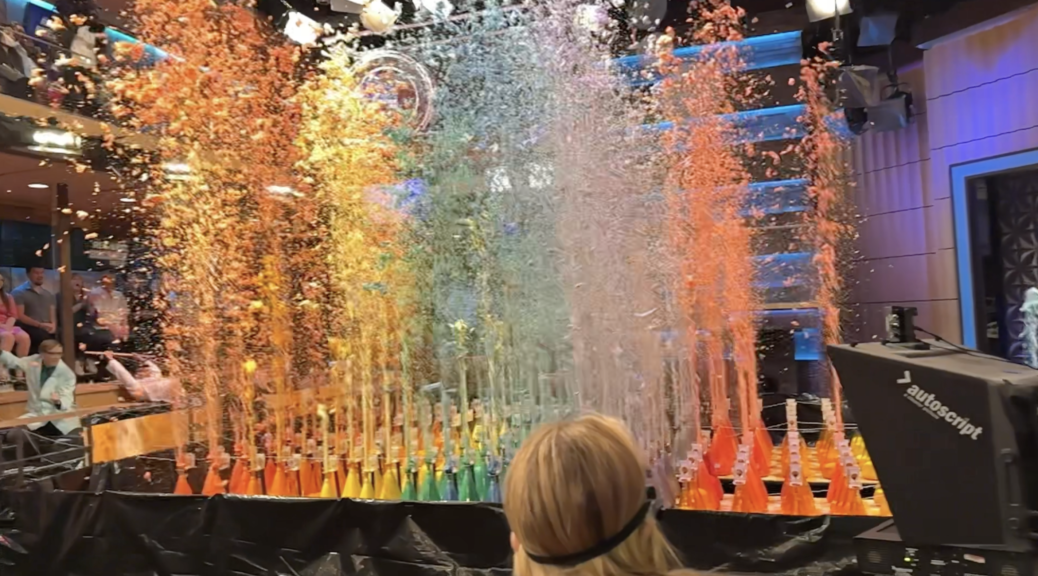
On a recent episode of Live with Kelly & Mark. Science Bob walked away with his third Guinness World Record involving his favorite science demonstration; Elephant Toothpaste! This time the record was for the MOST simultanous elephant toothpaste eruptions. The record to beat was 200.
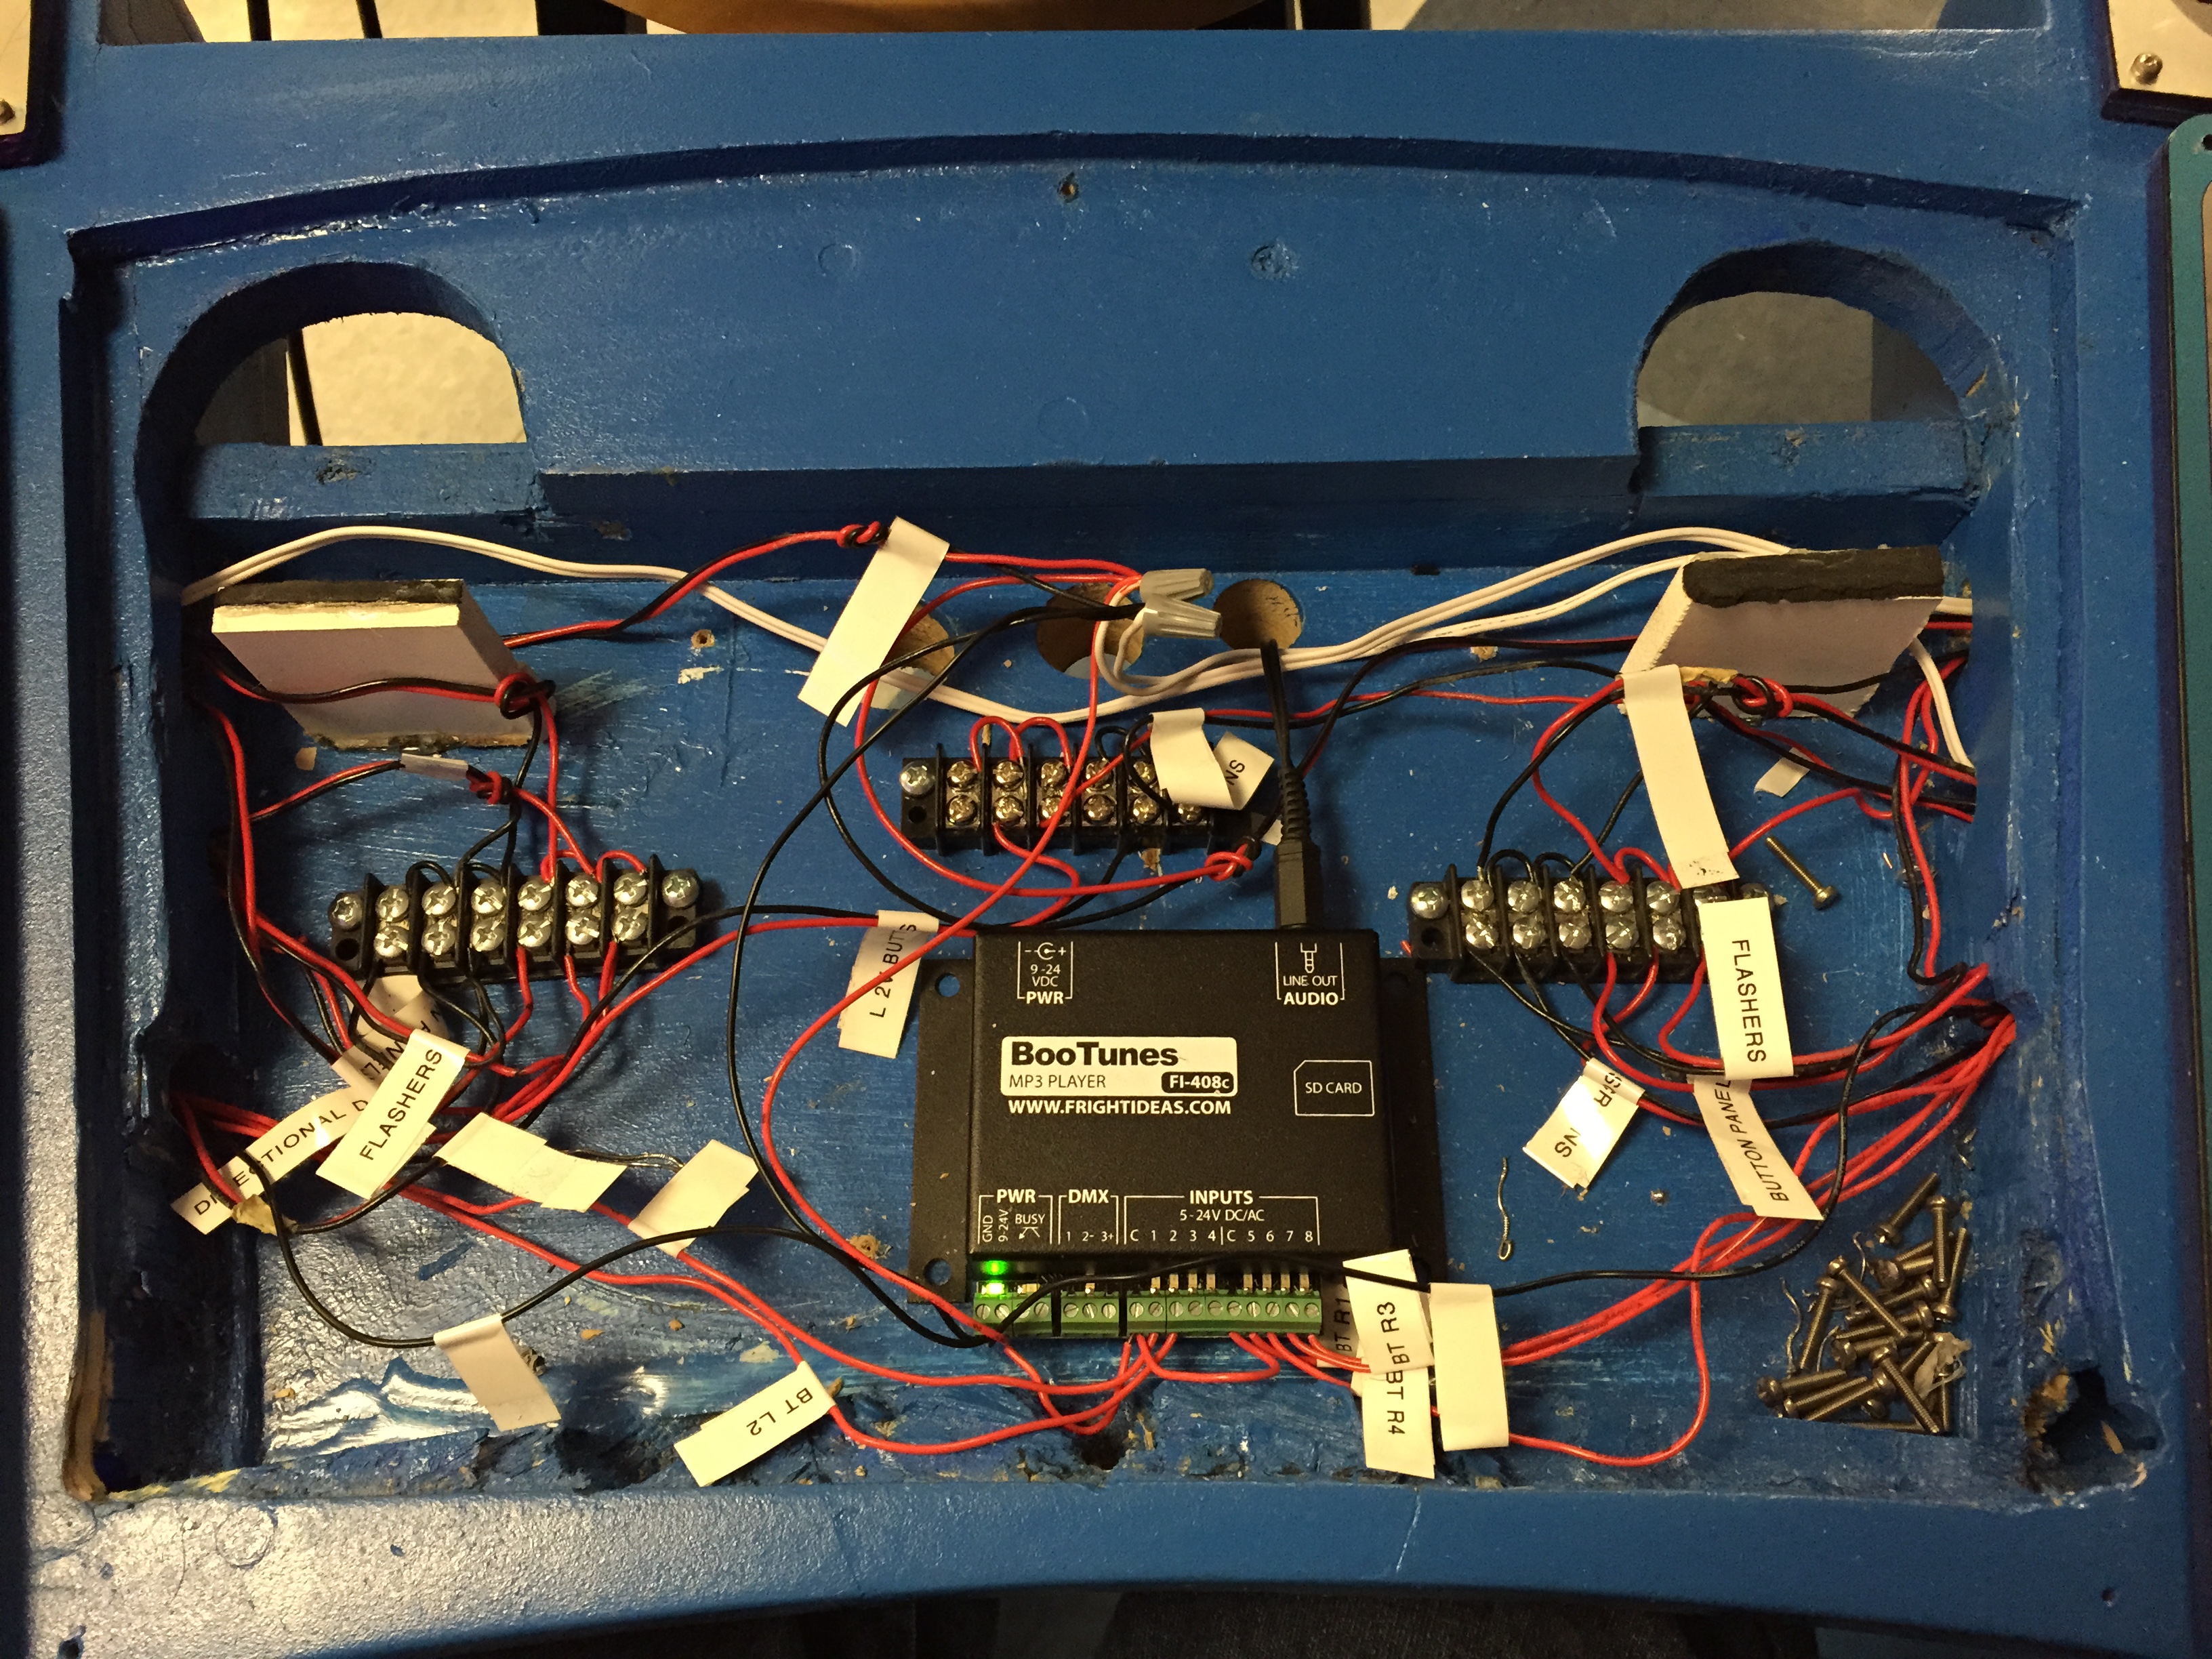
Triggering all the reactions took quite a bit of engineering. Bob designed, laser-cut, and assembled over 280 chemical tipping devices that could be triggered using strings and pins.
Then each flask had to be mounted, filled with hydrogen peroxide, and then the catalyst had to be added to the beaker on top in a very precarious way. The process to three days and the stage crew worked until 9pm the night before the demo.
In the end, It was all worth it, resulting in an epic demonstration and a new World Record!
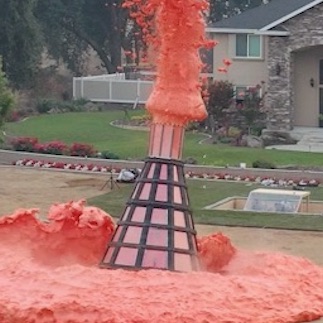
Anyone who saw Mark Rober’s epic Elephant Toothpaste video that broke the Guinness World Record for “Tallest Elephant Toothpaste Reaction” knows that despite its record-breaking reaction, there was also a CRITICAL OVERSITE in the way the base and the flask ultimately failed, sending the majority of the foam out the bottom instead of the top.
THE CRITICAL OVERSITE FROM PREVIOUS VERSION
Now we wondered what it would take to make it fully work. That means it was time to get back to the lab for Attempt #2! It took six months, over fifty people, and LOTS of testing to make this giant chemical reaction a success.
FIRST, What is Elephant’s Toothpaste…
The classic Elephant’s Toothpaste Reaction requires 3 things:
Hydrogen Peroxide
A catalyst (often potassium Iodide or yeast)
Soap
THE CHEMISTRY
Hydrogen peroxide is basically water (H2O) with an extra oxygen atom (making it H2O2) But don’t be fooled into thinking it is close to water. Concentrated hydrogen peroxide can result in a strong chemical burn if it gets on your skin. To create the elephant’s toothpaste reaction a second chemical is added (know as a catalyst) which basically tears-apart the hydrogen peroxide into the water while releasing Oxygen gas inside the bubbles.
Here are some Behind-The-Scenes testing clips and images from the video shoot.
This was a test of a special formula of Elephant’s toothpaste that was so powerful that it basically turned to steam before it could make foam.
This video demonstrates just how finicky chemistry can be. With just a difference of 10ml of soap and everything else the same, you can get very different-looking reactions.
This is the test we did for the Devil’s toothpaste box used outside the house. The new mixing device worked flawlessly.
The giant Orbees were expanded in a HUGE tank of water and then added to the top of the pool of small Orbees using a custom release and tube system.
RANDOM PHOTOS FROM THE BUILD & SHOOT DAYS
Building the steel flask
World largest flask!
The logo survived the eruption
Hanging out in Mark's workspace
Orbees!
Building the steel flask
Giant flask
Elephant Toothpaste New World Record!
Now it’s YOUR turn – try out the elephant’s toothpaste experiment at home!
Now that you’ve met Mark’s son, please consider sharing and donating to impact his life and so many others like him.
Mark will be joined by Jon Stewart, Conan O’Brien, Chris Rock, Adam Sandler, Stephen Colbert, John Oliver, Jack Black, Andy Samberg and a stellar collection of stars, YouTube creators, entertainers, comedians, musicians, athletes, (and me!) in a three-hour, interactive, livestreamed event as they raise money to support NEXT for AUTISM.
Perhaps the only thing better than the classic elephant’s toothpaste experiment, is the elephant’s toothpaste experiment at an absolutely colossal scale! After a record breaking science experiment last year with YouTuber, and NASA engineer Mark Rober, we teamed-up once again along with engineers and fabricators to try for another World Record attempt while highlighting a very special young cancer survivor. Watch the full video here:
WATCH THE VIDEO!
HOW WE PULLED IT OFF:
So much testing….
We knew we wanted the flow from the flask to be laminar, meaning it stays in a column of foam and does not break up into “confetti” when it leaves the flask – this was one of the biggest challenges from a chemistry stand point. (Breaking the world record by going confetti would have been much easier, but it does not look like the classic experiment.)
We conducted well over three dozen small scale tests to find the best chemical ratios, food coloring brands, chemical temperatures, flask designs, as well as testing whether tubes in the neck create a better stream or not, whether objects on the flask affect the flow, and other factors. After each test, Mark and the team would get on a call, review footage, and figure where to go next. Each attempt was tracked for every variable we could test and cataloged on an ever growing database.
The Elephant’s Toothpaste Reaction requires 3 things:
Hydrogen Peroxide
A catalyst (often potassium Iodide or yeast)
Soap
THE CHEMISTRY
Hydrogen peroxide is basically water (H2O) with and extra oxygen (making it H2O2) But don’t be fooled into thinking it is close to water. Concentrated hydrogen peroxide can result in a strong chemical burn if it gets on your skin. To create the elephants toothpaste reaction a second chemical is added (know as a catalyst) which basically tears-apart the hydrogen peroxide into water while releasing Oxygen gas inside the bubbles.
SMALL SCALE
Above is what we considered to be an ideal small scale version of the experiment – we got height, good color, and it stayed laminar. The question was whether we could crank up the scale and keep everything looking good. Next up was the 5 foot version.
MEDIUM SCALE We ran the medium scale, 5 foot flask five times and quickly discovered our biggest enemy was, in fact, pressure…lots of pressure. It was all about pressure and flow to keep it laminar and keep the flask intact.
In this 5 foot test, the chemistry worked well, and we got the laminar flow down, but the foam created so much pressure it split apart the plastic connection points held together by screws.
Here the neck size caused the foam to go confetti.
Nailed it!
LARGE SCALE We figured that we had enough information from our five footer to go ahead and ramp it up to the 10 foot version, heavily secured with Flex Tape, screws and straps. We were confident is was indestructible, and it turns out we underestimated chemistry.
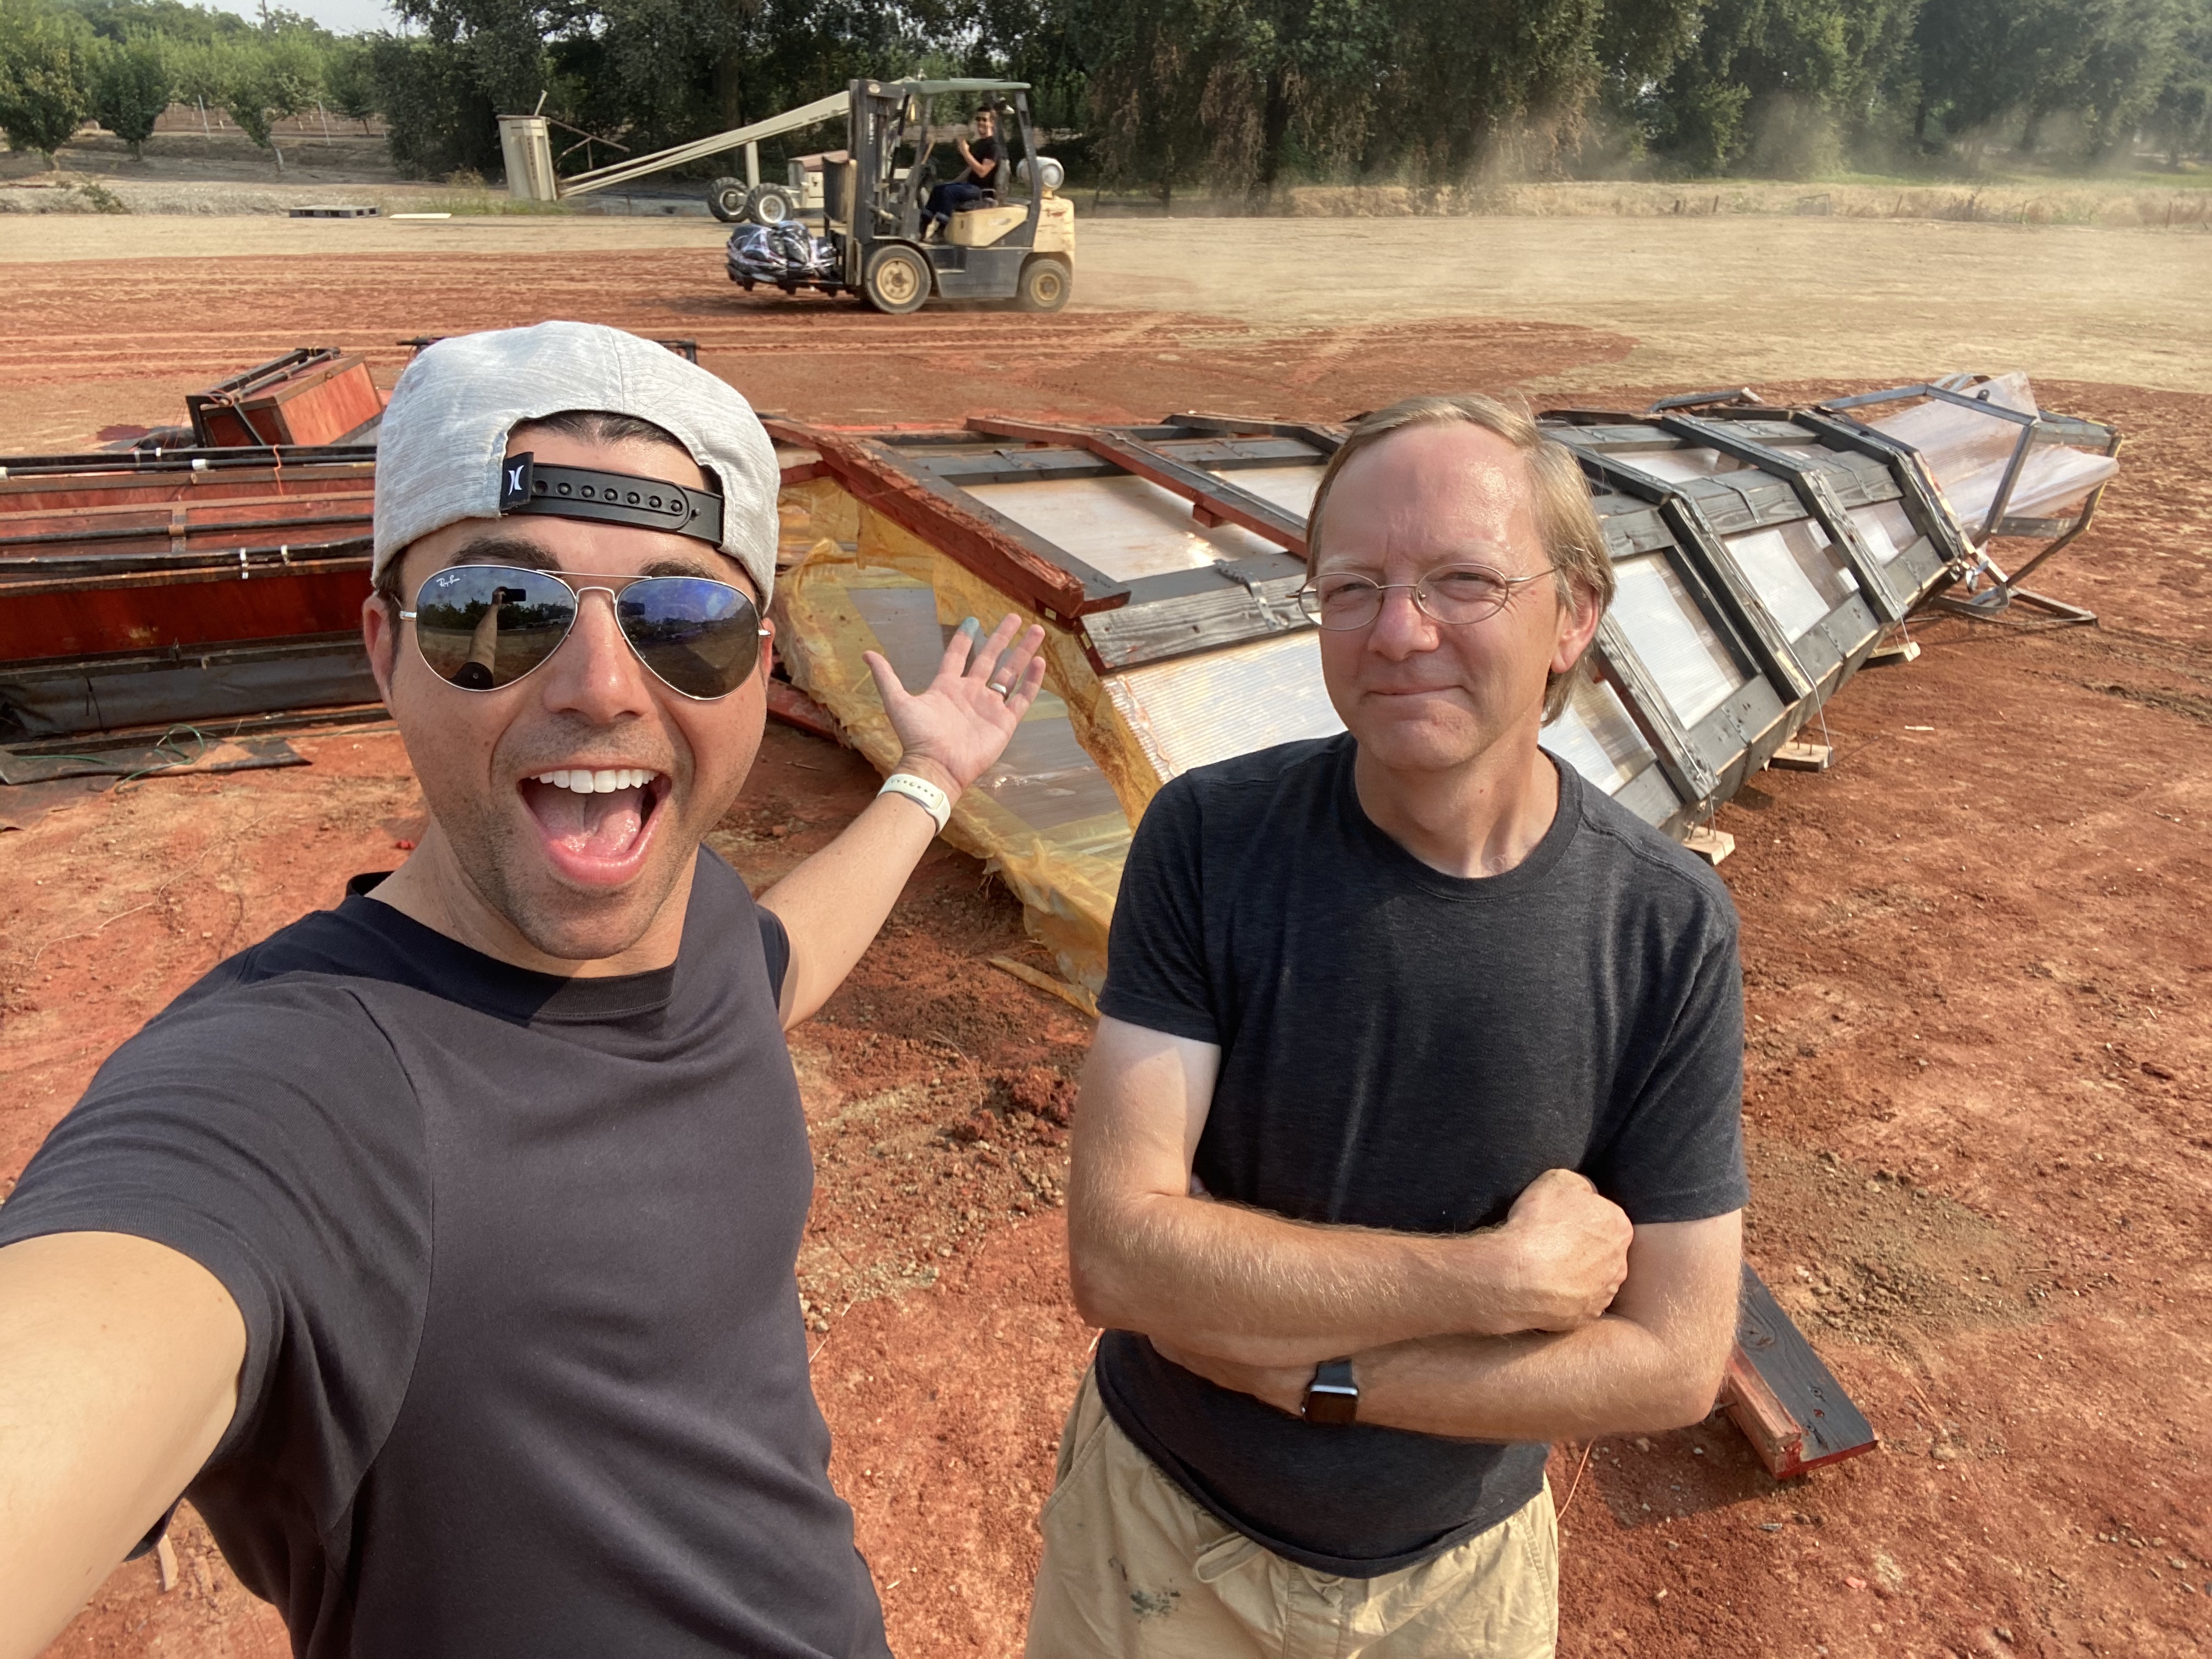
My buddy Jacob working on the flask
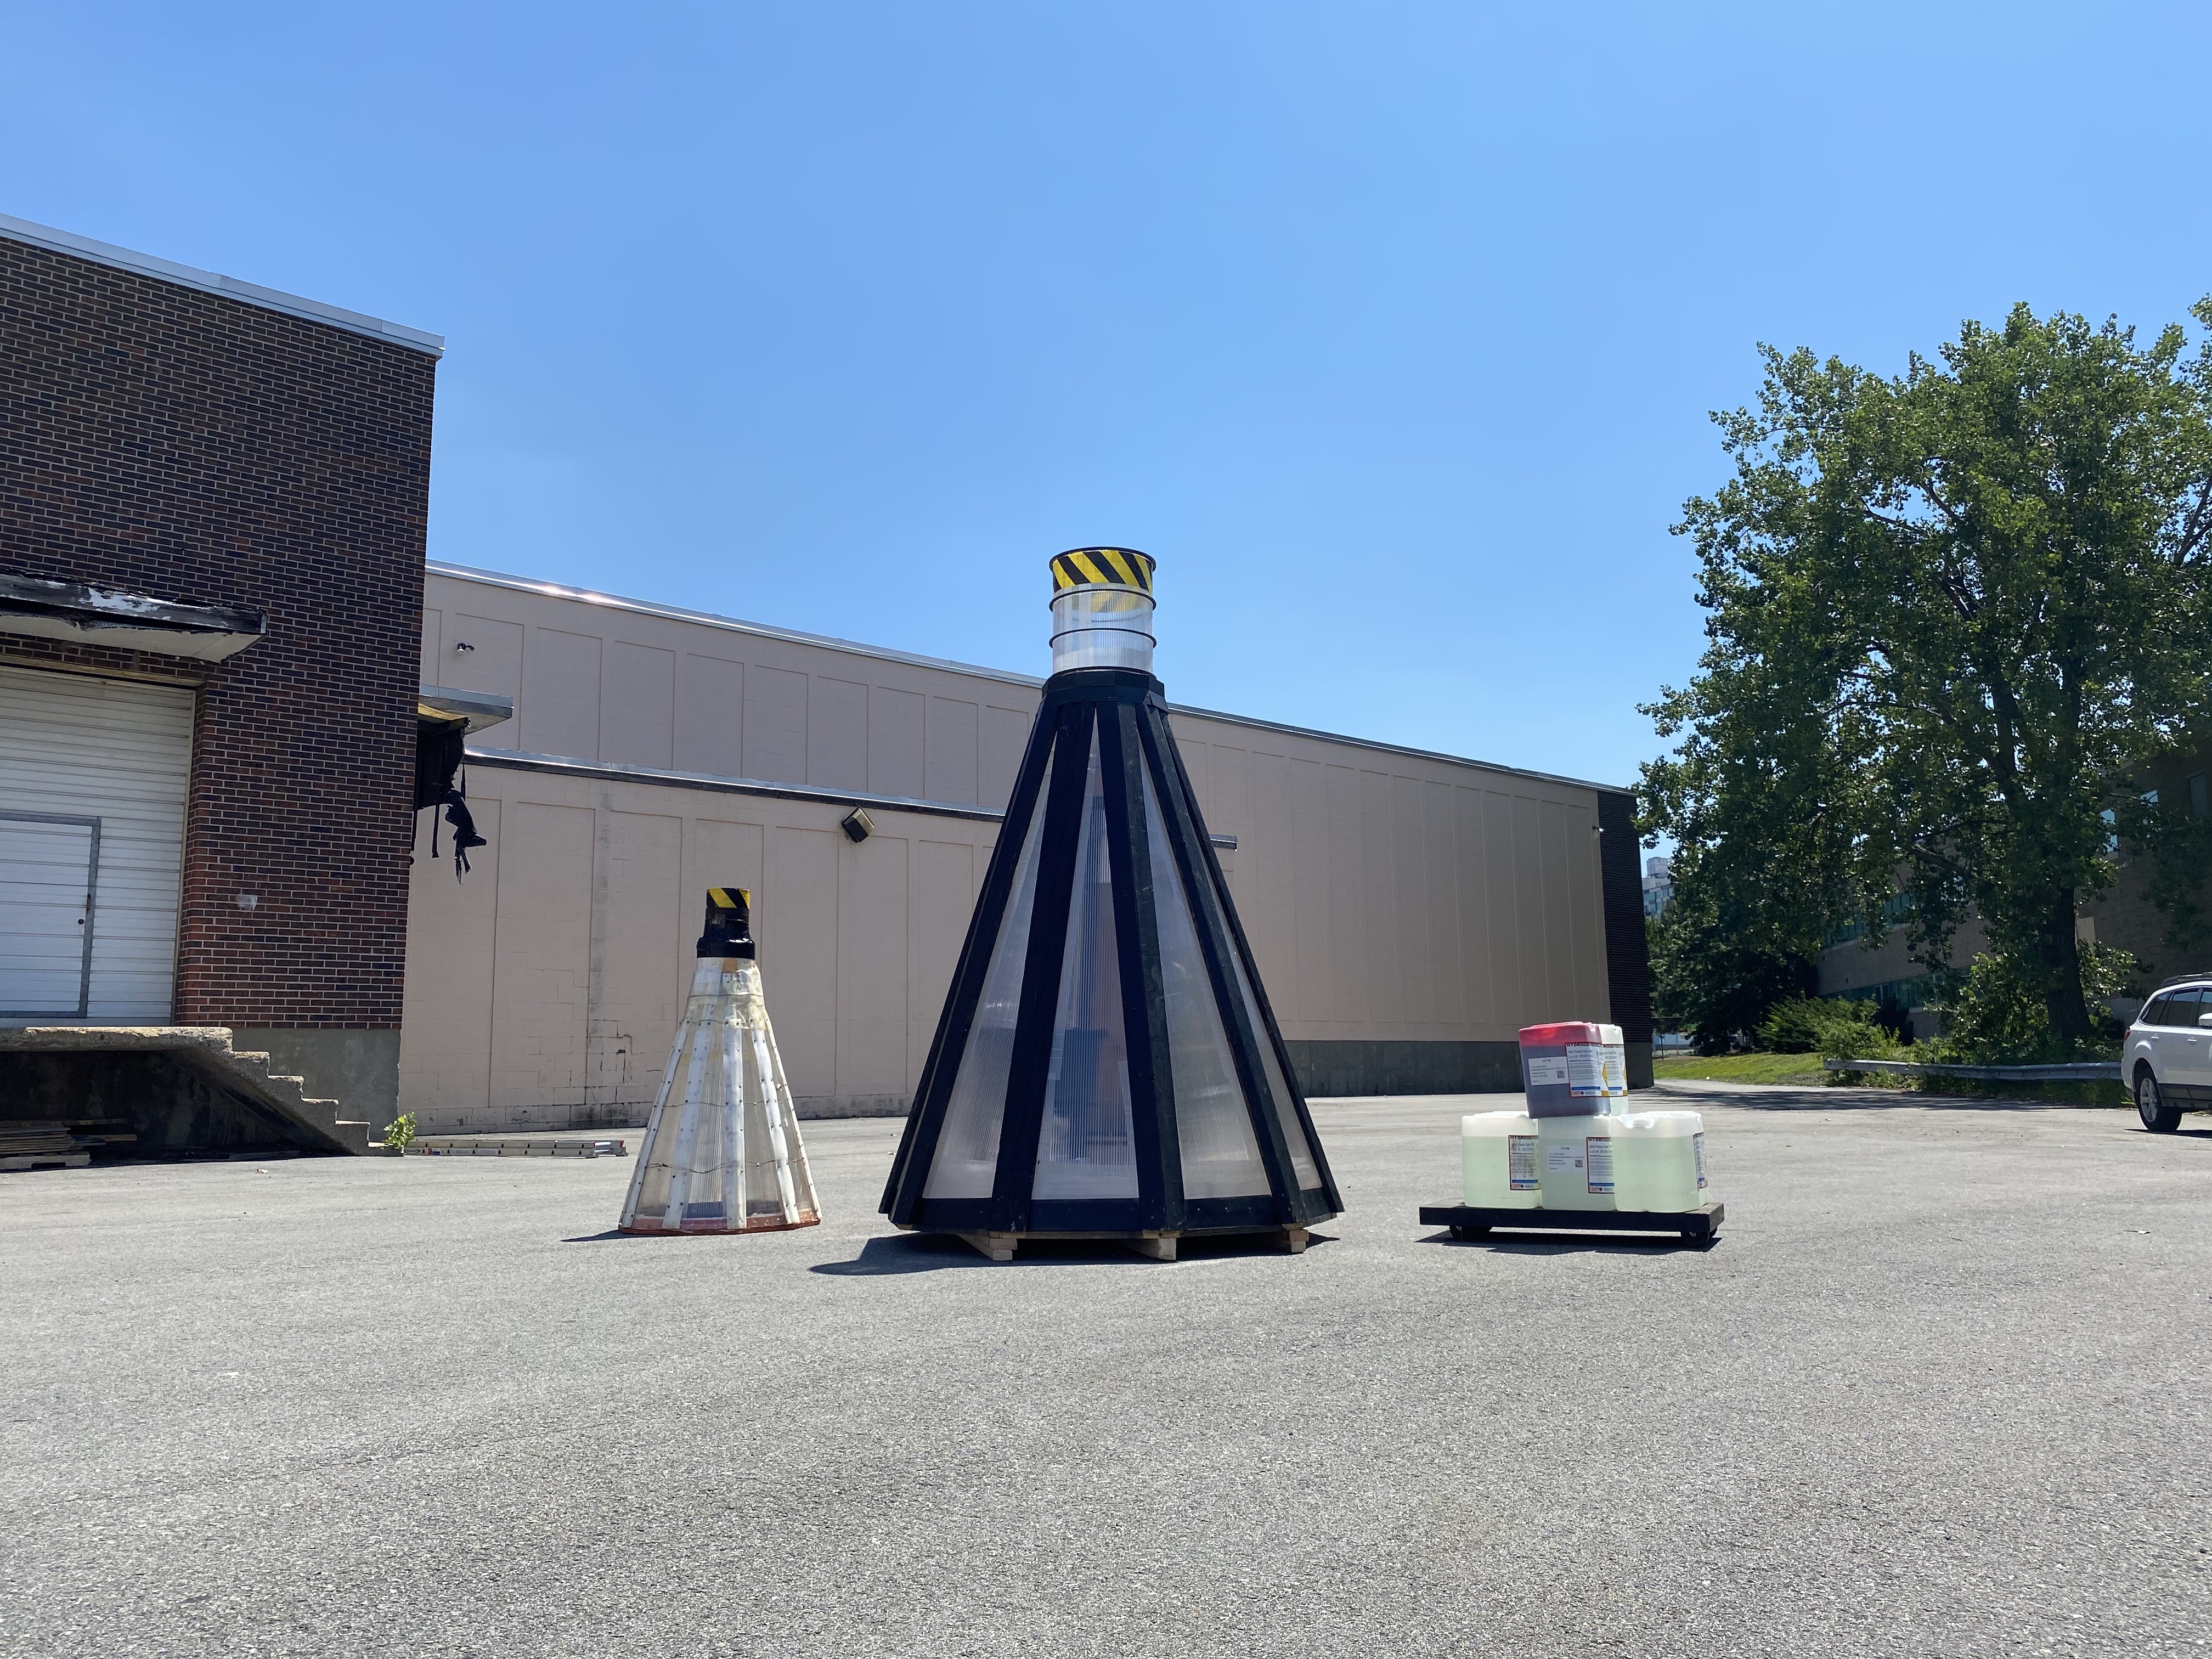
Comparing 5 and 10 foot versions
Flask Family
To the test site!
This lead to many Skype calls about the size of the neck, in particular, the WIDTH of the neck. We opted to go with a 4 foot neck on the giant flask which we hoped would ultimately allow enough foam to come out laminar while reducing enough pressure to avoind turning the flask into a bomb.
GIGANTIC VERSION!
After months of designing and testing, and hours of Skype calls, it was time to build the gigantic flask over 3 days on a walnut farm in Gridley California.
EPIC
Here’s a view not shown in Mark’s YouTube video that shows the force and beauty of this reaction. The base was made of 3 layers of 3/4 inch plywood, and in hindsight, of course, it should have been much thicker, and, more importantly, unable to flex. Essentially, the base bowed so much that the plywood layers sheered away from each other. The bases never failed in any of our tests, and so it was not on our radar as a significant failure point.
DEVIL’S TOOTHPASTE
The Devil’s Toothpaste demonstration was basically the elephant’s toothpaste demo on steroids. We discovered some unexpected chemistry that really bumped up the output and energy even more than the David Dobrick version of the experiment. The added reaction also came with added danger and we were constantly reminded just how much we need to respect the power of chemistry which is why we’re not sharing it publicly just yet. Oh sure, foam looks all fun and harmless…that’s what it wants you to think, but we saw another way-more powerful, (and beautiful) side of the soapy fluffiness.
In the end, of course, this video was much more than a large scale science experiment, it was a chance to celebrate a strong and brave young man, as well as embrace the good and joy that comes when people collaborate and work hard to create something special for others.
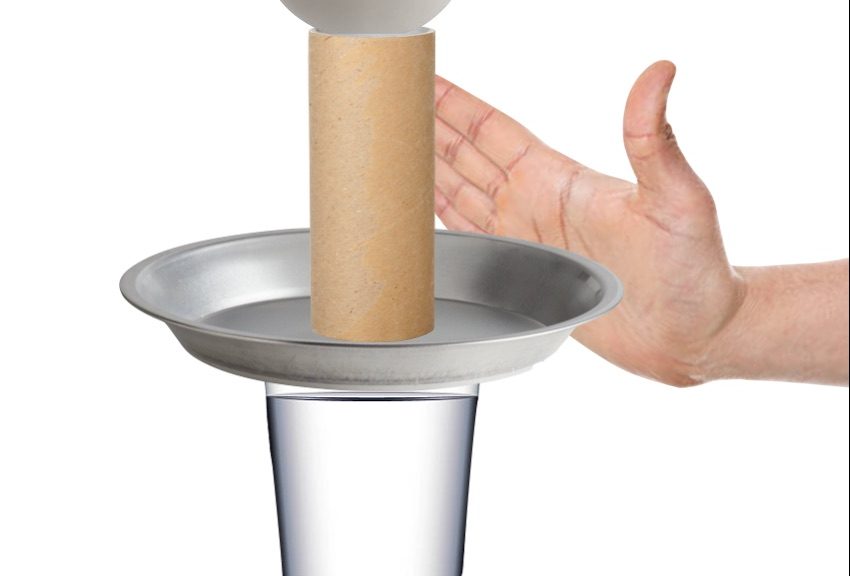
1 plastic cup of water with a mouth wide enough to fit the egg.
1 10” (25 cm) piece of cardboard or a small tray with a SMOOTH bottom
1 cardboard tube (paper towel or toilet paper tubes work well)
1 Egg (uncooked for more drama)
What to do:
Place the tray centered over the cup
Place the tube on its end in the center of the tray
Place the egg horizontally on the tube
When ready, strike the tray hard enough with your palm to send the tray flying, but not so hard you hit the glass of water. If all goes well, the tray and paper tube will go flying, but the egg will safely drop into the water.
How does it work?
INERTIA describes an object in terms of how much energy is needed to move it or stop it from moving. Since the tray and tube are very low mass (lightweight,) they have very little inertia, and will easily move out of the way.
The egg, however is heavier (has more inertia) and so it is not easily moved, leaving it in place for gravity to bring it down into the cup.
How do you fill a pool with foam in 5 seconds? It’s not an easy task. After demonstrating the classic Elephant Toothpaste reaction in countless ways over the last 8 years, and even setting the Guinness World Record for the largest Elephant Toothpaste reaction, I thought I had seen it all – then Mark Rober called. Mark is a talented engineer, YouTube All-Star, and all-around great guy who wanted to take the classic demo to new heights – literally!
WATCH THE VIDEO!
What you don’t see in the video, however, is the days of testing that went on behind the scenes to pull these demonstrations off. It turns out that, at a large scale, Elephant Toothpaste can be a fickle demo; slight variations to the chemistry, and the reaction can increase, or decrease significantly. If you change the temperature of chemicals a bit, or mix the chemicals a little longer, it can be the difference between filling a pool, and, well, overflowing it.
The Elephant’s Toothpaste Reaction requires 3 things:
Hydrogen Peroxide
A catalyst (often potassium Iodide or yeast)
Soap
THE CHEMISTRY
Hydrogen peroxide is basically water (H2O) with and extra oxygen (making it H2O2) But don’t be fooled into thinking it is close to water. Concentrated hydrogen peroxide can result in a strong chemical burn if it gets on your skin. To create the elephants toothpaste reaction a second chemical is added (know as a catalyst) which basically tears-apart the hydrogen peroxide into water while releasing Oxygen gas inside the bubbles.
THE REACTION
The reaction can be triggered in lots of ways. In all the videos other than the giant pool version, we use a solution of Potassium Iodide to break apart the molecules. For the pool version, we wanted it to be safe to touch, so we started with a diluted hydrogen peroxide solution and used off-the-shelf dry yeast mixed with water as the catalyst. Yeast contains an enzyme called Catalase that does the job of breaking down the hydrogen peroxide. It also creates a kind of foam that tends to hang around a bit longer. (GET DIRECTIONS FOR THE YEAST VERSION HERE.)
It took 3 tries to get these to hit right on, but the effort was worth it with a perfect crash.
This was a test of the Elephant Toothpaste filled balloon. A piece of scrap wood with a needle on it acted as a spear. The result was beautiful.
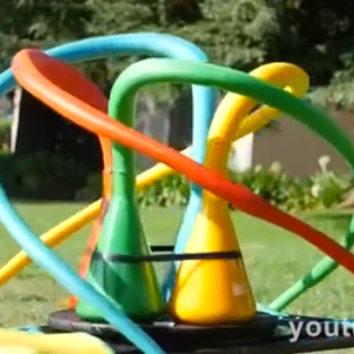
This carousel of foam was one of our experimental surprises. The foam was supposed to go higher, but we top-loaded the reaction with food color which diluted the peroxide. It is one of my favorite shots in the video. Here’s an extended clip.
SCALING UP
We scaled up using a 5 gallon bucket, and then a kiddie pool with the hope of getting the foam to just reach the top of the pool and this first scaled up test was promising:
OVERFLOW!
Why did our foam overflow the swimming pool? There are many variables in this experiment that ranged from the temperature of the chemicals, to the addition of water from food coloring, to the efficiency of the mixing of the yeast and water. We’re still not exactly sure what bumped up the amount of foam, but let’s face it, it was better to overflow the pool than have it come up short.
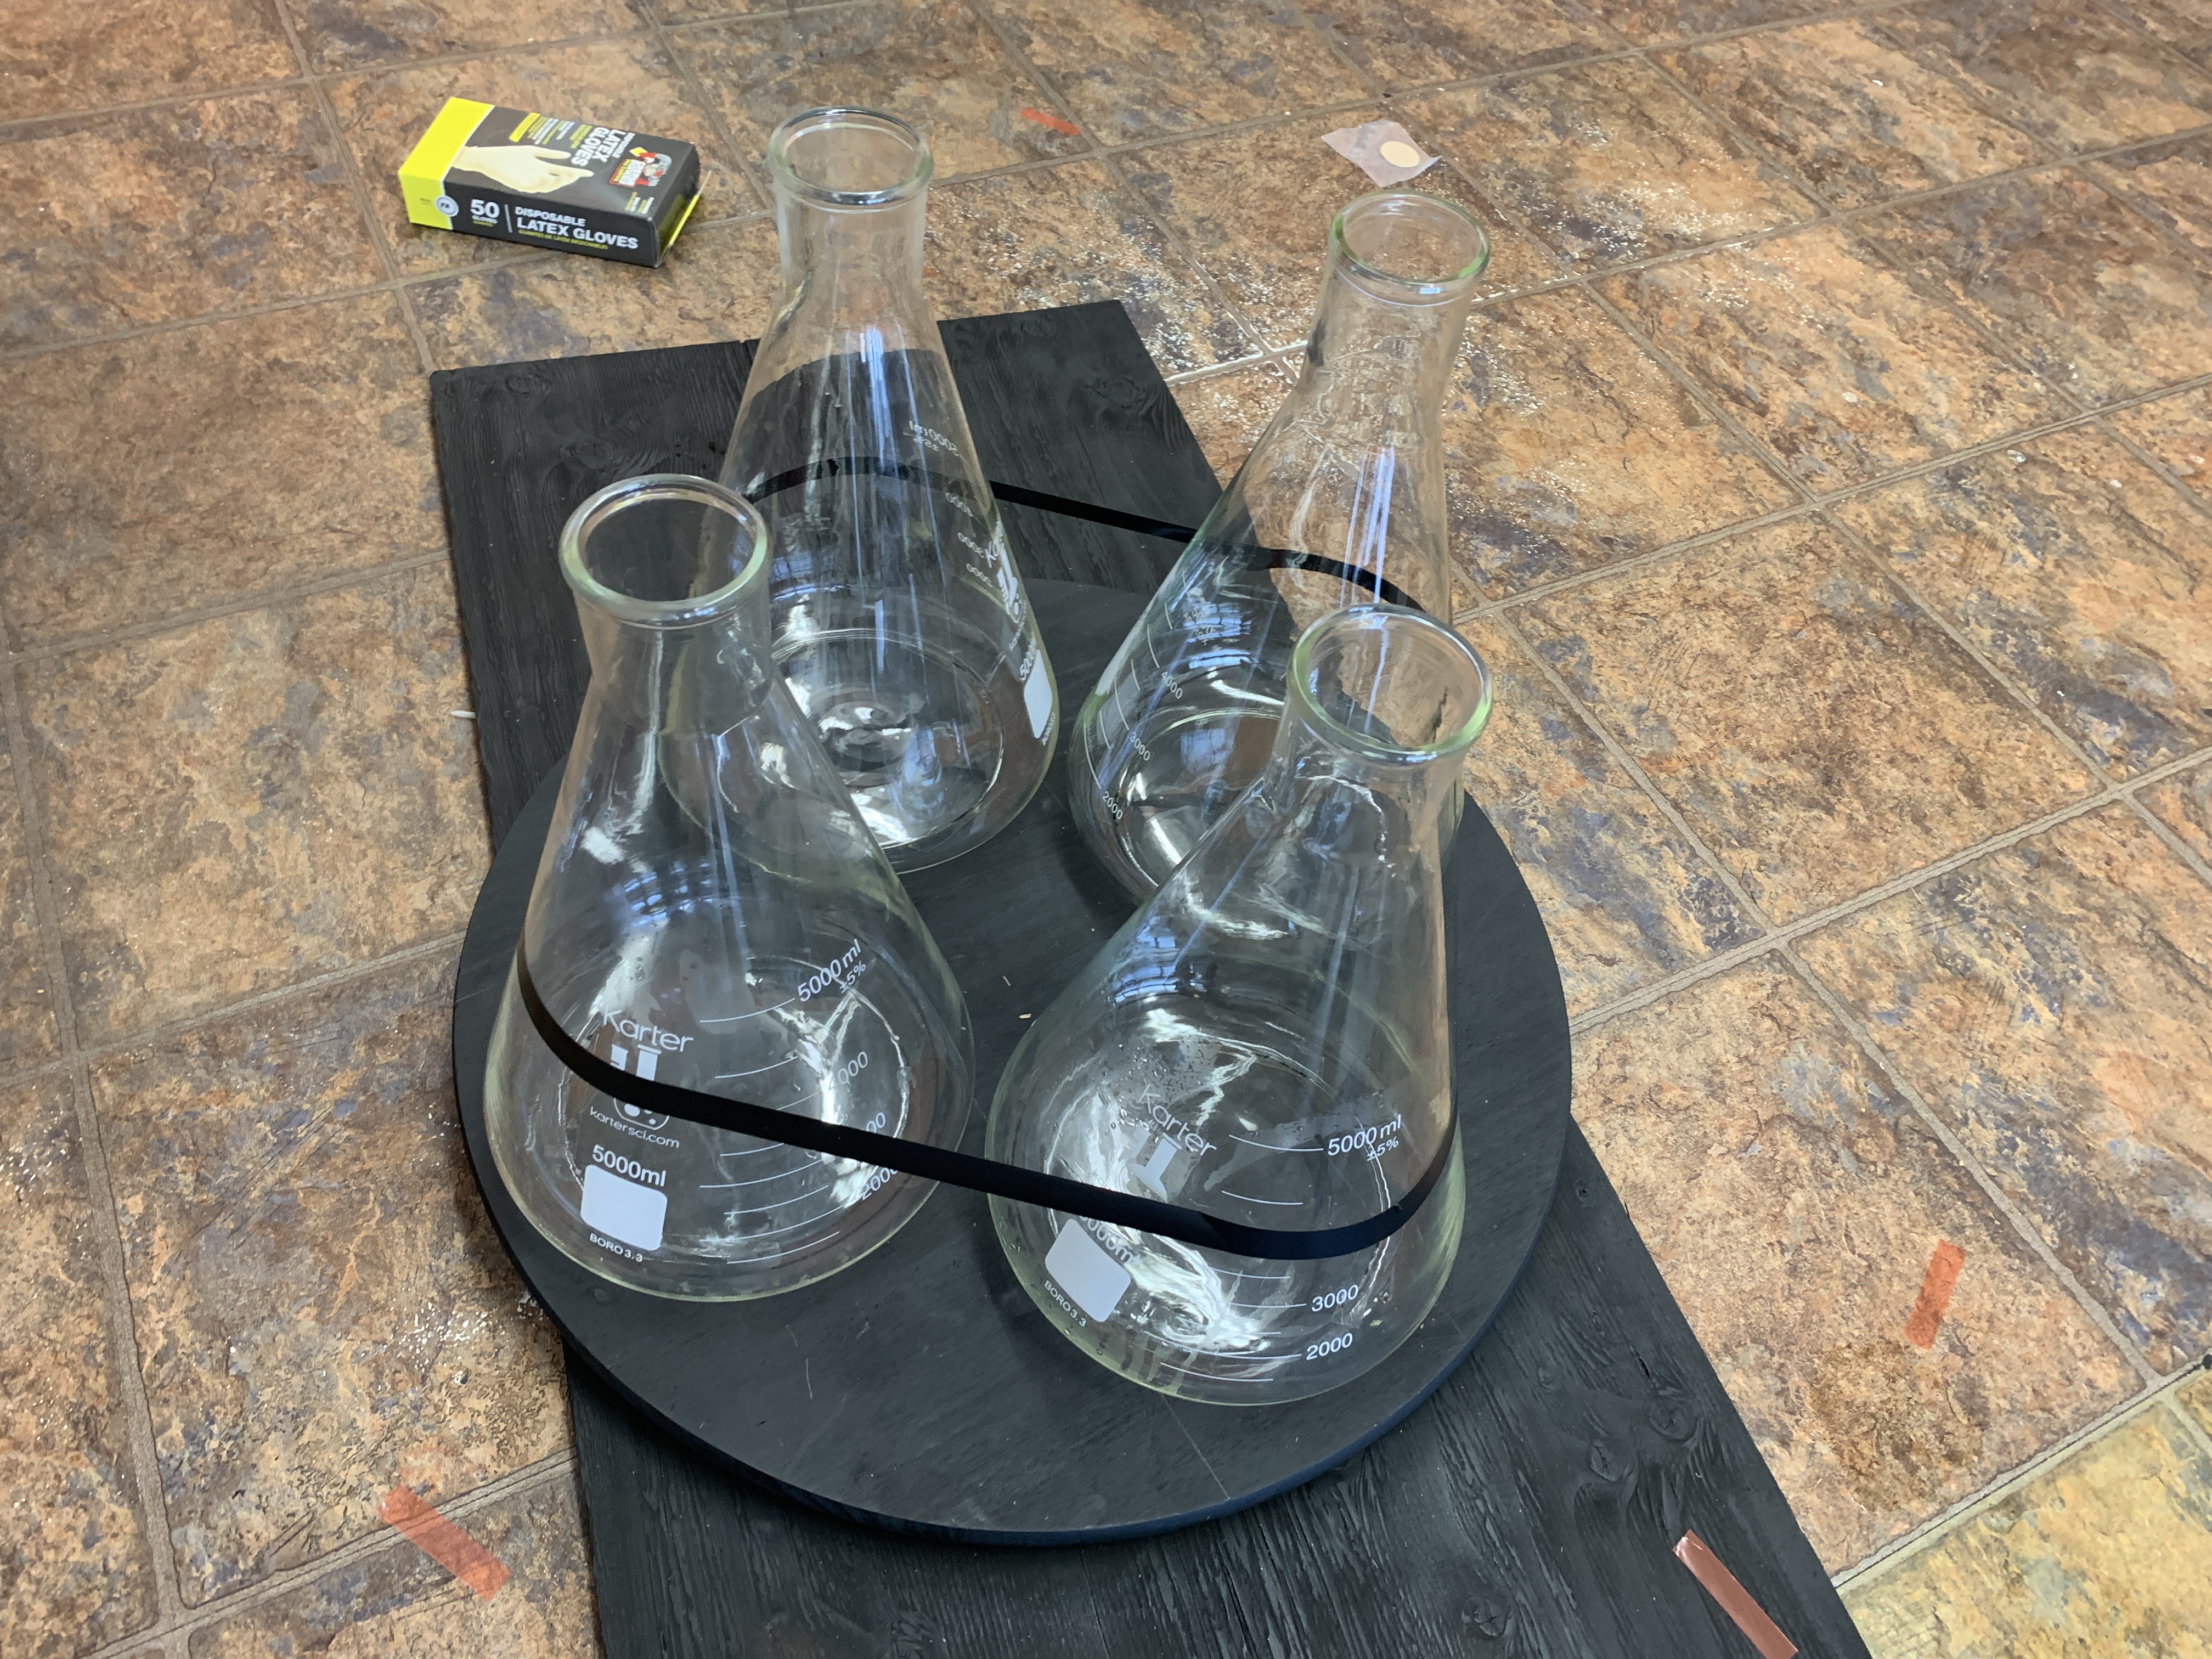
The Flask Army
Rare (clean) view of the foam crash rig
Successful test!
Science!
Just looks tasty.
A Mark Rober GoPro
Ready to roll.
Exhausted but happy.
CLEAN-UP
One of the nice things about the reaction is that it breaks down into generally harmless, bio-degradable components when the chemistry is correct. (Basically you end up with soapy water with small amounts of either iodine or yeast in it) Cleaning the pool was simply a matter of hosing down the coloring and soap and disposing of what was left down the drain like you would after doing the smaller, home version.
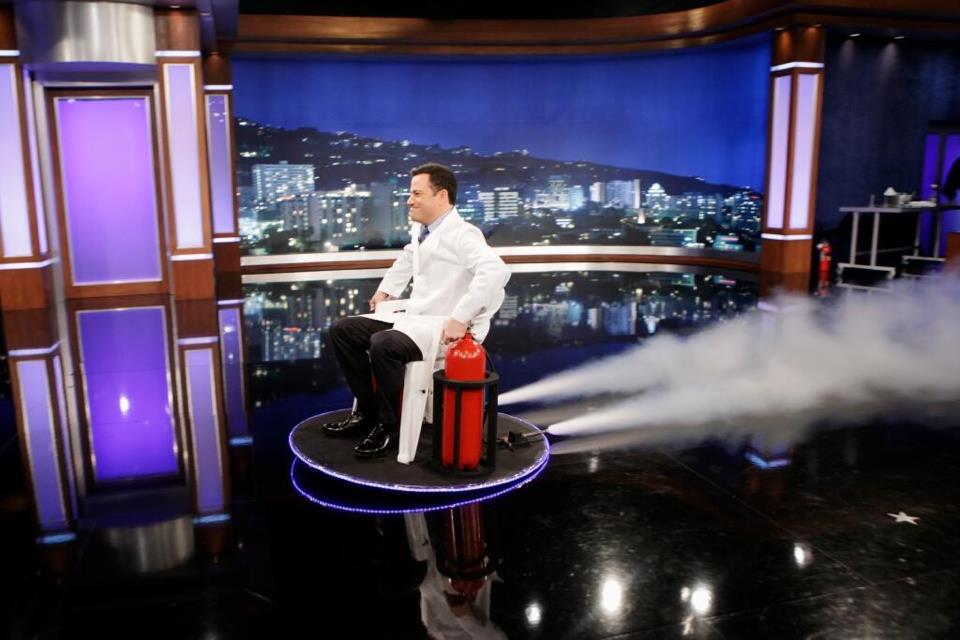
Creating an exploding hydrogen balloon chain reaction was one of the most challenging things I’ve done on Jimmy Kimmle Live. It failed many more times than it worked, but on the show, we got lucky!
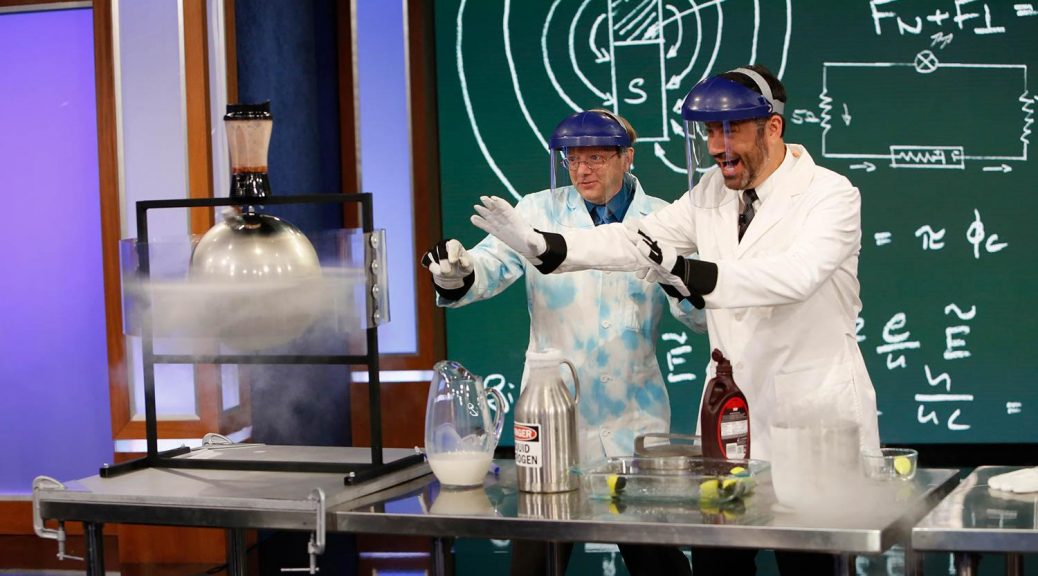
A Hero’s engine is an ancient device usually powered by steam. I decided to make one using the expanding power of liquid nitrogen to a gas. Since most engines do some sort of work, I decided it would be the perfect device to make some chocolate milk using an attached blender.
This was the very first experiment I ever did on Jimmy Kimmel Live, and, as far as I know, the first time that the Elephant Toothpaste demo was ever done publicly using a large flask.
1/4 tsp of vanilla (or use other flavors usually found near the vanilla in a grocery store – you can use chocolate syrup for chocolate ice cream)
4 tsp of sugar
A few drops of food coloring (optional – if you want colorful ice cream)
Lots of ice
Lots (half cup) of salt. Rock salt (sold at hardware stores) works best.
Small (quart size) zip-lock freezer bag
Large (gallon size) zip-lock freezer bag
What to do:
Put the milk, cream, flavoring, coloring, and sugar into the SMALL zip-bag and zip it shut (be sure it is zipped up and closed completely)
Put about a cup of ice into the large bag and the cover the ice with a small handful of salt. Put the small bag with your ingredients into the larger bag.
Add some more ice and then some more salt. Keep adding salt and ice until the bag is almost full.
Zip it shut (be sure it is zipped) and then carefully hold opposite sides of the bag and shake the bag back and forth (like your steering a car) for about 5-8 minutes.
Open the larger bag and take out the smaller bag – it should be full of ice cream! Rinse off the bag under running water to remove any salt that may be near the opening of the bag.
Open and enjoy!
The Science of Ice Cream When you added salt to the ice, the chemistry between the two forced the ice to melt. Before the ice could melt though, it needed to borrow heat from objects that surround it. This is called an ENDOTHERMIC process. Since your ingredients are not as cold as the ice, it borrowed heat from your ingredients making them colder! When they get colder, they freeze up into ice cream. Yum!
I had another exciting appearance filled with explosions, tornados, and, well, salad. Let’s break down some of the science.
First watch the video!
Toilet paper tornado on Jimmy Kimmel Live!
TOILET PAPER TORNADO This easy-to-do demonstration allows you to have a visual representation of the centripital energy of the spinning blades and the opposing energy of the moving air created by the blades. This creates a simulated vortex of toilet paper. If you plan on trying this out, here are some tips:
Use cheap, lightweight toilet paper for the best results
If you use a smaller fan, you may have to trim the toilet paper lengthwise
Experiment with different lengths of toilet paper to get the best vortex.
If you make your own Toilet Paper Tornado, (and you should) be sure to tag it #toiletpapertornado in your social media posts so I can shout it out.
Jimmy Kimmel exploding Hydrogen
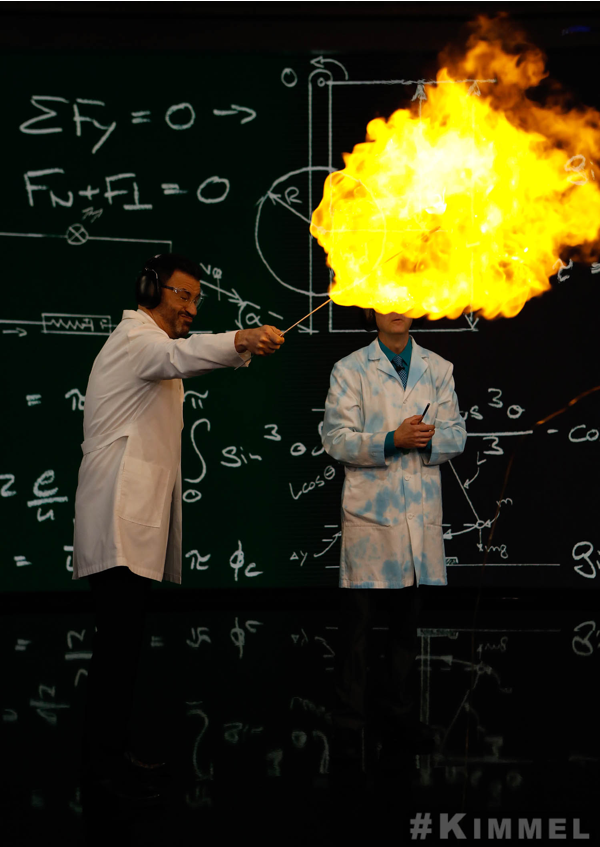
EXPLODING HYDROGEN Many of you may have seen a sign in a hospital that reads, “NO SMOKING – OXYGEN IN USE” and would logically assume that oxygen is flammable. This demonstration showed two traits of oxygen; first, that oxygen is NOT flammable at all, and second, that oxygen can intensify any fire. (the reason for the hospital warning) The balloon filled with hydrogen and oxygen burned very fast and very loud. I could easily feel the shockwave of the the last balloon where I was, and many of the crew said they could as well. Incidentally, the explosive reaction of the hydrogen and oxygen likely produced some water (H2O) during the reaction.
Jimmy Kimmel Live Vacuum Cannon on stage.This is the mylar cap after firing the vacuum cannon.
VACUUM CANNON The vacuum cannon is a simple concept: remove most of the air from a tube, and then use air rushing back in to propel any object in the tube. In our early tests with a ping pong ball, we were able to use a chronometer to clock the ping pong ball leaving the barrel at 845 feet per second – over 350 miles per hour! We were even able to blast the ping pong ball right THROUGH a ping pong paddle. Since we were able to move a ping pong ball faster than a “speeding bullet,” we thought it would be fun to see if we could actually get a model of Superman to faster than a speeding bullet. A model of Superman was sculpted by Jon Neal specifically for this demo and then cast in rigid foam. While it it never got through the brick wall, it certainly did quite a bit of damage to Superman.
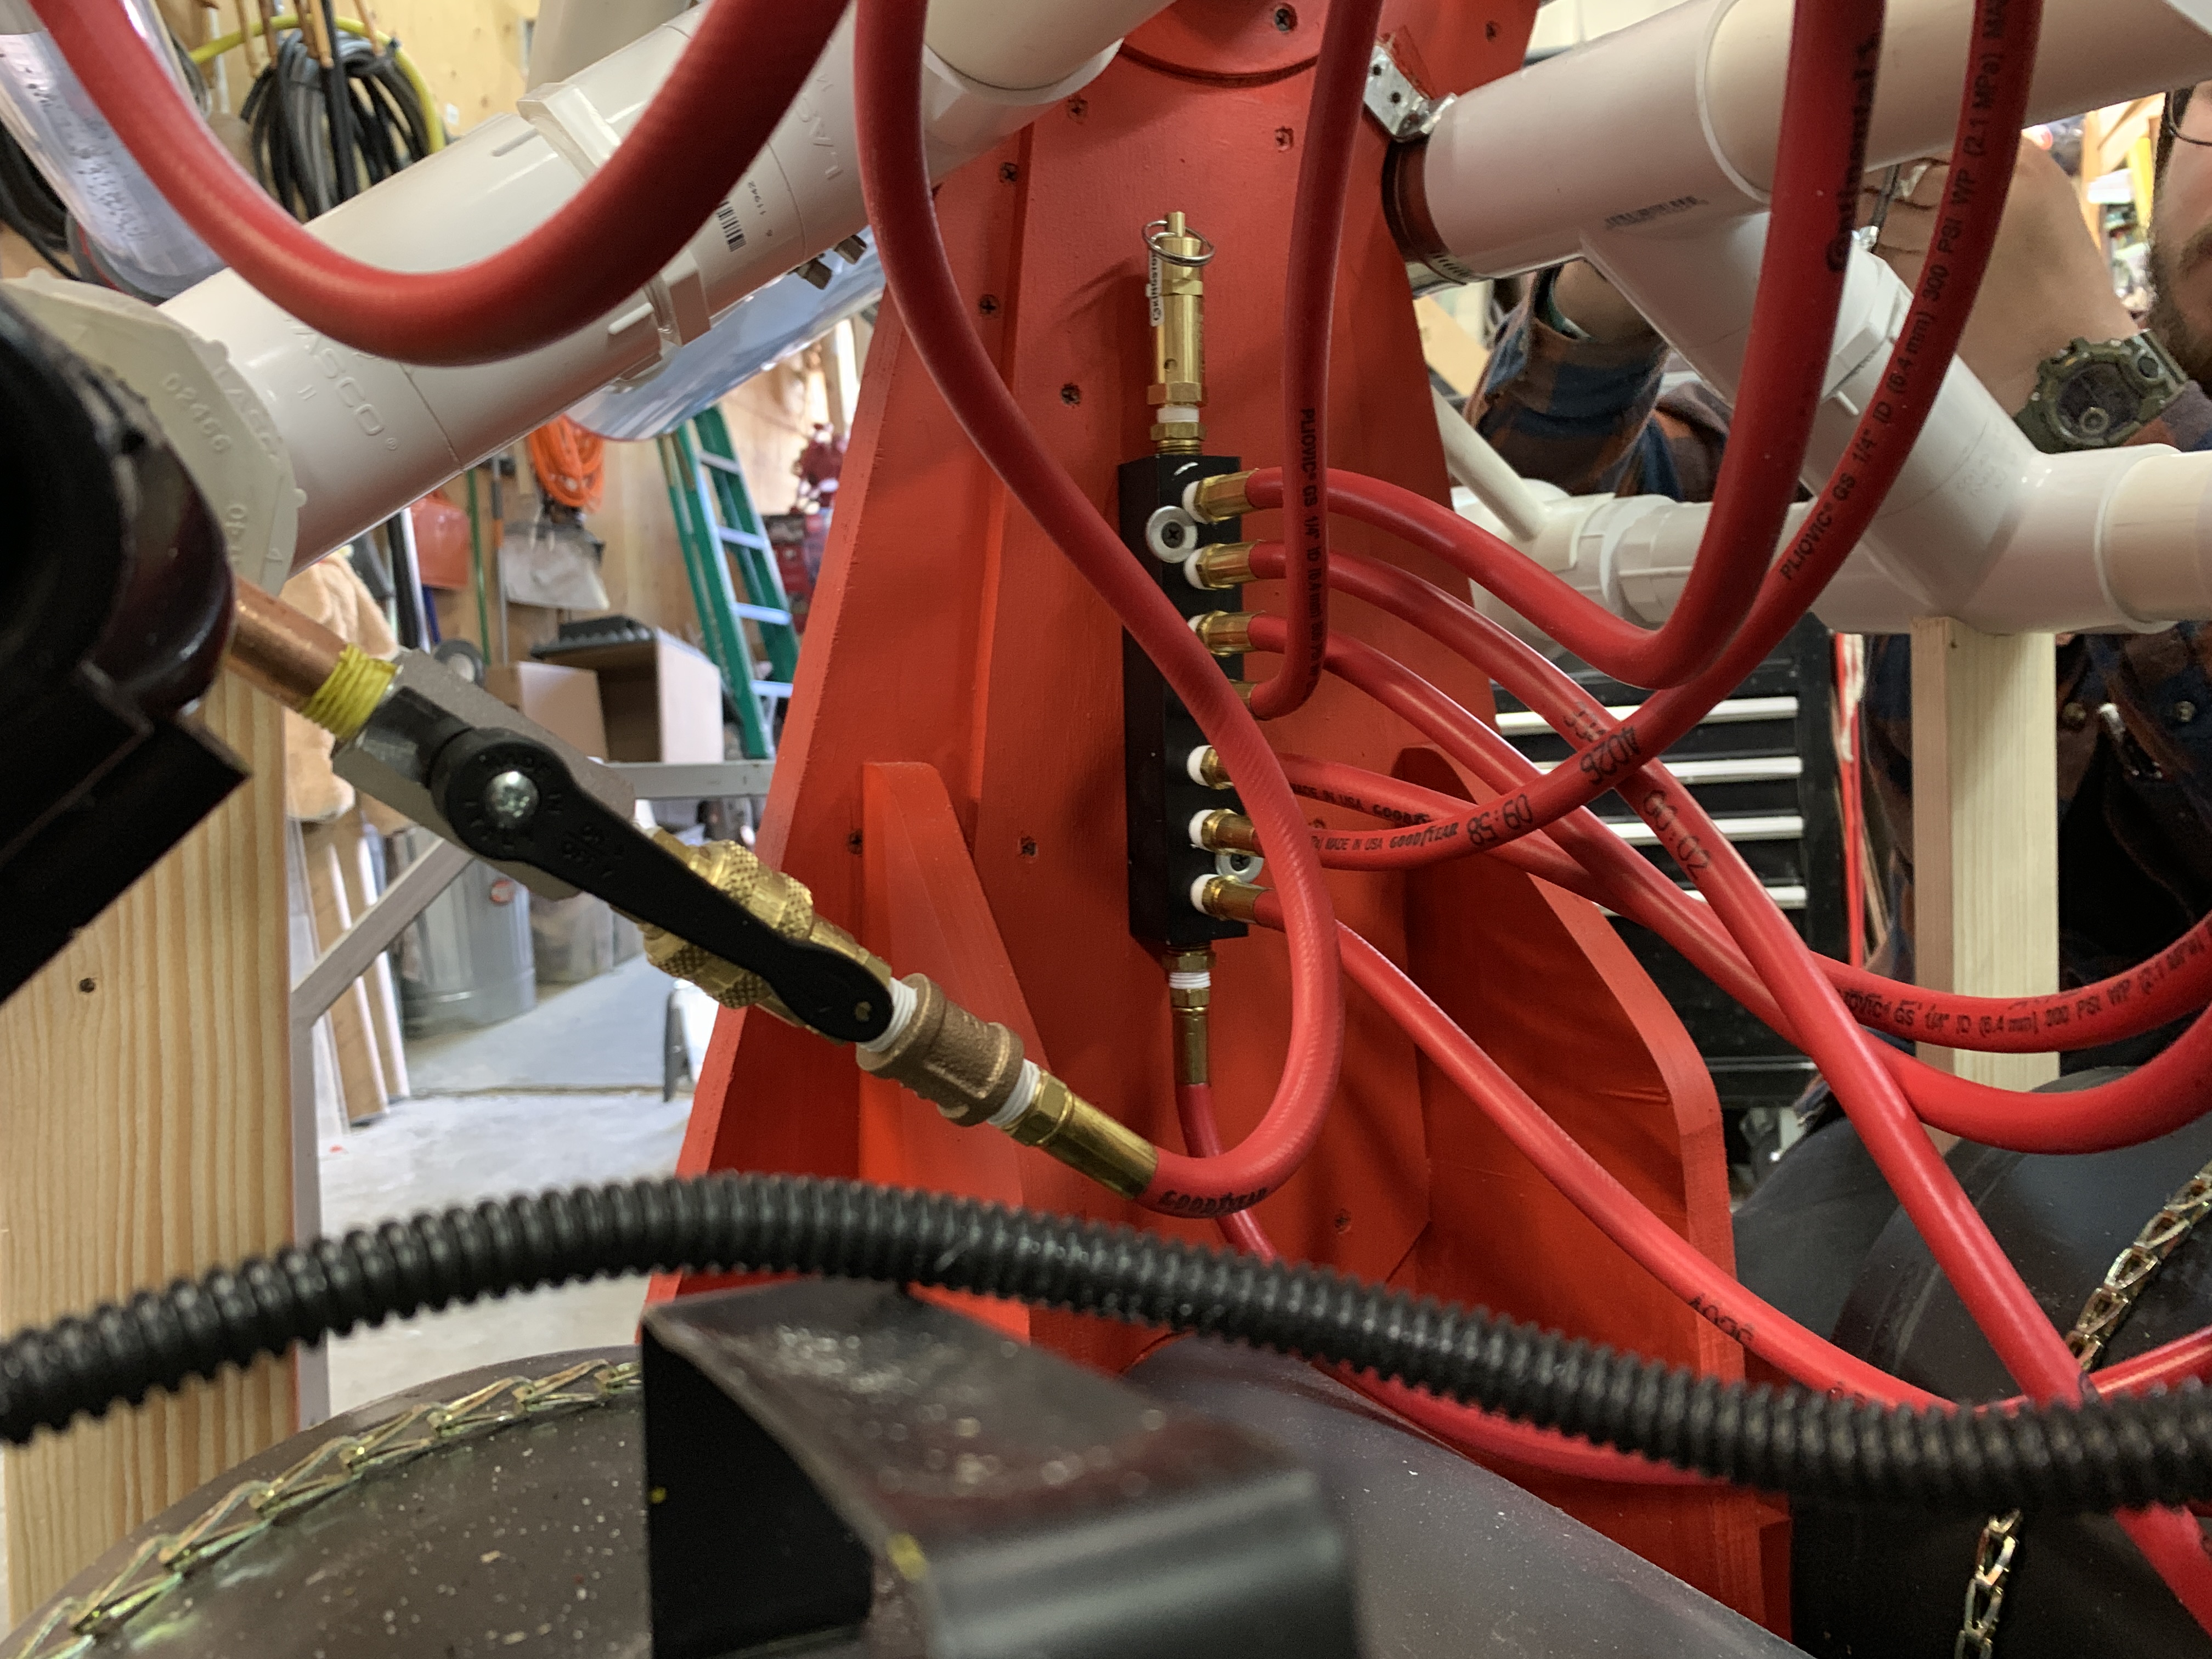
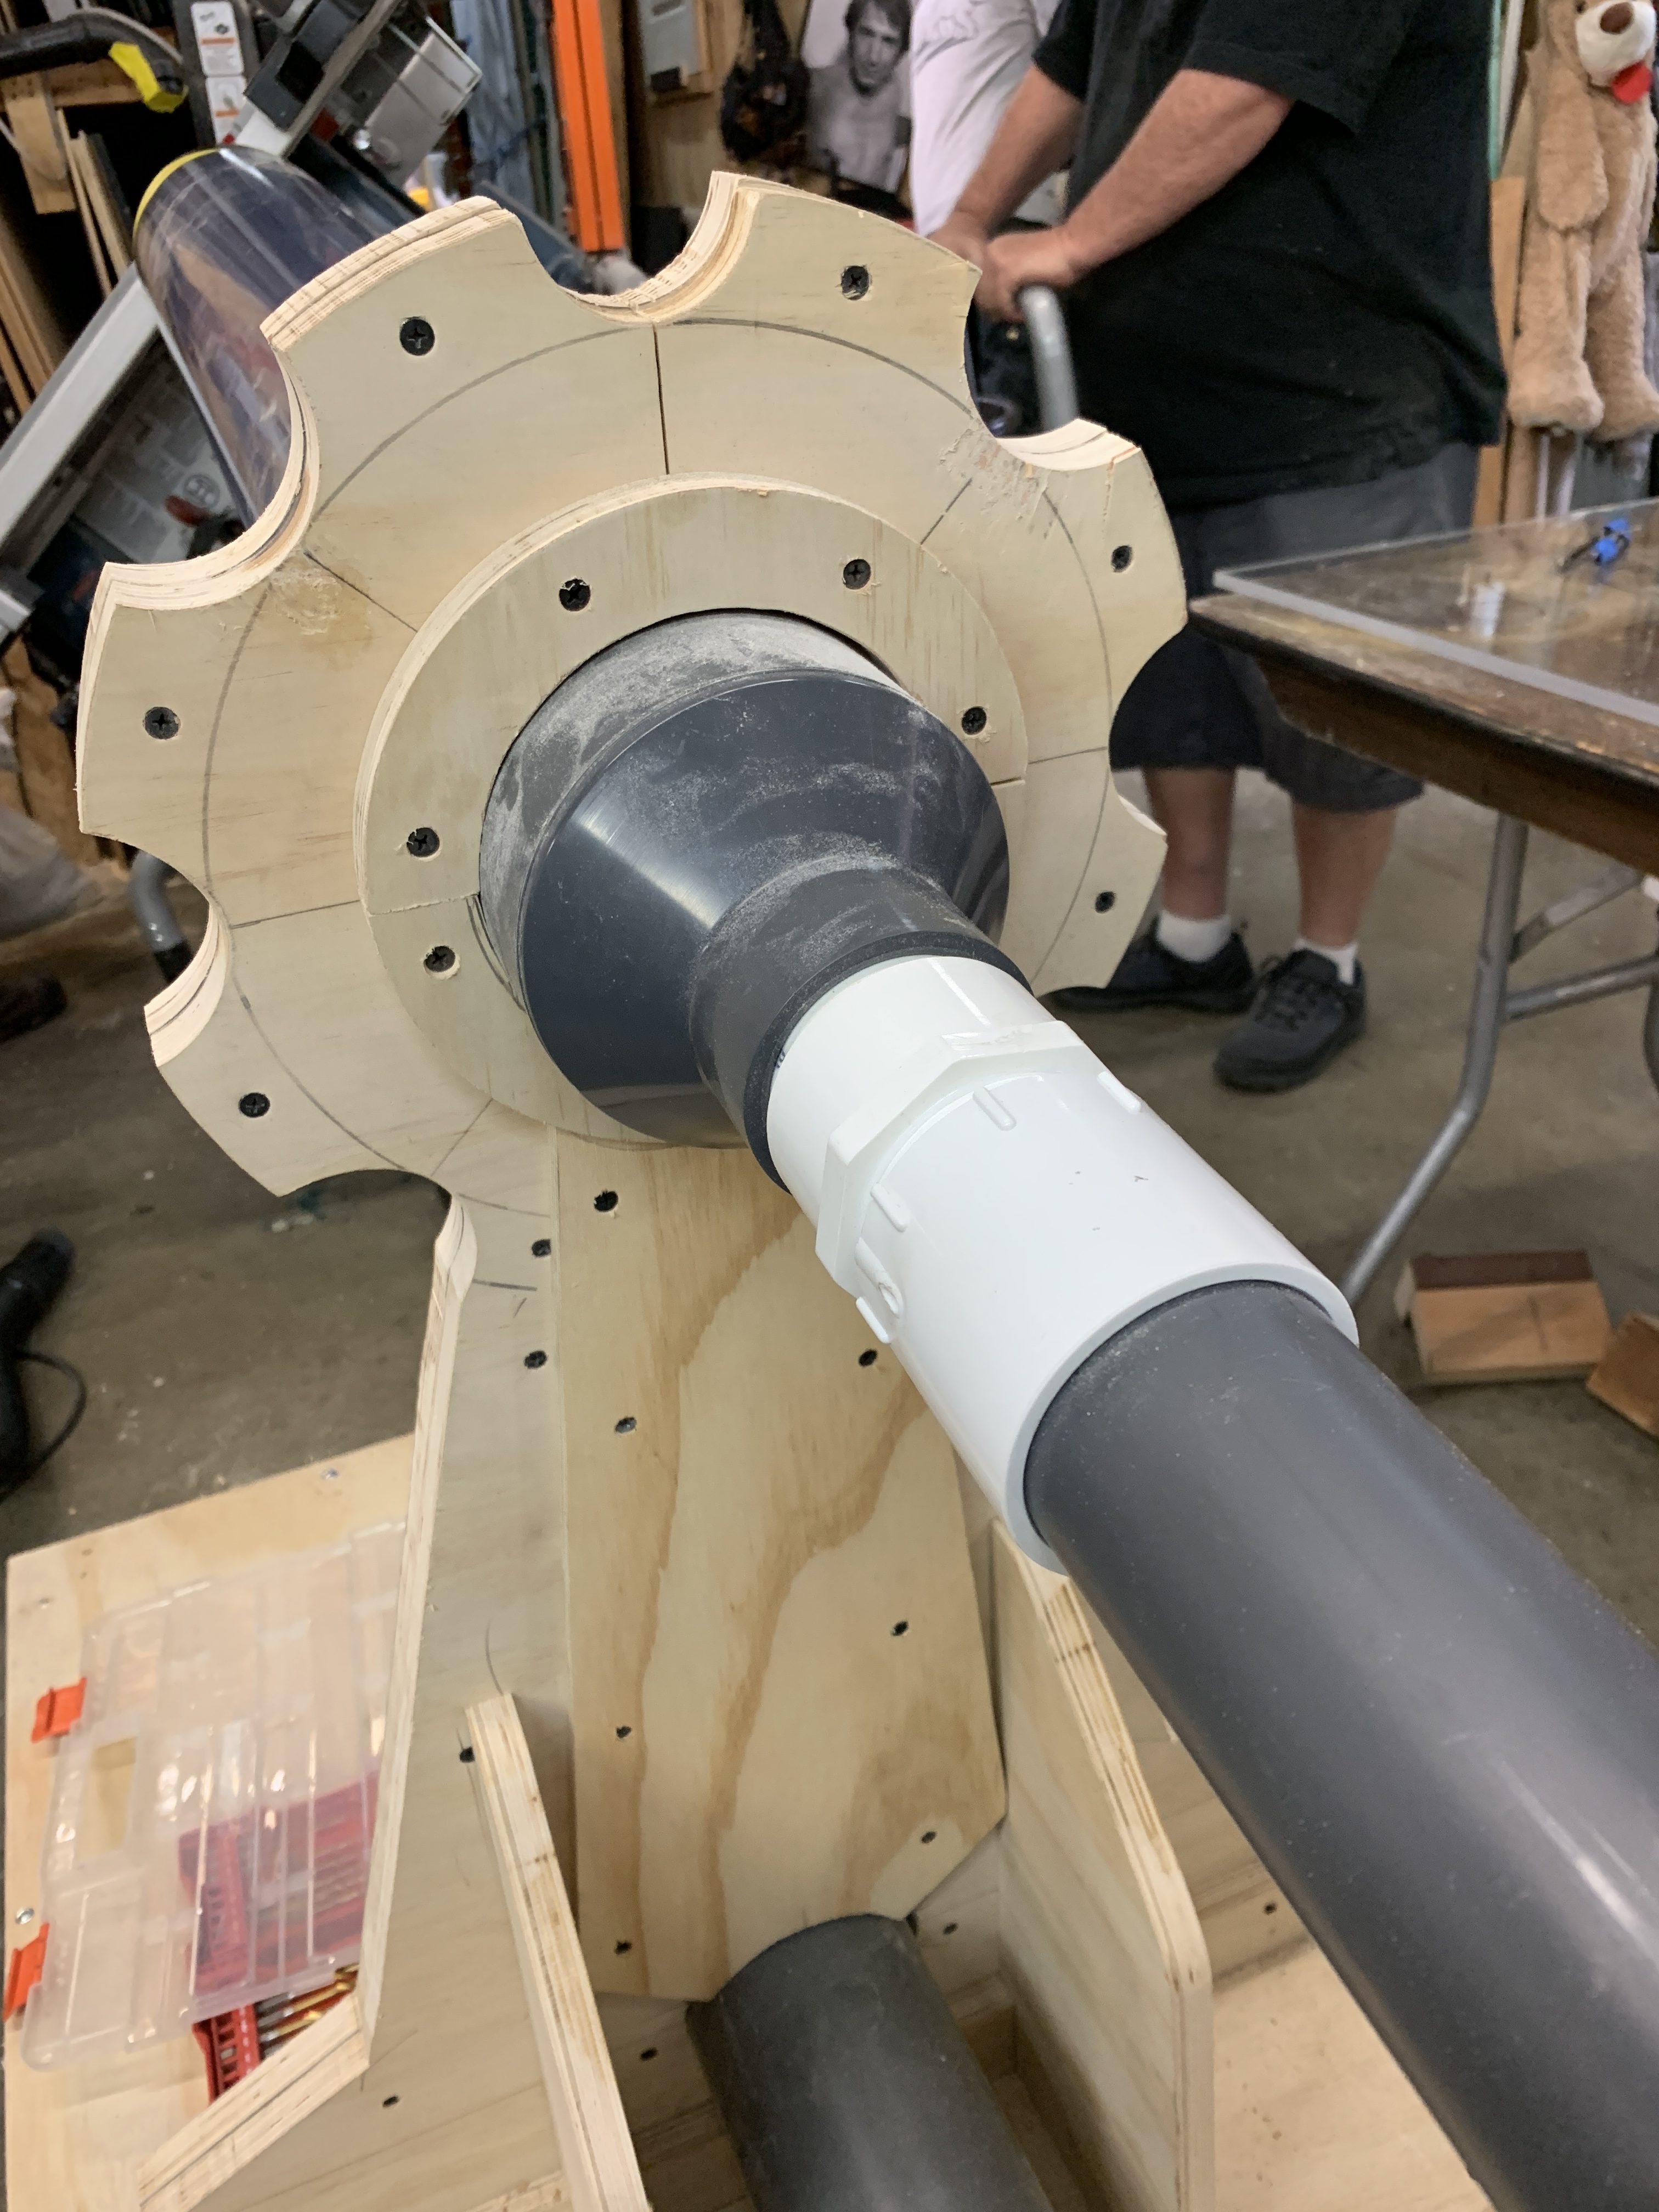
SALAD CANNON The salad cannon was an epic build that brought together several talented people to make it happen. The original idea was to build basic “potato” cannons, fill them with veggies, and trigger them all at once. My crew determined it might work even better if we used a piston-style system which creates a more intense release of air through the barrel. We also decided to build an ‘Electronic Menu” that would allow Jimmy to select the items he wanted in the salad and then trigger them on command. We used some commercially available chopping blades at the end of each cannon to slice the vegetable instantly as they exited the barrel. The only exception was the lettuce which got cut to the perfect size just from the force of the air blast. The array required lots of custom parts and electronics and it took over a week to build and test.
It was a lot of fun putting these demos together and working with the uber-talented team at JKL.
Ready to learn more about the science seen on Jimmy Kimmel Live? Watch the segments below and then dig in and check out the science behind the demos!
VACUUM BOTTLE
This was a fascinating demonstration that shows just how much air expands when heated. The boiling water cause the air in the flask to heat up and expand, pushing the heated air out of the flask. When it was turned upside down into the water, the air cooled and condensed, creating a vacuum that sucked in the water. The amount of air in the flask after the demo filled the entire flask when it was on the heater.
THE STRING THING
The “String Thing” demonstrates some amazing physics of a fast moving loop of string. I have had a hard time figuring out the actual physics involved in this demo. It is based on a smaller toy version and a design by physics teacher Bruce Yeany.
Below you can get the instructions and equipment list to make your own string thing. Play around and explore device and post a video telling me how you think it works. Be sure to put Science Bob in the video title so I can find it easily.
I love the elephant’s toothpaste demo and have done it MANY times in many ways.
This is a decomposition reaction that separates oxygen from hydrogen peroxide. Add a little dish soap and you have some serious foam. Try the home-version by clicking >>HERE<<
The Venturi Effect Ping Pong Ball Blaster
(via www.wassertec.co.za)
This was a lot of fun to develop. I was based on a design by Adam Savage, but his version was limited to the amount of ping pong balls in the tube. By adding a hopper I was able to shoot 600 ping pong balls in about 2 minutes.
The original design was a little…aggressive.
That prototype used the strongest bouncy castle blower I could find. It worked great but the balls traveled way to fast to be safely used on stage.
This was a fun national commercial I got to shoot for a finance company. Since it involved wrecking balls, flame throwers, and high speed cameras, we had a lot of fun when the camera was not rolling.
On a recent appearance on Live With Kelly & Ryan, Science Bob performed his messiest and biggest demonstration yet! In the process, he also established a new Guinness Book World Record! His demonstration was based on the classic Elephant’s Toothpaste demonstration which uses some decomposition chemistry to create a LOT of foam from a small amount of liquid.
Check out the HOME VERSION of the experiment (above) by CLICKING HERE.
When it came to the record breaking version of the experiment, Science Bob scaled everything up, from the size of the container to the concentration of the chemicals. In all, over 40 liters of hydrogen peroxide and more than 8 liters of catalyst were used. In addition, Bob constructed a bucket tipping system so that the demonstration could be done without the change of getting him covered in foam.
Three adjudicators from the Guinness World Record offices were on hand to quickly jump in and began taking measurements of the foam as soon as the commercial break started. The record to beat was 5 cubic meters, and the final calculation for this demos was over 13 cubic meters!
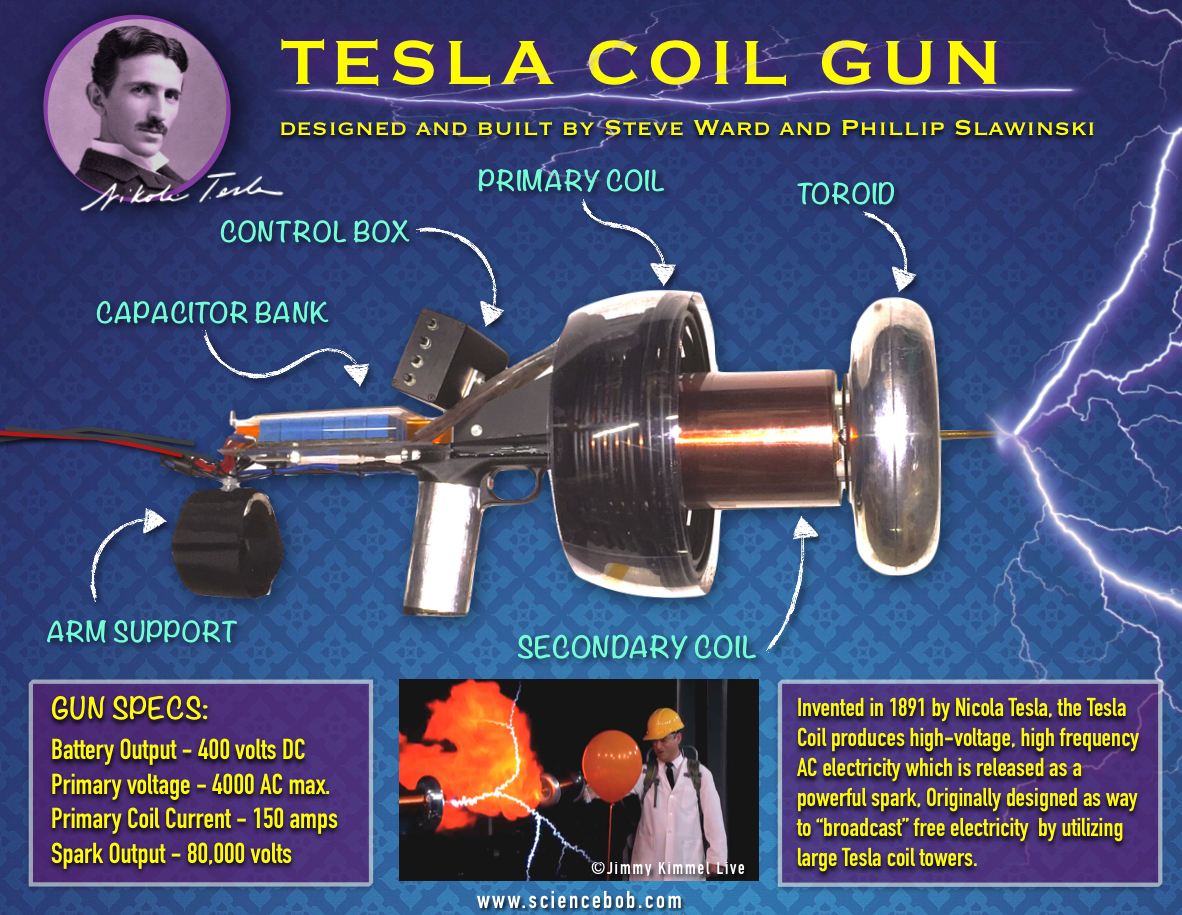
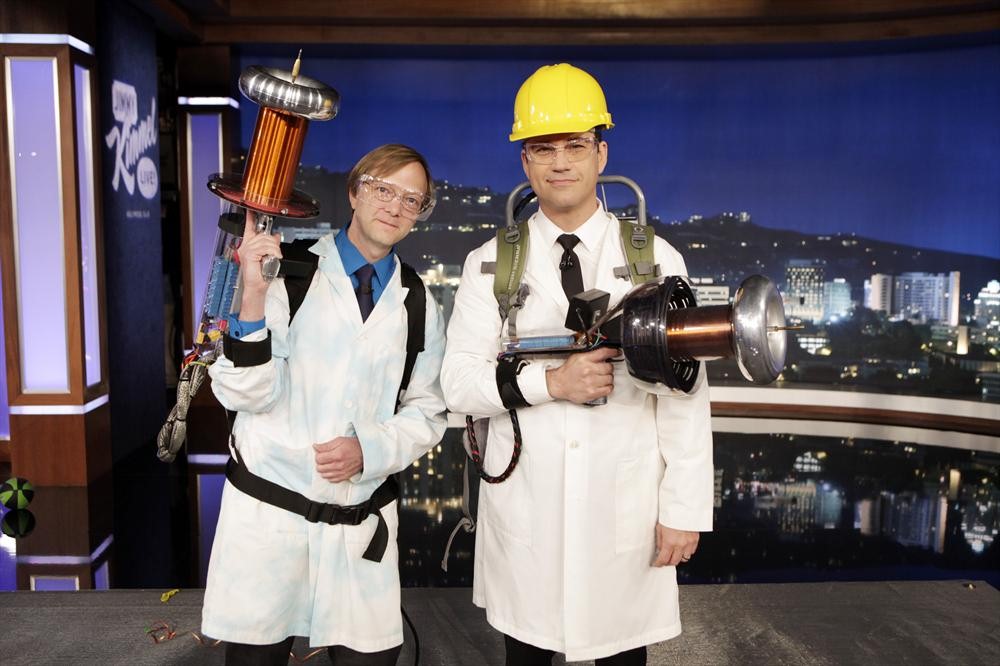
To bring these Tesla Coil Guns to life on Jimmy Kimmel Live, I elicited the help of Steve Ward and Philip Slawinski who had previously built Tesla Coil guns for fun. While the guns were impressive, they were also too powerful to use indoor since they could possibly damage the electronics in the cameras and stage equipment which costs hundreds of thousands of dollars. To get around this problem we brought in engineers to design a custom grounding system for the studio. We also made custom grounding footwear out of snowboard bindings so that the units did not have to be grounded directly through the building.
For fun, I wondered if the coils might be able to ignite balloons filled with explosive hydrogen. In a late night test session, it was discovered that they wonderfully exploded with just the microsecond spark of the guns.
While the arc from the gun would not likely kill someone if they were to get hit by a bolt, I can tell you it is certainly uncomfortable. In fact, it you were to hold the gun too close to your body, the arcs of electricity could turn and hit you.
I’m not sure Nikola Tesla would have ever imagined a Tesla coil gun, but I bet he would like it if he saw it.
What do you do when you’re an elementary school science teacher and you’re given a room with NO WINDOWS!? If your a bit of a geek and a maker like me, you turn the room into your very own STARSHIP CLASSROOM.
WATCH THE VIDEO
Let’s face it, building a science-fiction based room is any geek’s dream build, and if you’re a student coming to a startship classroom, hopefully it makes learning even more fun. Best of all, I got to learn a lot of new skills in the process of creating this. I used maker skills that ranged from 3-D printing, to computer controlled routers, to coding and electronics. Here are some of the basic elements of the room, and how they were made: The room started out looking like a typical science classroom. But that would soon change.
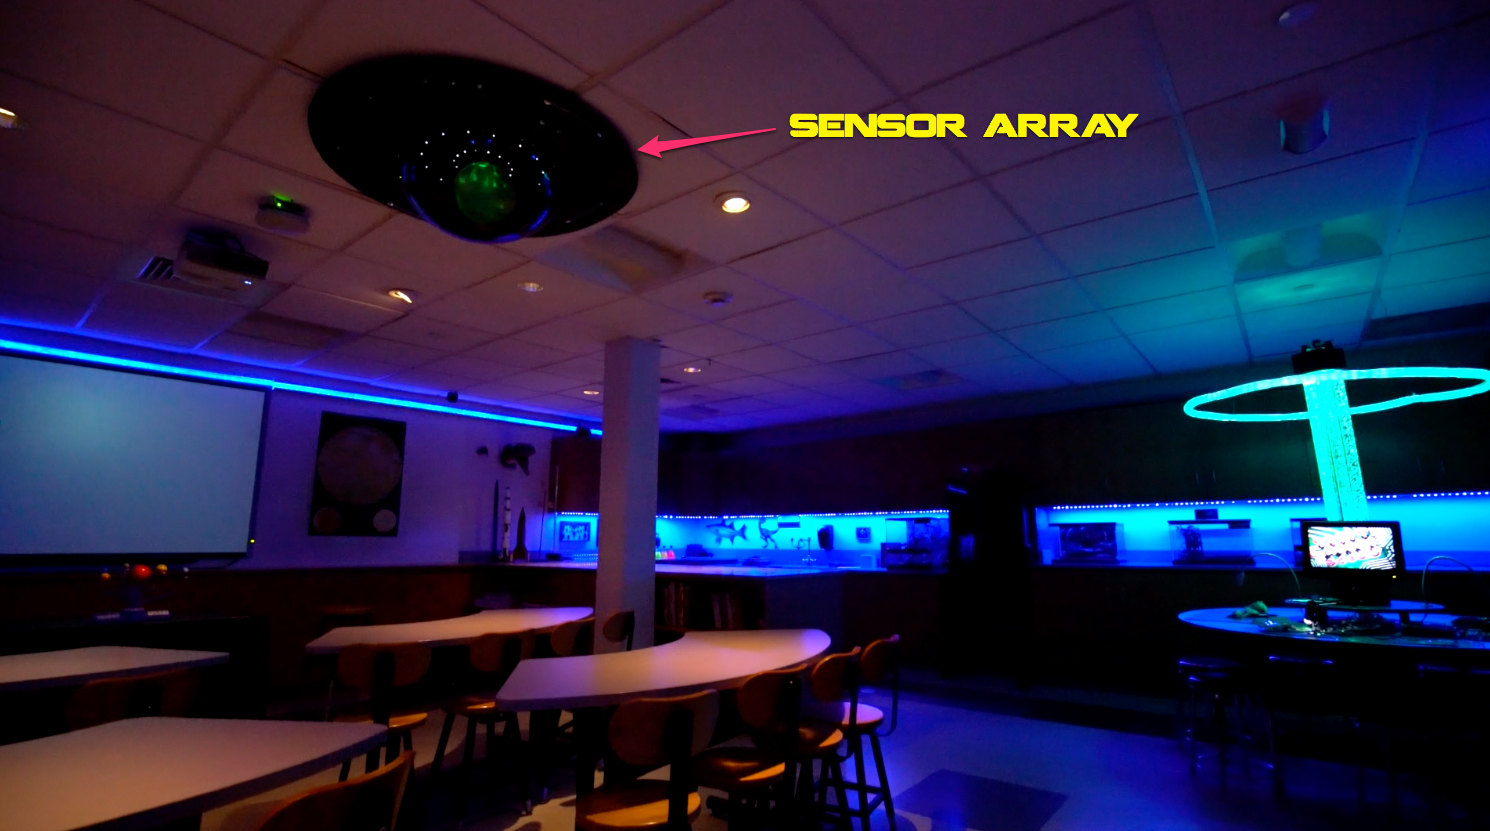
THE SENSOR ARRAY
The sensor array on the ceiling has no practical purpose other than looking cool. It was made of some scrap plywood and uses a smokey security dome that I got from a store going out of business. I added some holiday lights and put a color changing globe inside of the dome which had a really nice effect. It ended up looking like it belonged in the Death Star, which I considered a plus.
Here it is under construction. Fairly simple in design, but it looks pretty cool.
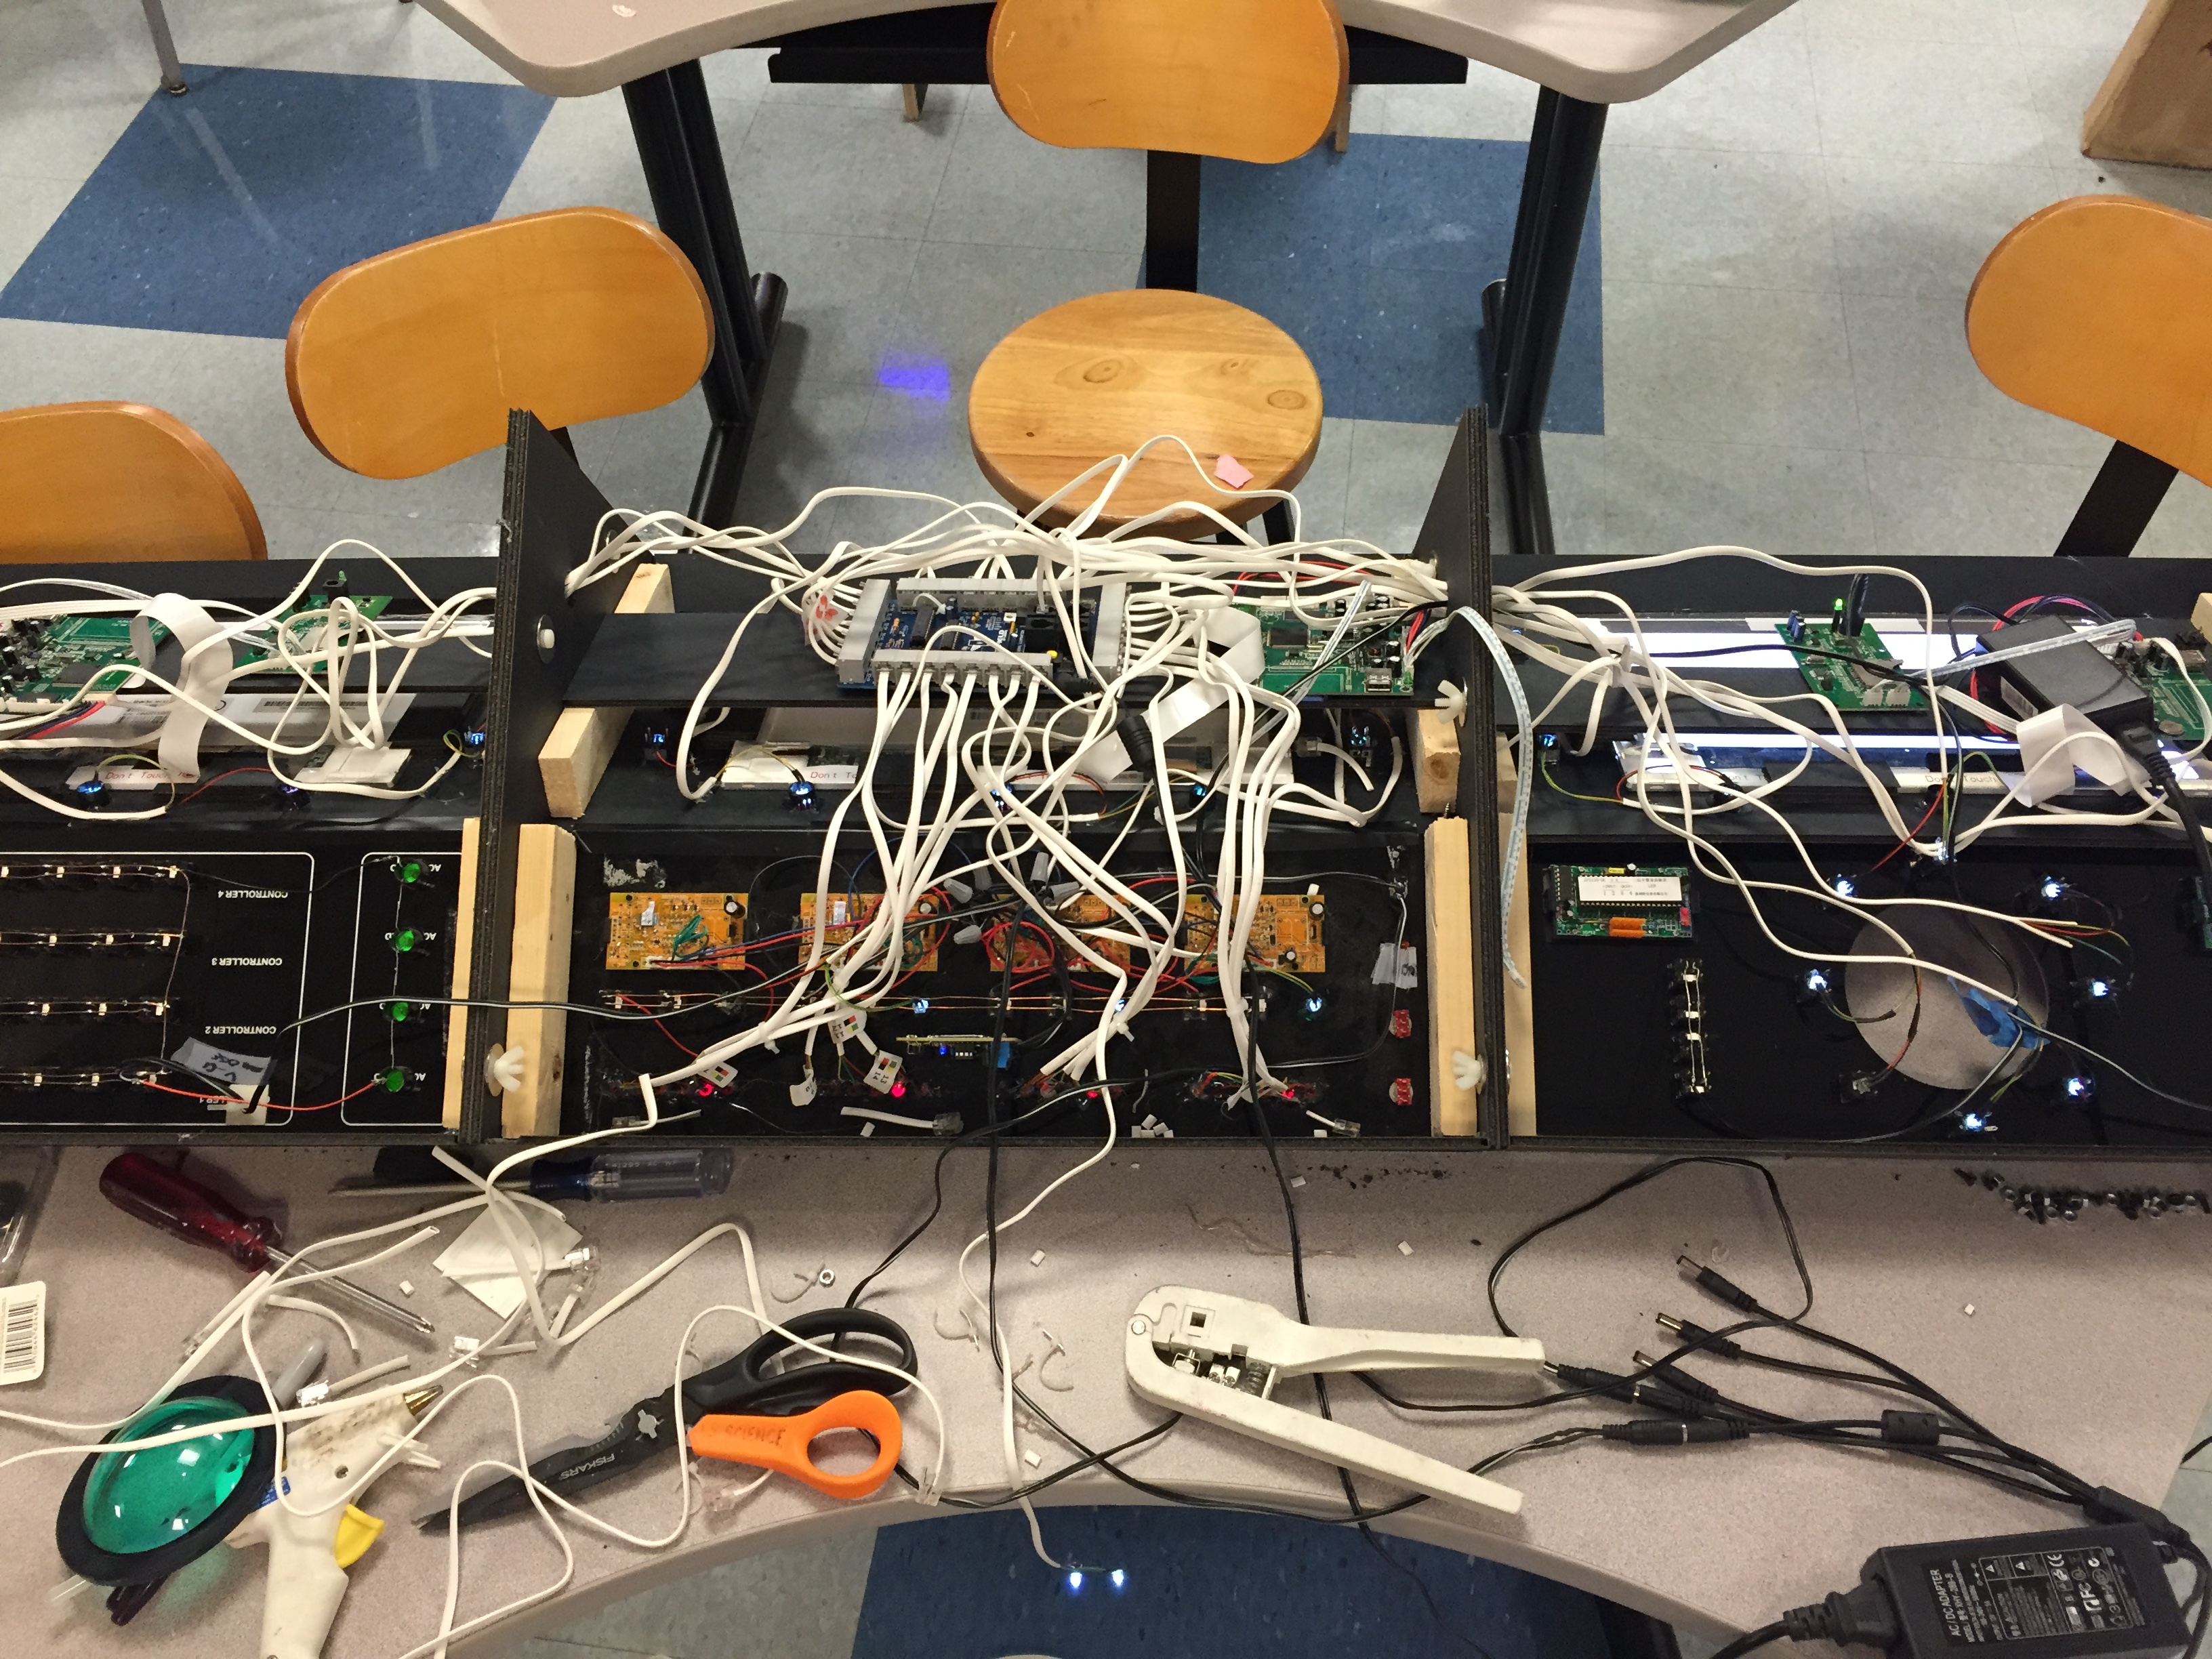
WALL CONTROL PANELS
The control panels were much more complex. The lower part was created by designing a layout on a computer by adding holes and openings for various buttons and lights I had. I then had these laser cut to size in black plexiglass. I could have drilled the holes, but many of the buttons were square, and I was fortunate enough to have access to a laser cutter.
The panels used numeric counters, LEDs, buttons and switched that I had, or sourced on eBay. The lighting effects were done using a modified Arduino controller to create the blinking and patterns. The video monitors were some hacked video panels that used to be part of a store display. I found these on eBay for about $8 each. I created the displays from some templates I found on-line, and then, for fun, modified them with some hidden easter-eggs of teachers names and school locations.
The round sphere on the left panel has a color changing LED Christmas ornament under it for effect. The two numeric displays on either side are voltage displays which I hooked up to the LED. Because the different colored LEDs require different voltages the displays continually change in sync to the LED colors.
Inside the control panels – that’s a LOT of wiring.
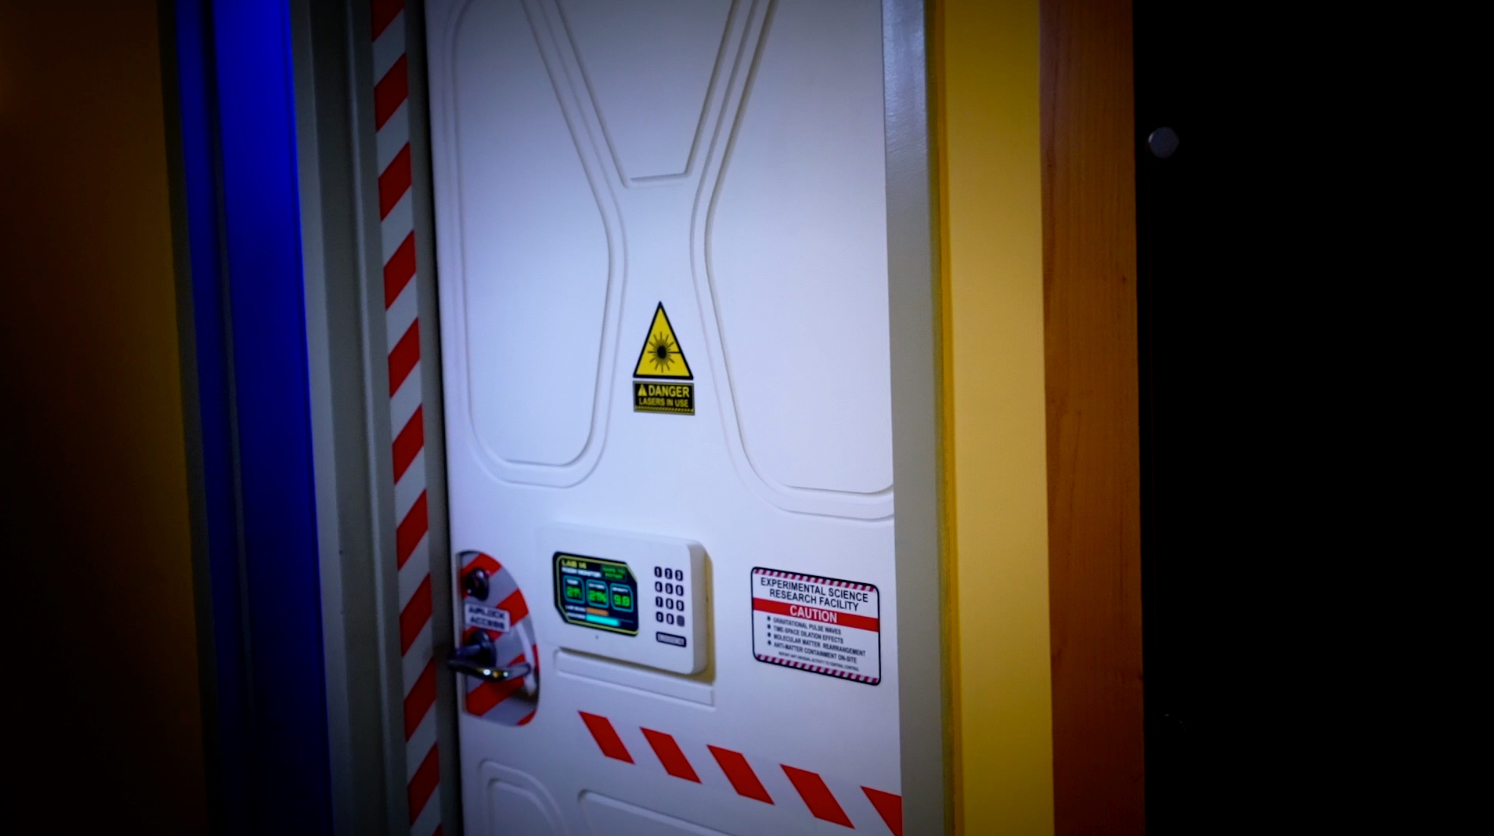
AIR LOCK DOOR
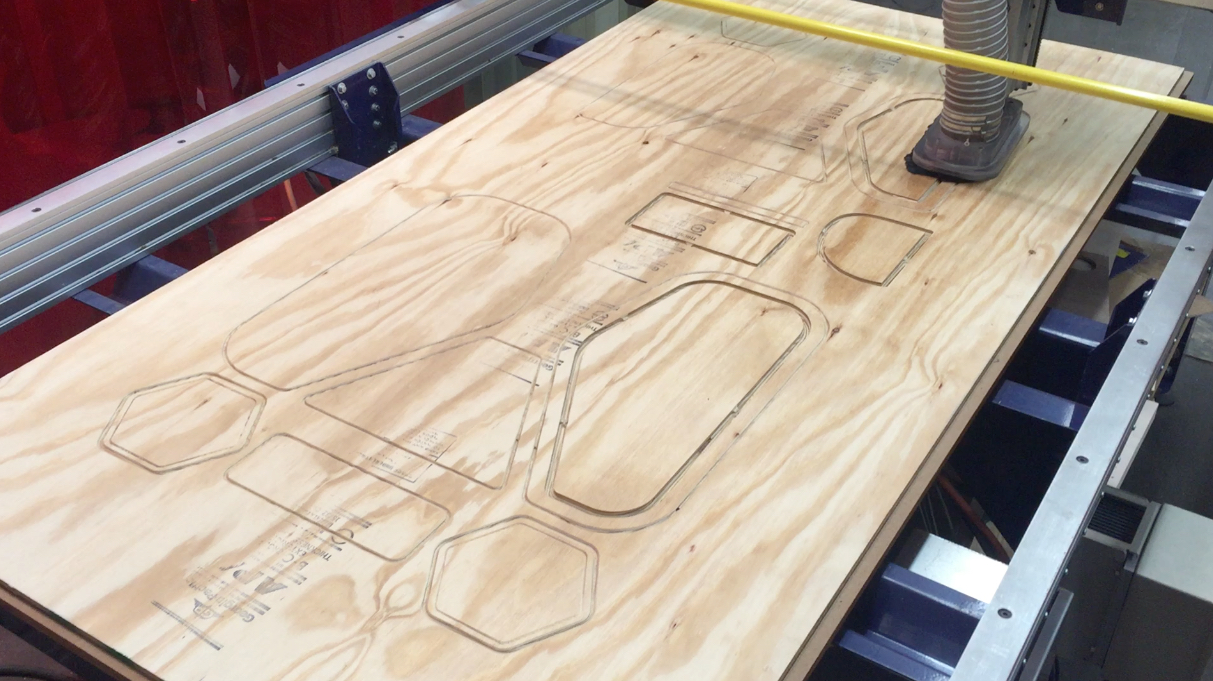
I love the airlock door – mainly because every now and then a a maked something you build from scratch turns out looking just how you imagined it, and this was one of the few things that did. I designed this door using Apple Pages (really!) and then transferred the design to a CNC program (VCarve) which would allow me to to use a computer controlled router to cut all the grooves with a level of precision that I could not accomplish by hand.
I should probably point out here that I do not own a laser cutter or CNC router – I am part of a wonderful community maker space that gives me access to an amazing amount of equipment and talent that I am lucky enough to utilize every day.
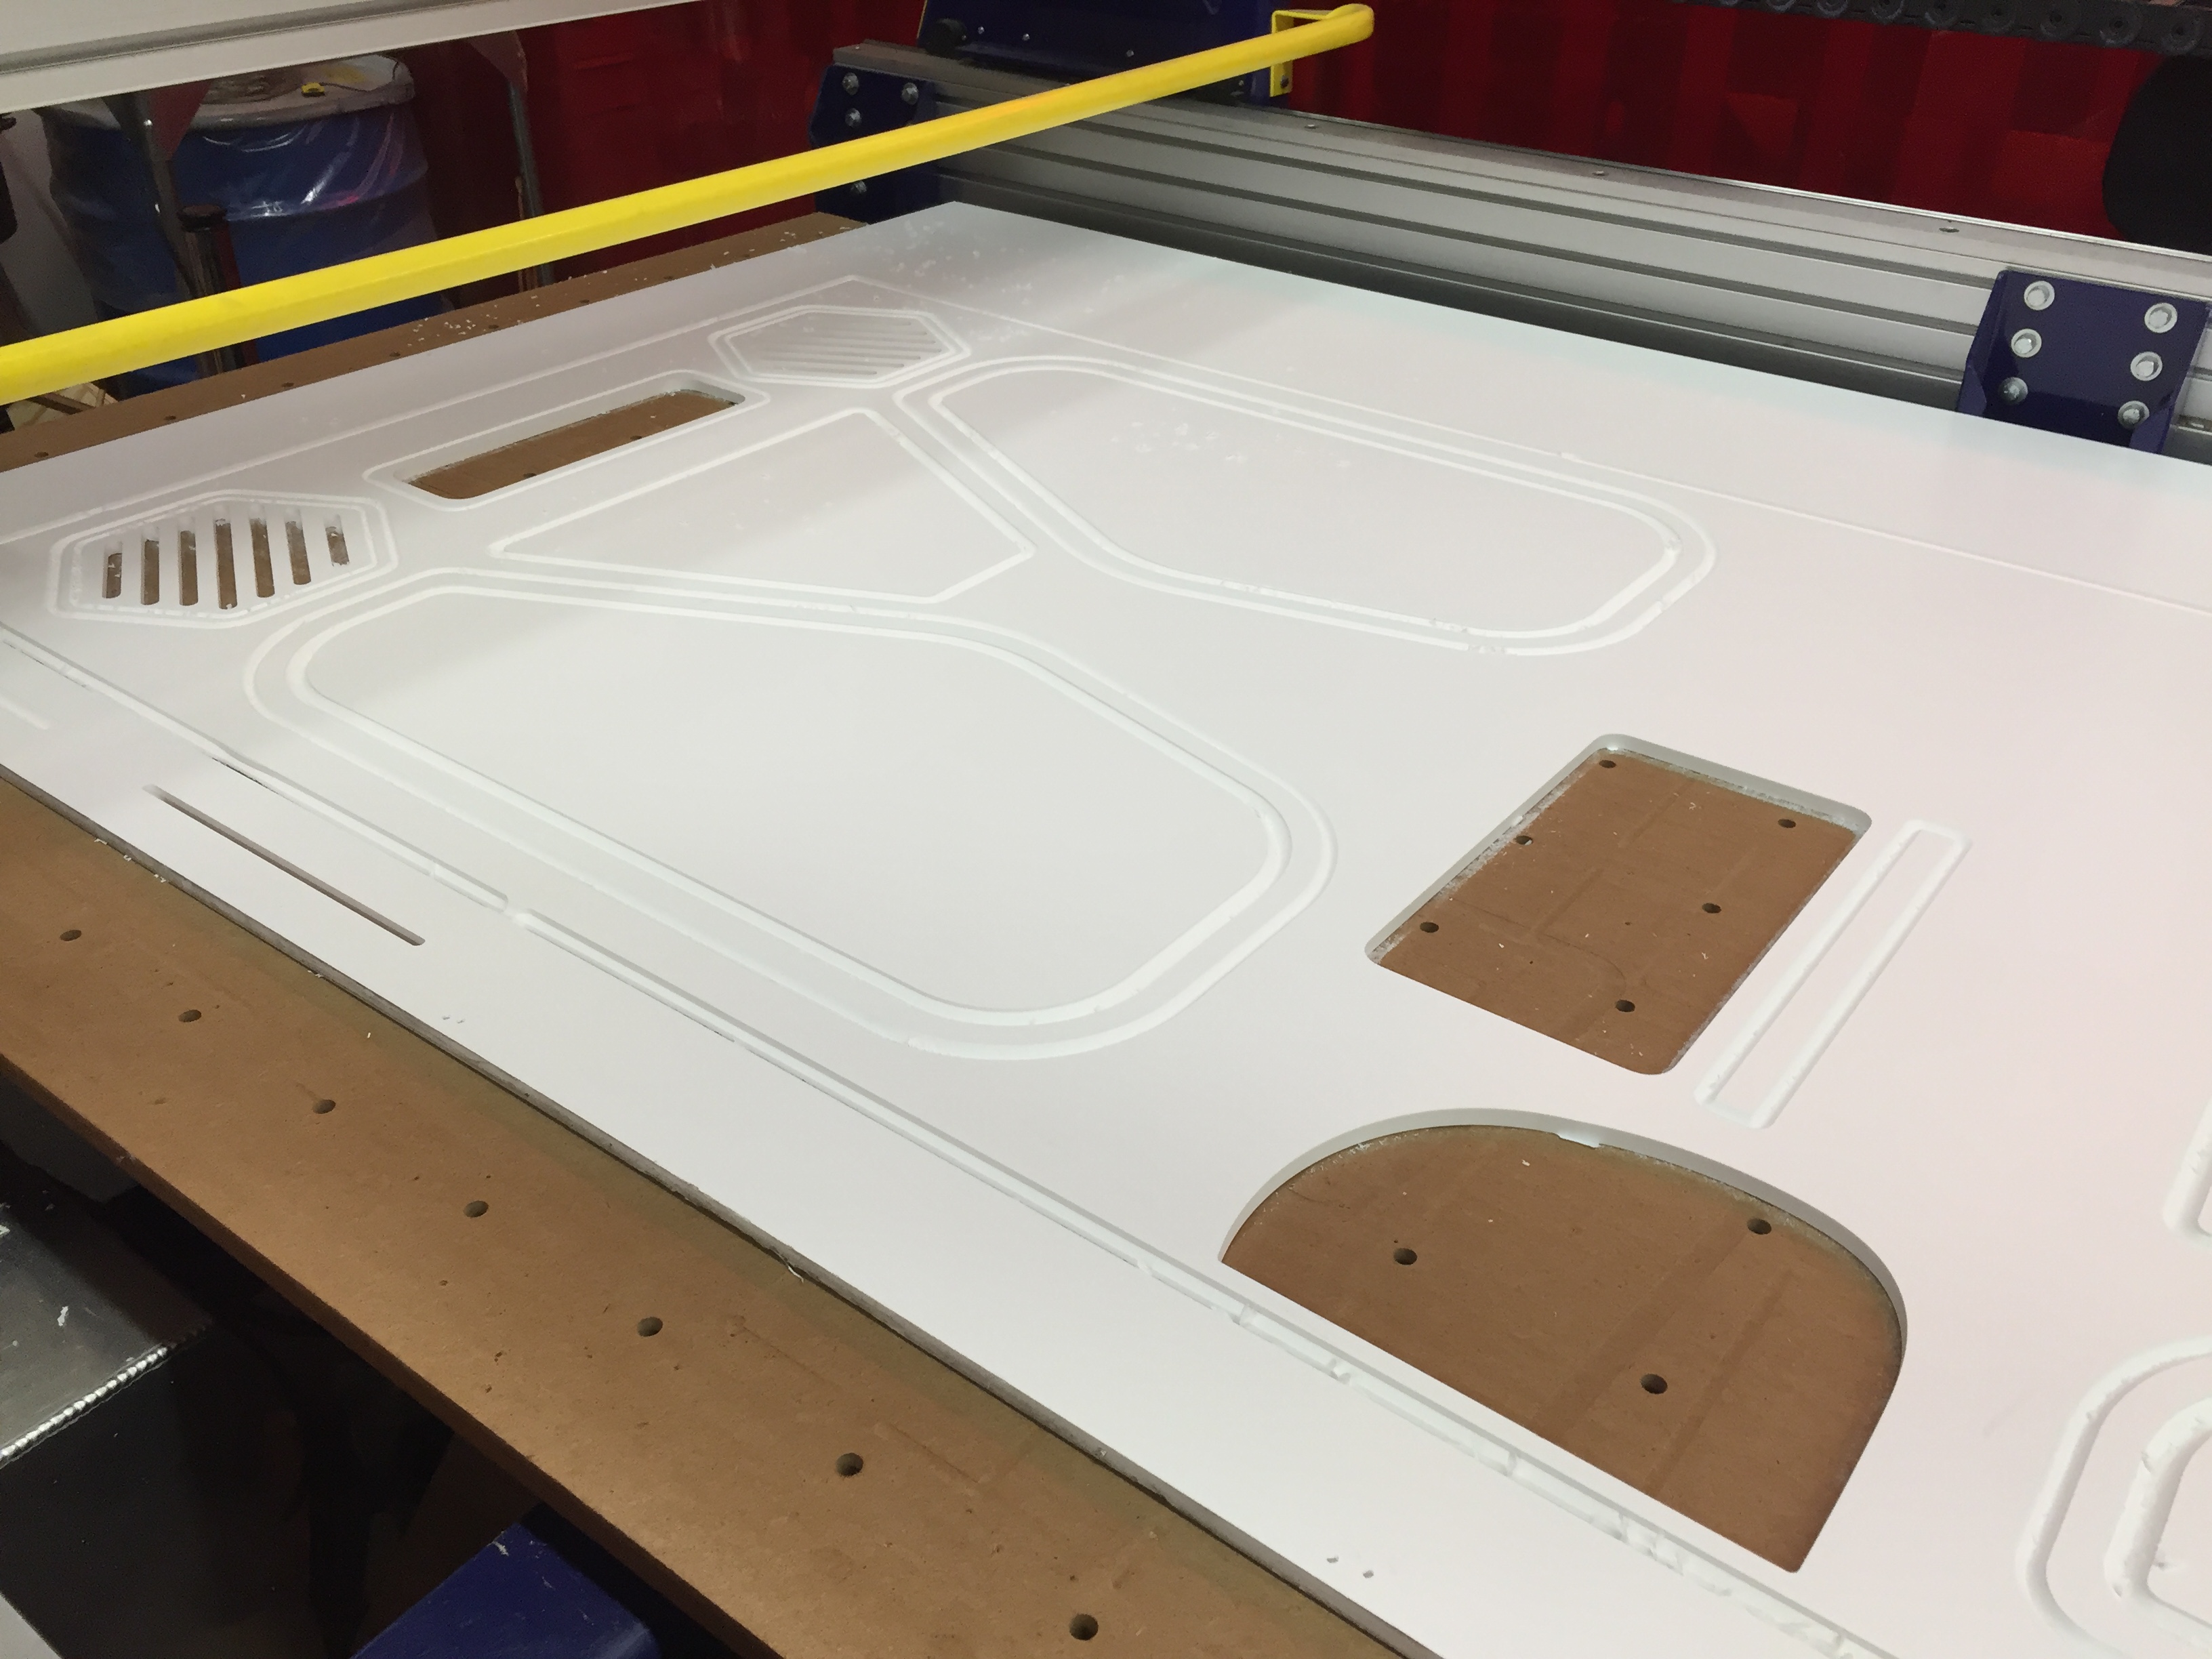
I originally cut the door out of wood, but it looked pretty bad and would take many hours to sand smooth, So I then tried 3/8 inch expanded PVC which is often used for house siding and trim. The results were exactly what I was looking for and it was practically ready to hang!
The video display on the door was made using an old digital photo frame that could play video files. I created all the graphics in Apple Keynote and exported them to video files. They loop endlessly. I hid the frame in some scrap pieces of the expanded PVC. The buttons were made on a laser cutter and have no function. The door was simply applied over the existing door with double stick tape. I added some signage and caution tape and the airlock was complete.
TEACHER COMMAND CENTER
The Command Center is a favorite part of the room, and the best part is it is a real movie prop! This was the main console used in the 2004 movie, Thunderbirds.
Here is my console being used by Oscar winner Ben Kingsley!
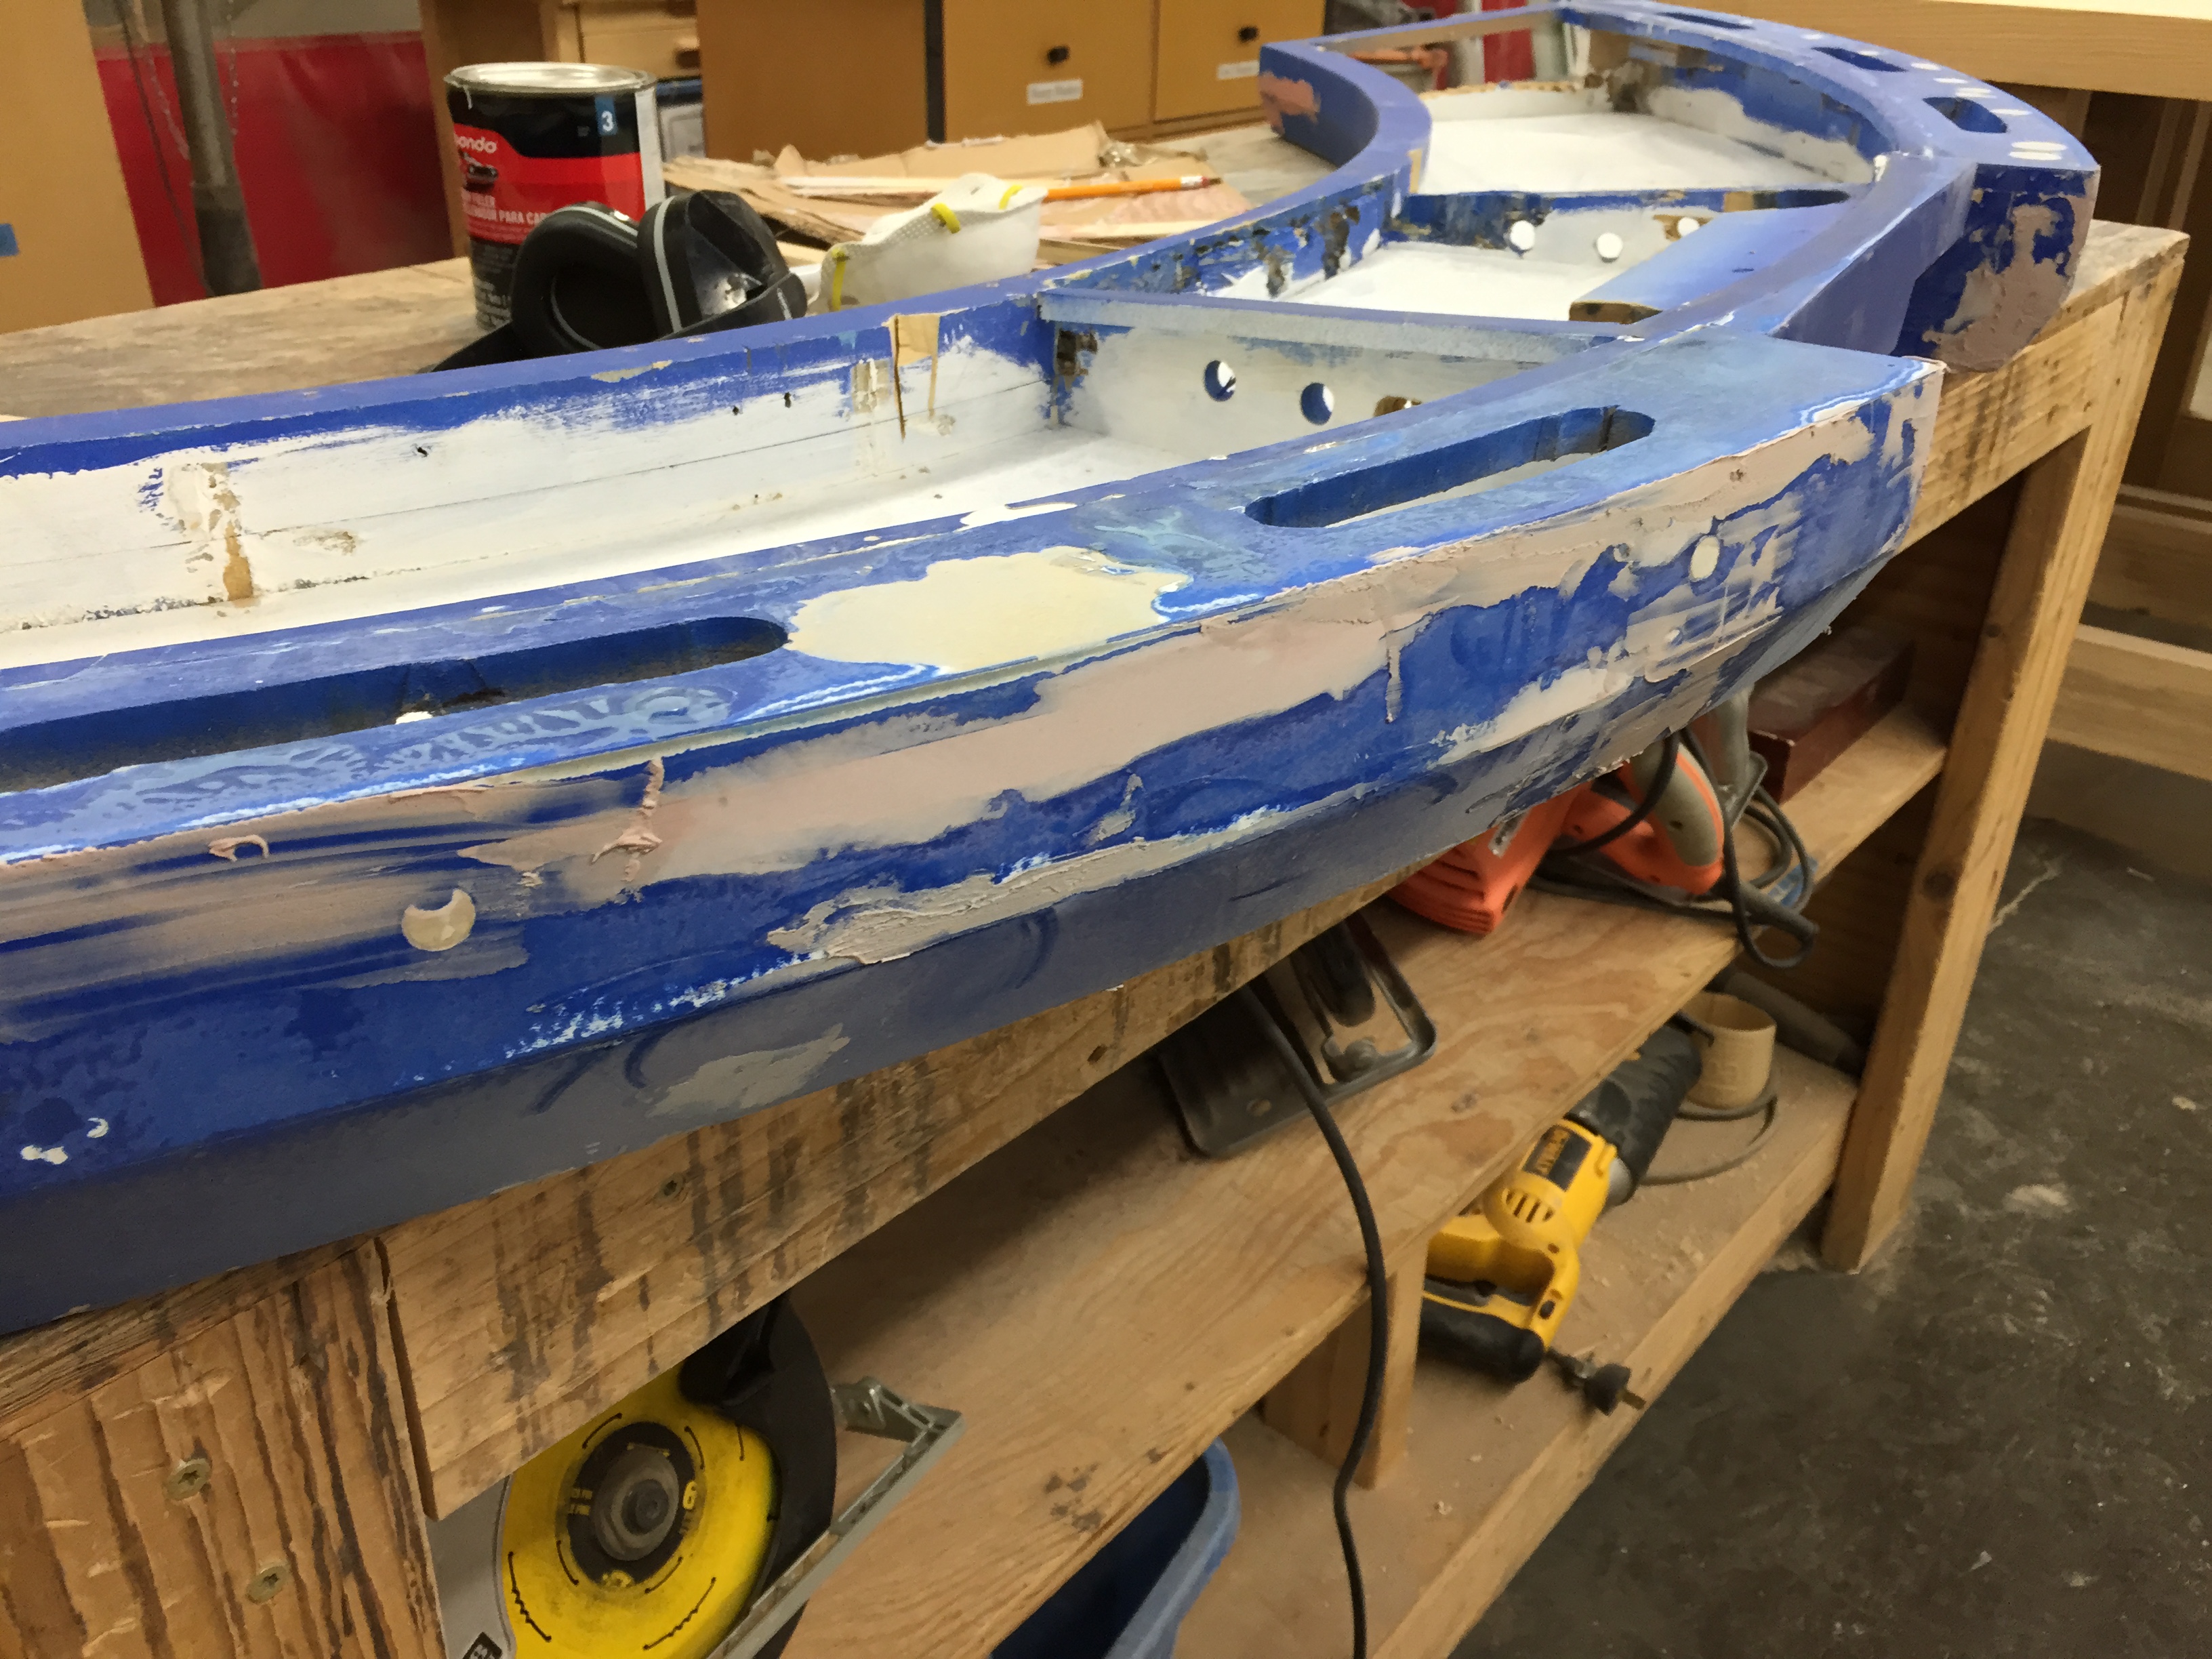
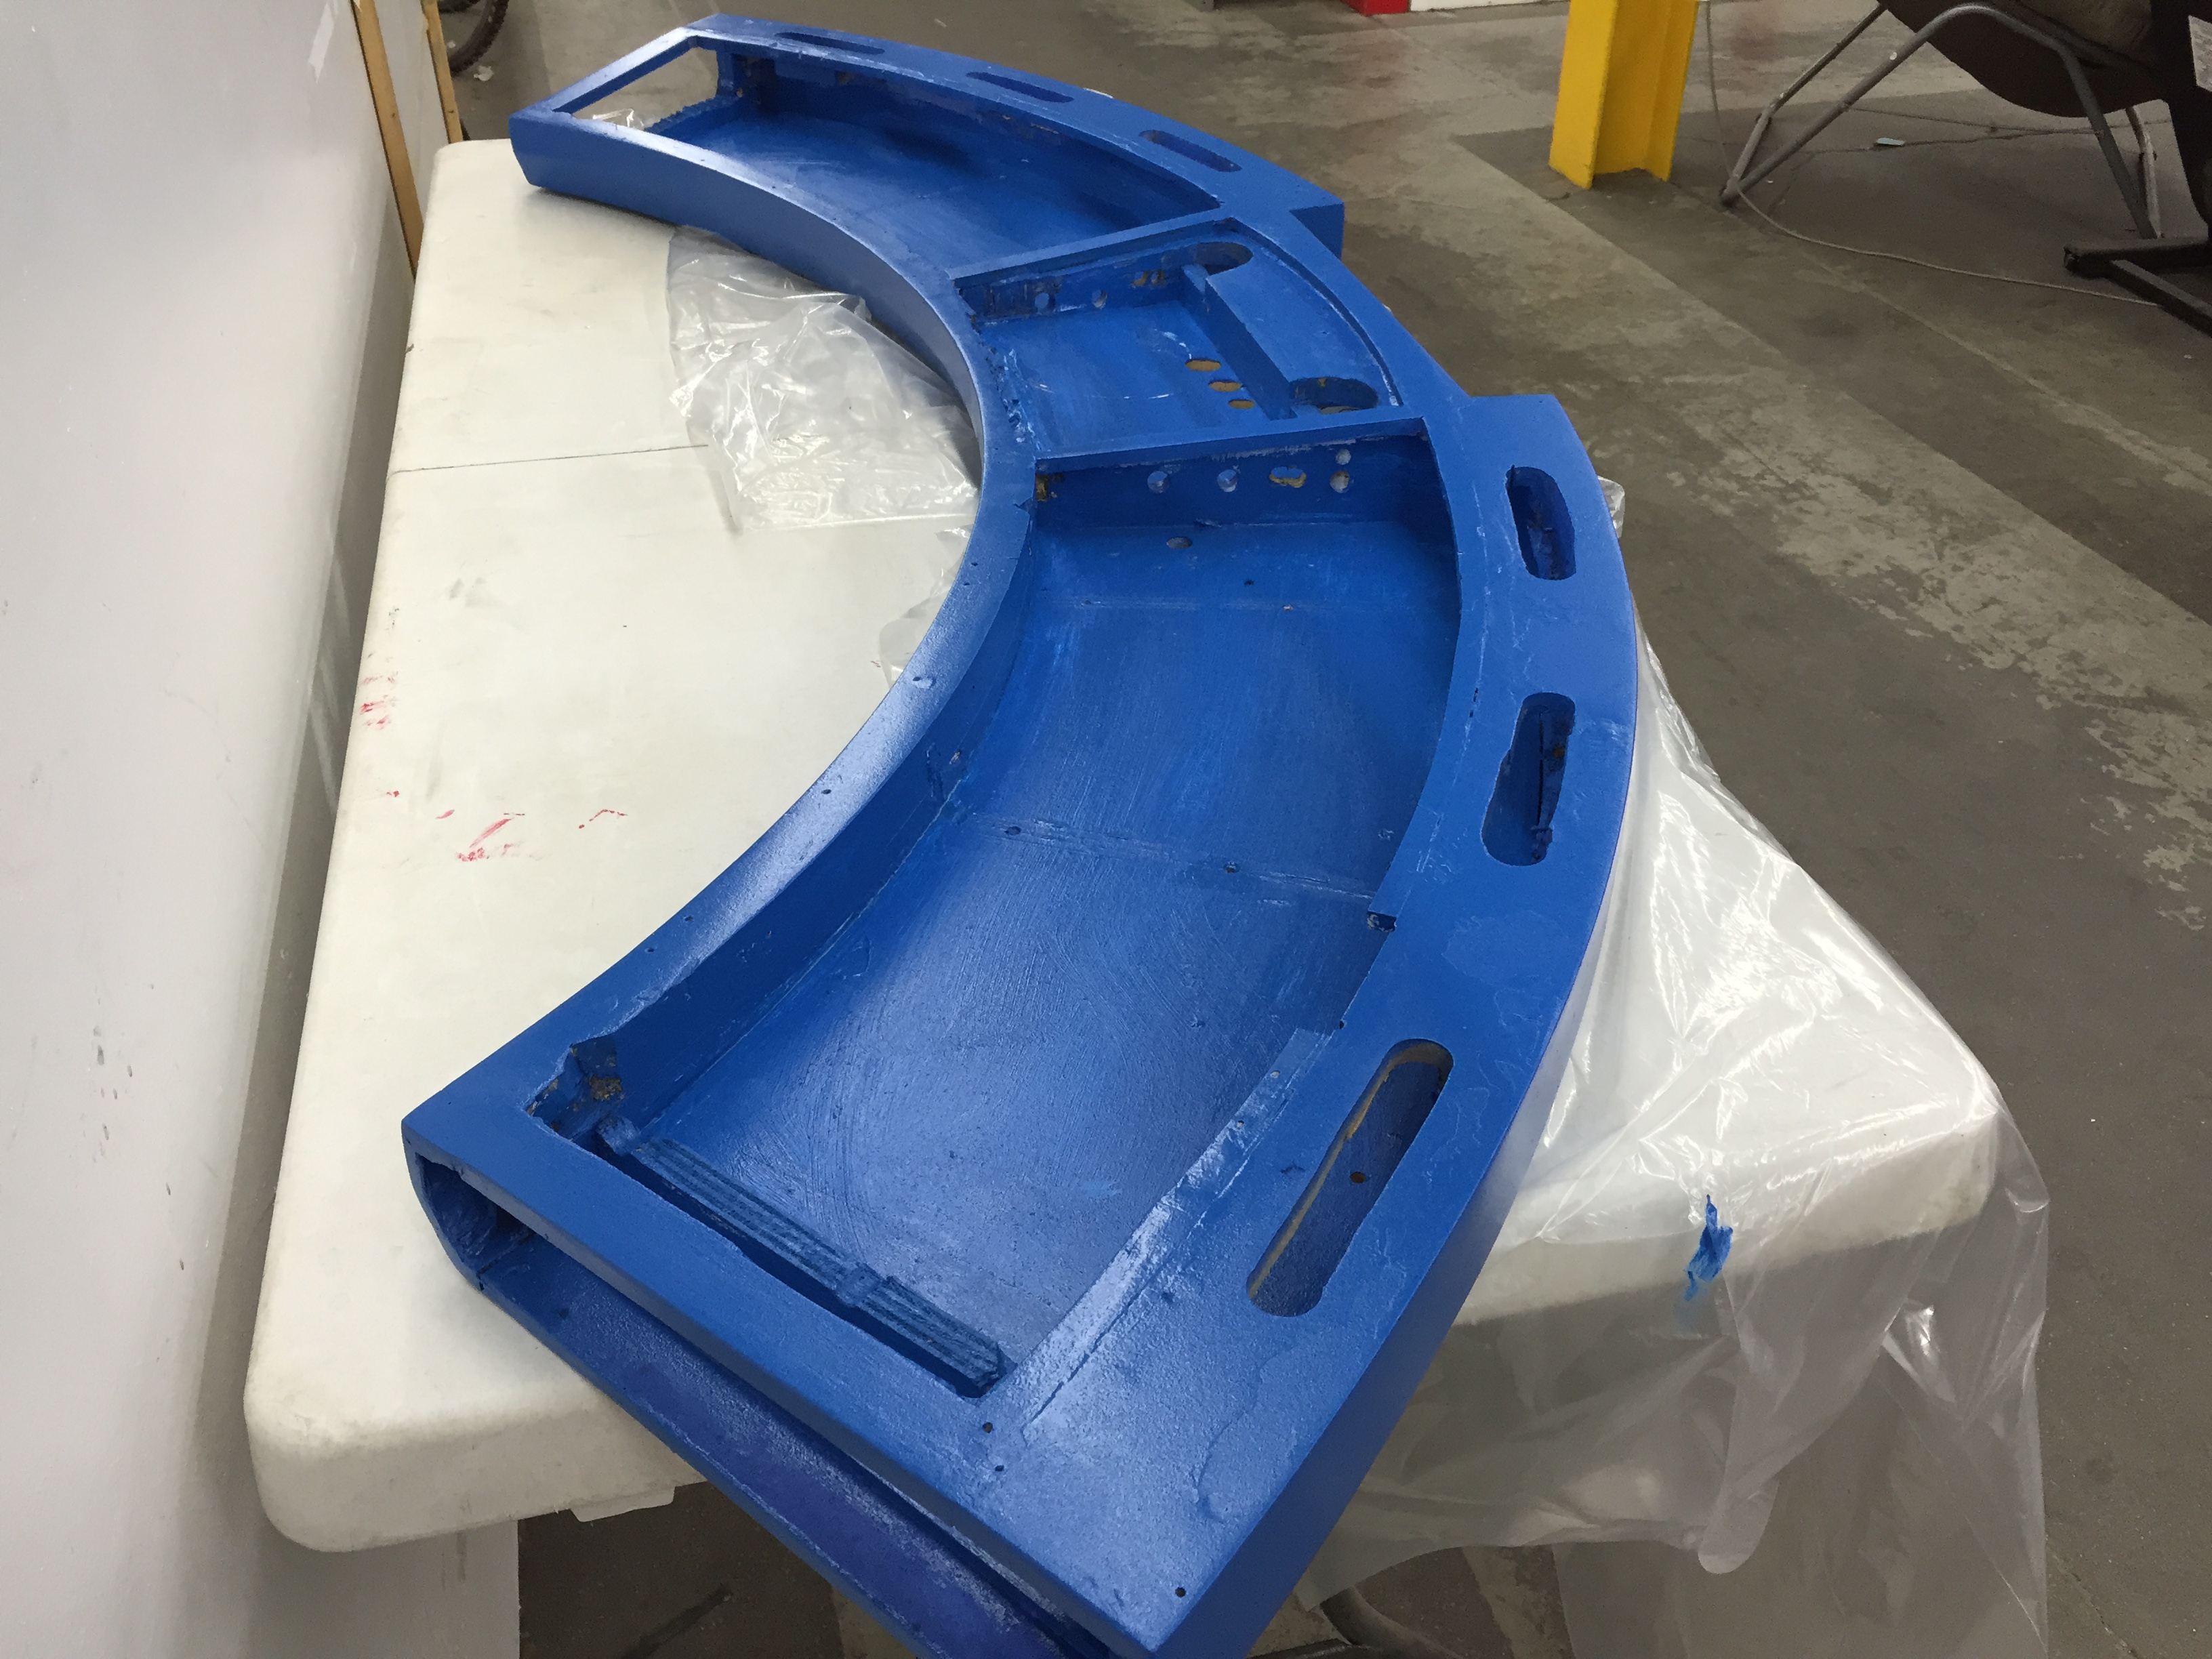
I purchased it from a source in England and had it shipped to the US. The console was pretty beat-up and required a complete renovation that took several weeks. First job was to patch, repair, and paint the base.
I then rewired and replaced many of the lights and completely reorganized the wires. For fun, I also added a sound unit which allowed me to add 8 computer-voice sound effects when various buttons were pushed.
The room has many other features in the way of lighting and Sci-Fi decorations.
If you’re thinking it would be cool to do this in your house or shop, go for it! I learned (and failed) a lot along the way and the internet is filled with wonderful resources to get you started. Keep exploring, keep making!
This video shows what it would be like to juggle on the moon (without a space suit.) This was filmed aboard a plane that makes parabolic flights up and down. As the plane descends, it can simulate partial or complete weightlessness for about 20-30 seconds.
The moon’s gravity is about 1/6th of the earths gravity. That means things fall a lot slower. It also means if you wanted to learn how to juggle, the moon is the best place for sure!
Science Experiments, Experiment Videos, and Science Fair Ideas from Science Bob
 Triggering all the reactions took quite a bit of engineering. Bob designed, laser-cut, and assembled over 280 chemical tipping devices that could be triggered using strings and pins.
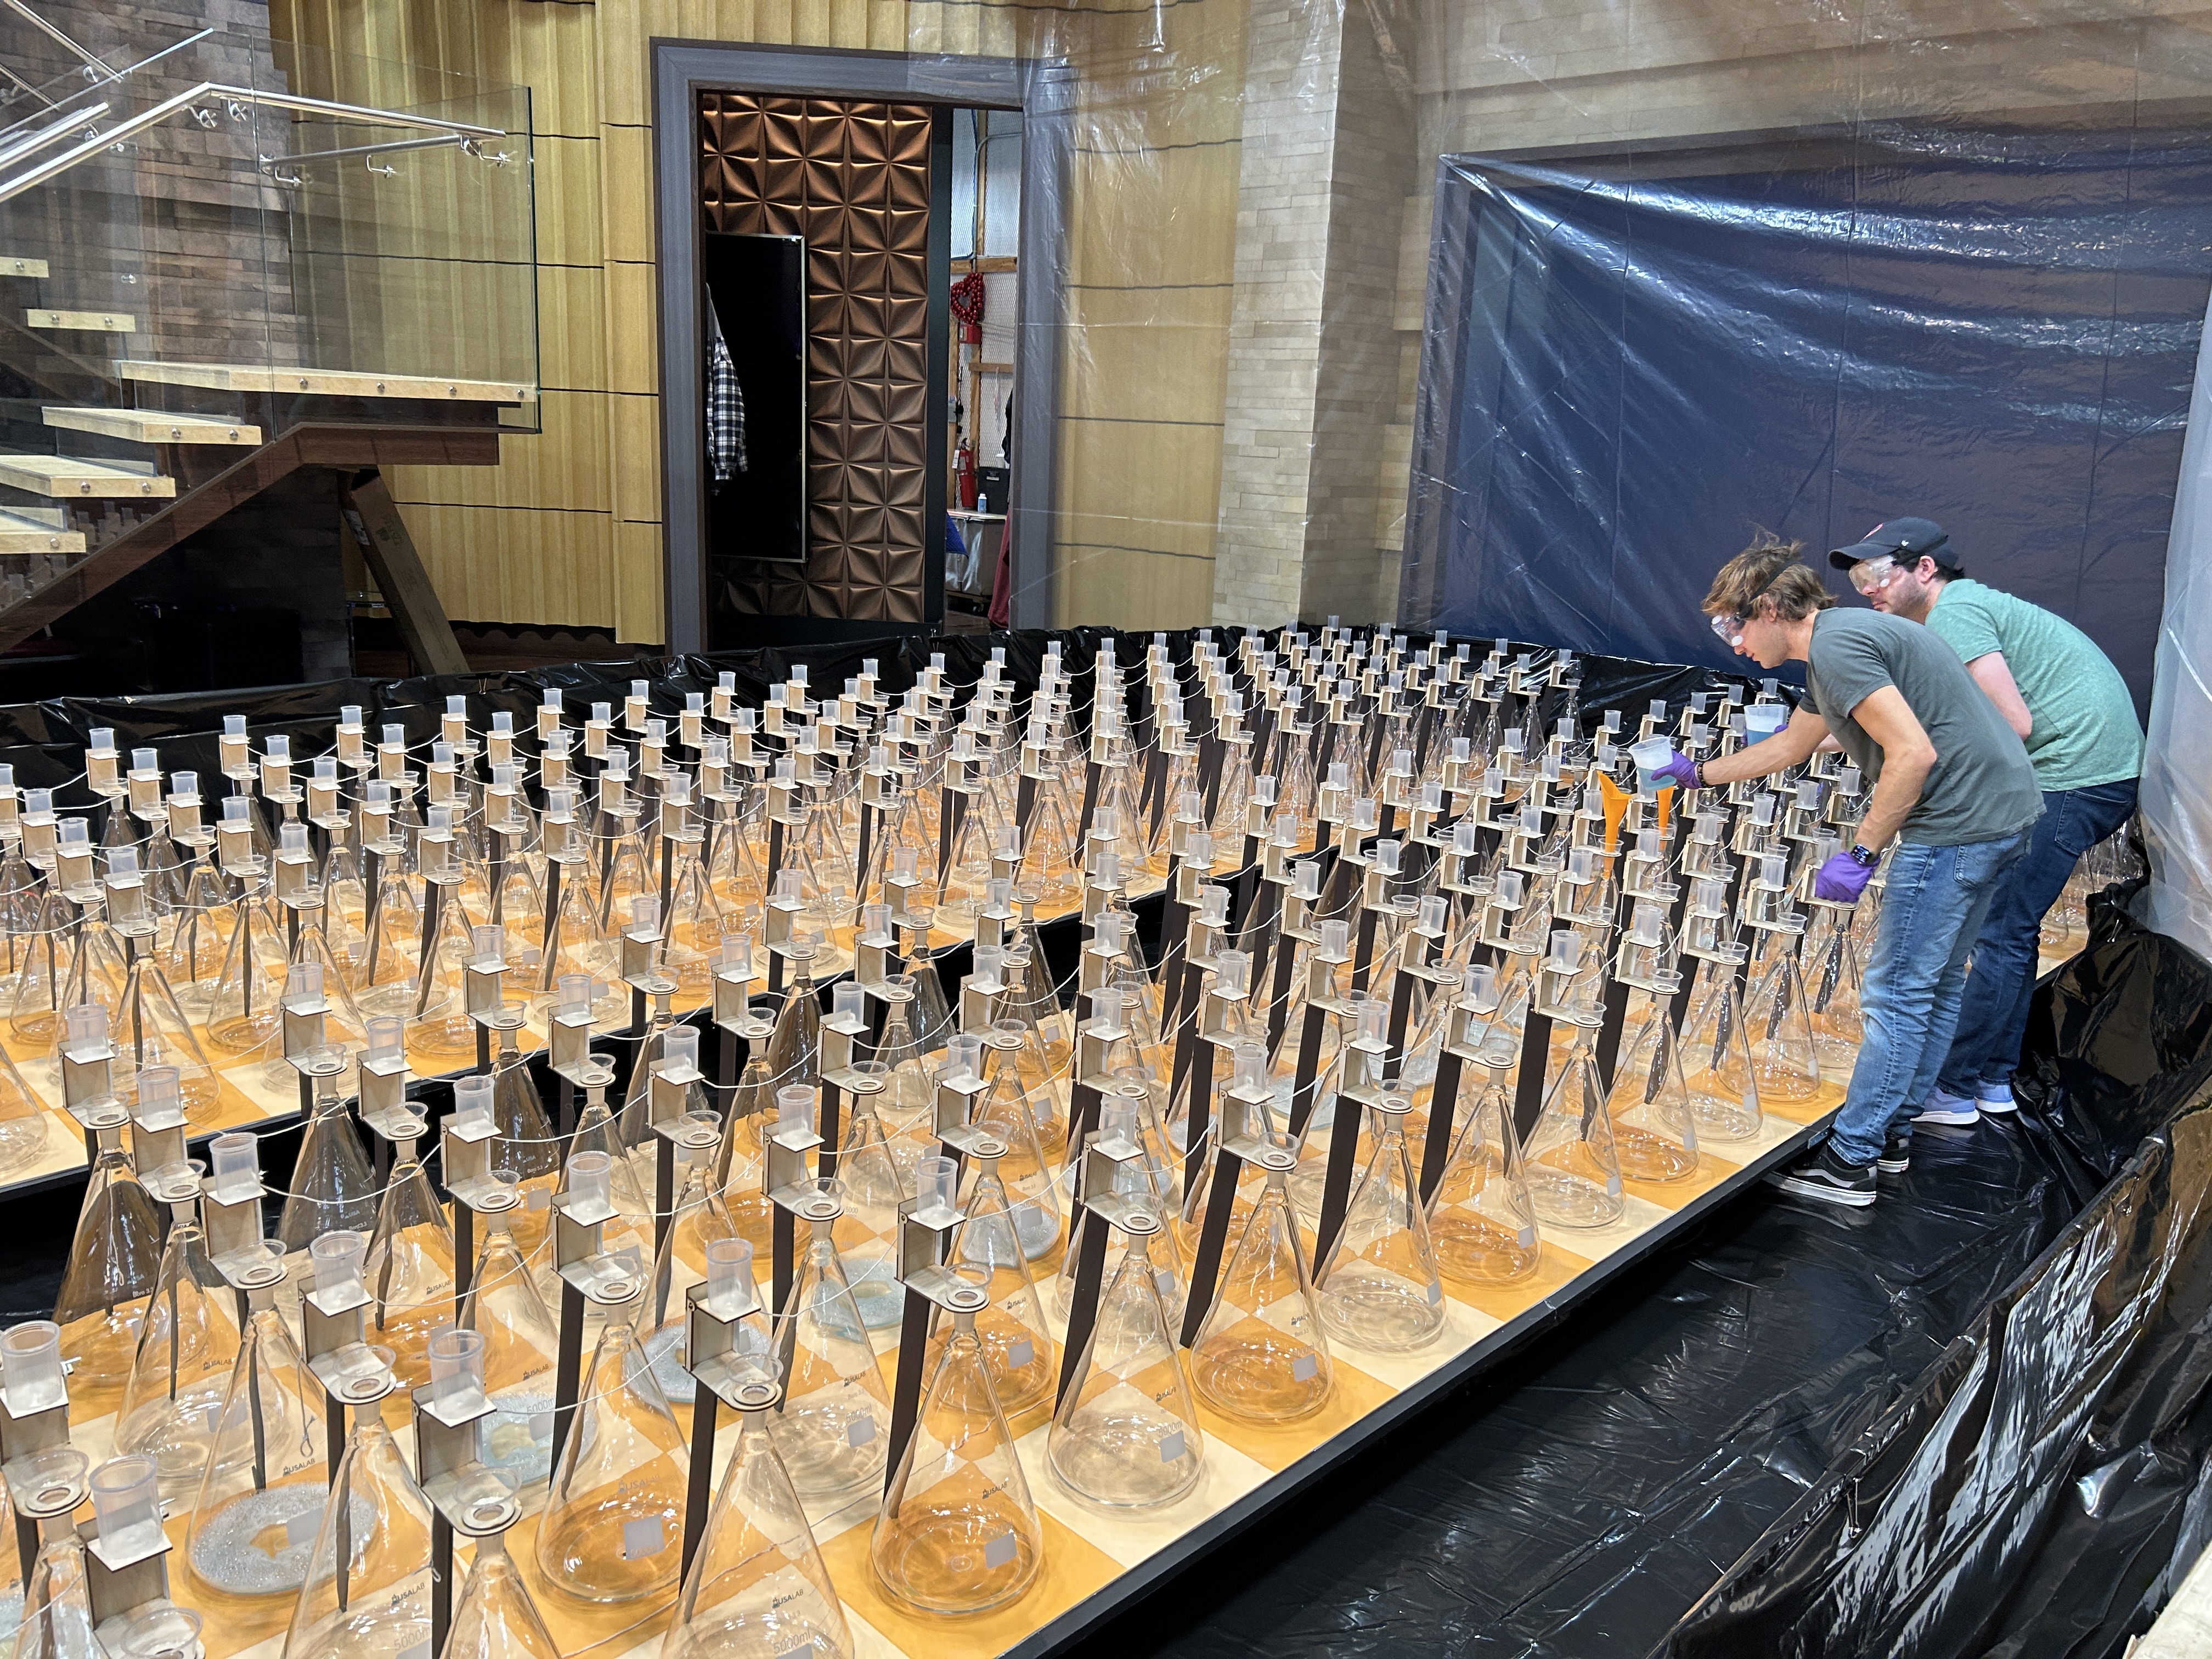 Then each flask had to be mounted, filled with hydrogen peroxide, and then the catalyst had to be added to the beaker on top in a very precarious way. The process to three days and the stage crew worked until 9pm the night before the demo.
 In the end, It was all worth it, resulting in an epic demonstration and a new World Record!


 TRY THE EGG DROP CHALLENGE AND POST IT ONLINE!