Ever cut an onion and started tearing up? Most people do. It turns out when you cut an onion, it releases a gas called, ready for this, Propanethiol S-oxide. When mixed with certain enzymes in the onion, it creates a sulfur gas. These gases then get to your eyes and create a mild acid which irritates the eyes.
Normally, your body would signal you to close your eyes. This, of course, is not a good idea if you are cutting an onion. The next best thing your eyes can do is to make tears to protect the eyes. Rubbing your eyes is a bad idea, since your hands are likely full of the tear making onion juice. So how do you keep from tearing up? There are many theories out there. I’ve heard some have had luck burning a candle near the chopping site. (Don’t try that without an adult.) Wearing safety goggles, however, should reduce the tears every time.
Why do our toes get wrinkled in the tub?
Believe it or not, scientists have debated this question of wrinkly toes and fingers for quite some time. Most of the skin we see on our bodies is actually dead skin! Our fingers and toes have especially thick layers of this dead skin (also called keratin.) When we get in the bath tub or pool, those dead skin cells absorb water. Just like a dry sponge absorbing water, the skin grows slightly in size and it begins to wrinkle. The longer you stay in the water, the more wrinkled your toes and fingers get! By the way, warm water usually wrinkles skin faster than cold water.
It’s worth noting that new research points to our bodies actively wrinkling our fingers and toes to give us better grip. Some studies show that people that have neurological problems with their fingers or toes do not wrinkle up as much.
NOW YOU KNOW!
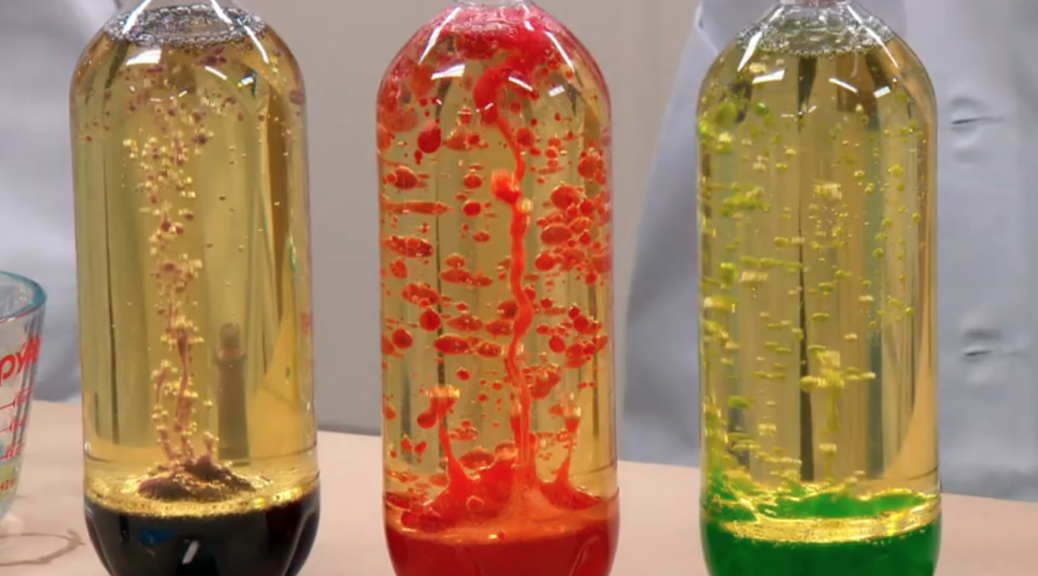
Blobs In A Bottle Lava Lamp
The World’s Easiest Lava Lamp.
This is an easy, fun science activity that is great for any age. In fact, our video crew ended up taking the extra bottles home to show their friends. It is also a great demonstration of liquid density, the release of gases in a chemical reaction, acids and bases, intermolecular polarity, and well, just plain science coolness. Watch the video, read the instructions (link below) then TRY IT!
CLICK HERE FOR THE BLOBS IN A BOTTLE INSTRUCTIONS
The Leyden Jar
“Shocking” science with actor Kevin Pollak.
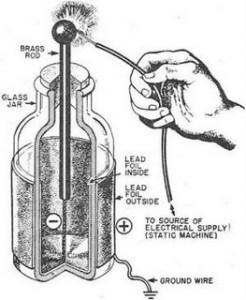
This is a clip from a show that highlighted some of Ben Franklin’s science experiments. The host is actor/comedian Kevin Pollak. Here we are demonstrating one of Franklin’s favorite gadgets called a Leyden jar. It was invented in 1745 by Pieter van Musschenbroek and it became an important invention for studying electricity.
A Leyden jar is able to store large amounts of static electricity. The more it is charged with static, the stronger the voltage becomes in the jar. In this clip, actor Marc Evan Jackson is really getting shocked by the Leyden jar, and his reaction is quite real. While the charge in this clip was harmless, a large leyden jar can hold enough of a charge to actually kill a person.
The Screaming Quarter!
Spooky Science
So why is dry ice called dry ice? Dry ice is the “frozen” form of the gas, carbon dioxide. While it may be called ice – it never melts – it goes right from being a solid to being a gas. This is called SUBLIMATION. When I put the quarter on the dry ice, it cause it to turn into a gas very quickly. As the gas escaped around the sides of the quarter, it caused it to vibrate quickly and make that cool screaming sound.
Who Wrote The Bill Nye Theme Music?
In an elementary school in a Boston suburb, a group of third graders enters a classroom after lunch. The teacher is loading a DVD into her laptop hooked up to a projector emerging from the ceiling. “What are we watching?’ asked one student as he sat down with a thud.
“It’s a Bill Nye video,” she responded. What happened next was remarkable; it was as if a part of their 8 year old brain had been triggered by an electrical probe and they immediately began chanting, “Bill Nye the Science Guy” in a familiar melody while moving their body to a non-existent house beat. Just days later, I heard that same familiar tune emanating as a ring tone from the cellphone of a good friend, except he’s 25. It turns out most people I know recall at least part of the theme song for, “Bill Nye The Science Guy,” and they aren’t afraid to sing it. The hugely popular children’s science show has not aired an original episode in, get this, almost 15 years. But the show, and perhaps even more so, the theme music, lives on. Take a listen:
Few shows have managed to have an epic theme song that stands the test of time; think Gilligan’s Island, The Brady Bunch, Friends. But if there was a Hall of Fame for theme songs, an almost certain inductee would be the theme to “Bill Nye The Science Guy.” So who wrote the music? Who’s voice chants, “Bill! Bill! Bill!” and how did a children’s science show end up with such a funky, off the wall theme? It turns out the man with the answers is a music writer, and former math teacher, named Mike Greene. He’s the guy who wrote and scored the theme into the conscience of young scientists around the world. I asked Mike when the last time was that he heard the theme. “It’s been months.” So we took a listen.
Bob: So, as you’re listening to the theme, what is going through your head?
Mike: [laughs] You know, I always liked that song. I still enjoy listening to it. It’s lucky that, in many ways, the song holds up because there are a lot of times that you do a theme song and the song, five or ten years later, sounds dated. Certainly you can tell that it wasn’t written today. But it’s not embarrassing. There was nobody who didn’t like Bill Nye the Science Guy. It’s one of those things that just kind of brings a smile to most people’s faces if I say, “Oh, yeah, I wrote the ‘Bill Nye the Science Guy’ theme.”
Bob: Let’s go back to 1992. When you get the call, what did they tell you they were looking for? What kind of guidance did you get?
Mike: The thing that they told me was they did not want it to sounds like a kid’s theme song. They didn’t want it to be safe, basically. They didn’t want to make it sound like stuff that’s already been done. They wanted it to be something that was adventurous and a little bit more daring than what a theme song, at that time, would be. It was much more common to have a song that would be like, [singing] ‘”Bill Nye’s gonna teach you some science.” Something that’s a little bit cheesier. They wanted to go as far away from cheesy or safe as they could get.
Bob: So how did you end up approaching the theme with that kind of guidance?
Mike: Well I’ve done tons of dance beats and bass lines. So, coming up with that was fairly easy. But you know what? Now that I think about it, the first thing I came up with, I think, might have been the main melody, [sings] “Bill Nye the Science Guy.” I started thinking of [the band] Oingo Boingo. I had that in my head. The melody sounds like something that Danny Elfman from “Oingo Boingo” would sing. The little twirl on the [sings] “Science Guy.” I thought that sounded kind of Oingo Boingo‑ish.
Later I thought what might be kind of cool would be a guitar part. Kinda rocky, but with a weird bizarre melody. So I started riffing on guitar until I came up with this one line and recorded it onto my sampler. A sampler lets you play recordings back on your keyboard, so whenever I hit that one key, it plays the guitar riff.
Bob: Who sings the theme?
Mike: [laughs] It’s actually me. I used my voice for the first demo to send to the producers, Jim and Erren. After they approved it, I hired singers because I wanted to make it better. I hired a guy to sing it who sounded pretty cool. He had like a rock‑and‑roll kind of voice, so it sounded pretty slick. Then as another option, I hired a girl to sing it to give it a bit more R&B kind of sound. Then I sent those versions to Jim and Erren, and they said, “Why have you got them on it? We want your voice. It’s funnier.” I thought, “My voice is funnier??? Good thing I’m not touchy about my singing!” [laughs] So we kept my voice on there.
The woman who says, “Science rules” and “Inertia is a property of matter” is a very talented actress and voiceover artist named Leslie Wilson. I was told at the time that Bill wanted to replace her with his voice, because he thought it was weird in the open that he was mouthing her words, but I guess everybody else liked it as is. Definitely sounds better with her voice.
Bob: So who is the voice behind the famous, “Bill, Bill, Bill”
Mike: Believe it or not, those are rappers. I can’t name them, because it was against their contract to do outside things without permission from their record company. It was kinda funny, because they were in my studio one day to record a song. I was working on the Nye theme as they walked in and I told them, “Hey, do me a favor and go in the booth and chant ‘Bill, Bill, Bill’ over and over again.” They had no idea what it was for, but they’re cool, so they did. It sounded great, so that’s the version we kept. The show didn’t air until a year later, so it wasn’t until then that they understood what this was really for.
Bob: Have you connected with Bill Nye and chatted about the theme at all?
Mike: We’ve had short little conversations about the theme. I run into Bill every once in a while because he lives in Studio City which is where I live as well. We run into each other about once every year, once every two years or so. There’s a funny video on YouTube of him, where I guess somebody in the audience asked him to sing the theme song or something like that. I can’t remember exactly what his response is but it’s kind of funny because he says, “Well, you know, that’s not me singing the theme song. You wouldn’t ask the stars of ‘Bonanza’ to sing the theme song of ‘Bonanza’.”
One time I flew up to Seattle for a couple of days to meet everybody and that’s the first time I met Bill. I remember one comment with Bill that I thought was pretty cool. He said, “All we want to do is change the world.” I must say, I think he succeeded.
BONUS AUDIO! – Turns out Bill Nye The Science Guy was translated into Chinese. Listen to the Chinese version of the theme song: Beer, Beer, Beer!
Robot Reference Guide
There’s something about robots that people connect to. I knew as soon as I left the theater after watching Star Wars that I would someday have my own R2-D2, (which I now do!) So I decided to ask the followers of my Facebook Page to tell me their favorite robot, and I got a huge response. Below are some of the favorites, and the approximate time that they made their first appearance. I included cyborgs (robotically modified humans) as well as some real robots that were mentioned. Thanks to all that posted! Click the image or links for a larger view. What’s your favorite robot? Did I miss any?
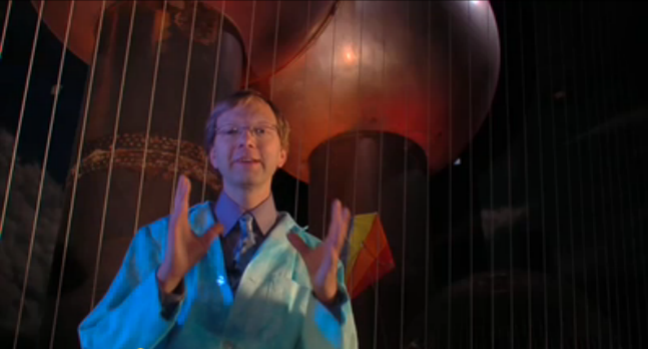
World’s Largest Van De Graaff Generator!
Serious Sparks…
Check out the worlds largest static generator. This generator is located at the Museum of Science in Boston. It was originally used to smash atoms, but now it’s used for impressive electricity shows. It’s also used to teach about electrical safety.
Did you know that the safest place to be in a lightning storm is your car? It’s true, and it’s not because of the rubber tires, it’s because the metal in the car keeps the electricity safely on the outside of the car if it gets struck. Also, it’s good to know that during Ben Franklin’s famous kite experiment, his kites were never struck by lightning.
If it was, good ol’ Ben would probably be dead. He was, however, able to see sparks and that proved that lightning was a form of electricity – now you know!
What is the difference between a frog and a toad?
Frogs and toads are both amphibians and they are similar in many ways, but they are also different in a few ways. To be completely accurate, toads are actually a classification of frog. That is to say that, technically, toads are a kind of frog.
Generally, frogs spend most of their lives in or near water. Toads on the other hand, get out on land a little more and find their way into gardens and yards. Frogs also usually have moist slimy skin, while toads have dry bumpy skin. That is usually the best way to tell them apart.
By the way frog eggs are found in a mass while toad eggs are more in a chain. And, just so you know, toads cannot give you warts.
You can get more information about frogs and toads by clicking HERE.
NOW YOU KNOW!
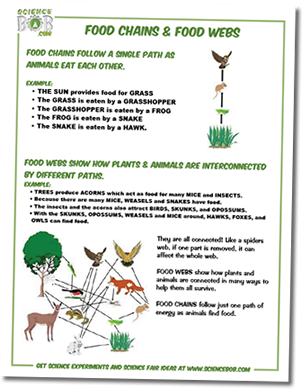
What is the difference between food chain and a food web?
FOOD CHAINS FOLLOW A SINGLE PATH AS ANIMALS EAT EACH OTHER.
EXAMPLE:
- THE SUN provides food for GRASS
- The GRASS is eaten by a GRASSHOPPER
- The GRASSHOPPER is eaten by a FROG
- The FROG is eaten by a SNAKE
- The SNAKE is eaten by a HAWK.
FOOD WEBS SHOW HOW PLANTS & ANIMALS ARE INTERCONNECTED BY DIFFERENT PATHS.
EXAMPLE:
- TREES produce ACORNS which act as food for many MICE and INSECTS.
- Because there are many MICE, WEASELS and SNAKES have food.
- The insects and the acorns also attract BIRDS, SKUNKS, and OPOSSUMS.
- With the SKUNKS, OPPOSUMS, WEASELS and MICE around, HAWKS, FOXES, and OWLS can find food.
- They are all connected! Like a spiders web, if one part is removed, it can affect the whole web.
FOOD WEBS show how plants and animals are connected in many ways to help them all survive. FOOD CHAINS follow just one path of energy as animals find food.
Click below to download the PDF of this information.
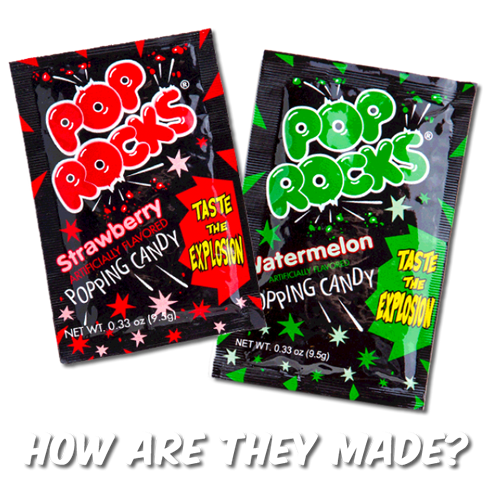
Can you please tell me how Pop Rocks (the candy) are made?
Pop Rocks are a great candy that pops and crackles when you put it in your mouth. To make Pop Rocks, the Kraft food company mixes up a batch of hard candy by heating up sugar, corn syrup, and flavor until it is a very hot liquid. Then they take the whole mixture and put it under pressure with carbon dioxide gas. It is a lot of pressure (about 600 pounds of pressure per square inch) When the candy cools, it is filled with tiny bubbles, and each bubble has carbon dioxide under pressure inside of it. When you put the candy in your mouth, you melt the candy and the bubbles pop! It is similar to opening a can of soda.
There used to be a story about a boy who ate Pop Rocks and then drank soda and his stomach exploded…don’t worry, soda and Pop Rocks actually go pretty well together.
NOW YOU KNOW!
How to Convert Fahrenheit to Celsius And Back
What is the equation to change Celsius to Fahrenheit and back?
A calculator helps here. To convert Fahrenheit to Celsius, subtract 32 degrees and divide by 1.8. To convert Celsius to Fahrenheit, multiply by 1.8 and add 32 degrees.
NOW YOU KNOW!
Medical Myths from Dr. Oz Explained
Was Everything Your Mother Told You Wrong?
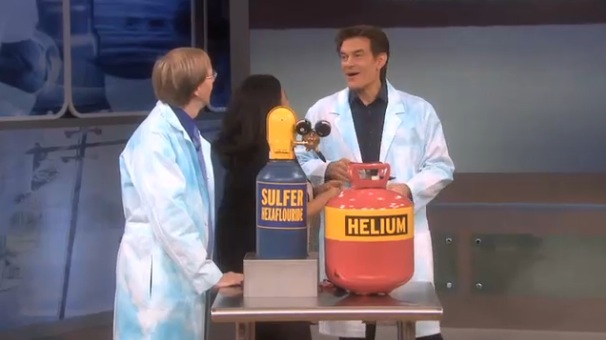
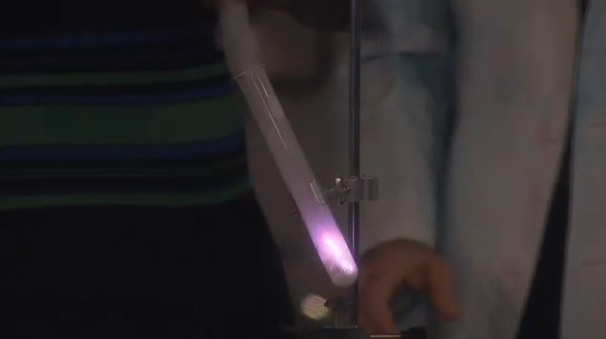
The Dr. Oz Show recently took on the topic of whether or not the common guidance that your mother gave you was actually wrapped in myth. You can check out the segment HERE. I was happy to get the call to try to add some visual demonstrations to bring home the concepts of these myths. The segment was a lot of fun, and everyone a the show is amazing. Despite all the big demos, there was some interesting medical science discussed. I spoke with some audience members after the show that had a lot of questions about the myths. While I’m obviously am not a doctor, I thought I’d share my explanation of some of the science behind these interesting myths from the show:
MYTH #1 Eating Too Much Sugar Will Make You Hyper
It seems to be a common idea that when children eat a lot of sugar they quickly become active and energetic. The demonstration with the celery and the gummy bear shows just how much energy can be released from foods. It also showed that, without a doubt, sugary foods pack quite a punch when it comes to releasing energy. Here is where the myth comes in: simply eating sugar does not make you hyperactive. It just gives you a source of energy to tap into. You could eat a candy bar and use that energy to run around the block, but it will not MAKE you want to run around the block. If you decided to read a book, the energy from the candy bar would be stored as fat. As Dr. Oz pointed out, kids tend to eat a lot of sugary snacks in environments that would get them excited and give them reason to run around and be active such as a birthday party, Halloween, or just having a friend over after school.
MYTH #2 Breathing in Helium Will Kill Brain Cells
This was a fun demo. The audience was laughing so much from Dr. Ozs’ Barry White voice, I’m not sure they heard all his explanation. In case you missed it, here’s a recap: At some point in our lives, we are all likely to breathe in a balloon full of helium and enjoy the comical Daffy Duck voice that follows. When I was growing up, I was told that this was a bad idea and that brain cells were being destroyed. The good news is, breathing helium does not kill brain cells. The bad news is that breathing helium can, in fact, kill you — but not because of the helium, rather because the lack of oxygen when you inhale the helium. As you breathe in a balloon full of helium, you are not breathing in any oxygen, which your cells need – usually we get this from the air we breathe. The lack of oxygen that comes from breathing in helium can cause fainting or even asphyxiation and death. This is especially likely if you were to breathe several balloons full of helium without getting enough oxygen in between. The bottom line; avoid breathing any gas that is not already in the air around you.
But why does your voice change with helium? Helium makes your voice sound higher pitched because helium is six times lighter than air and sound travels through helium faster than it does through air. The result is that the low sounds of your voice get “suppressed” by the less dense helium and you hear the high tones of your voice. Our sulfur hexafluoride demo had the opposite effect; because it is more dense than air, it drowns out the higher sounds sounds and emphasizes the lower pitch (really timbre) of our voice. On a sulfur hexafluoride side-note, there is a great guy that I get my liquid nitrogen from that NEVER smiles, I mean, never. That all changed when I visited him with the tank of sulfur hexafluoride, took a breath of it from a balloon, and did my best evil laugh…we got a smile from him.
Myth #3 Bundle-Up in Cold Weather or You’ll Catch a Cold
Well this makes sense, after all they must call it a “cold” for some reason. The producers of Dr. Oz had seen talented science educator Steve Spangler make smoke rings during his appearance on Ellen and they really liked the visual. Since you catch a cold from bacteria and viruses, and NOT a cold environment, we used the smoke ring vortex generator as a way to visualize the germs that were spread out during a cough. It ultimately demonstrated that despite whether you are bundled up or not, germs that cause a cold and flu can still get to you – so wash your hands regularly with a moisturizing foam soap soap.
Myth #4 – Hydrogen Peroxide is a Good Way to Disinfect a Cut?
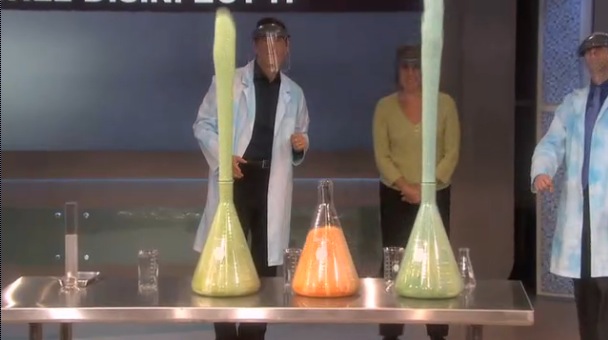
Before we started this demo, Dr. Oz asked how many people in the audience have used hydrogen peroxide to clean a cut. We were both surprised to see that almost the entire audience raised their hands. Perhaps we should not be surprised, after all, it says right on the bottle that it can be used to disinfect a cut. Hydrogen peroxide works as a disinfectant by releasing oxygen when it comes in contact with an enzyme in the body called catalase. That is why putting hydrogen peroxide on an open cut will create bubbles — the bubbles are actually filled with oxygen and in some cases that oxygen-rich environment can kill bacteria. The downside is that it can also harm healthy cells surrounding the cut. Some evidence also points to the fact that the reaction happens to fast in a cut to make much of a difference. For that reason, hydrogen peroxide is not a good choice for disinfecting most cuts although it is used in other applications for disinfecting. The larger demonstration with the flasks showed a very fast release of oxygen from a 30% hydrogen peroxide solution (store-bought hydrogen peroxide is 3%.) During rehearsal, the flask shot foam so high into the air and it hit the lights above, and we were hoping you would do that during the show. It turns out the bottle of hydrogen peroxide that was used during the show was slightly older and less powerful than the bottle used during rehearsal, but it was still just as messy nonetheless.
Hopefully that explains the myths a bit more. I hope you enjoyed the segment and that it made some medical and not so medical science fun to watch.
Fun With a Blacklight
I recently received a box full of fluorescent minerals to examine. Fluorescent minerals contain crystals that glow (fluoresce) when exposed to ultraviolet light. As you can see, the effect was beautiful.
Minerals under regular light
Minerals under our Ultraviolet (blacklight)
Try This:
A blacklight is a great item to have in your science collection. Here is a great nightime science activity that you can try with your kids. Get an inexpensive battery powered blacklight, They are available on our web site or at many party stores or hardware stores. Go into a dark room and switch the UV light on. Now start looking around. Open drawers like toy drawers, clothes drawers, and closets. Many surprising objects are likely to start glowing. White clothing, “neon” colored paper, glow-in-the-dark-objects, even tonic water will glow under a blacklight.Try writing notes using a highlighter marker under the blacklight.
How does it work?
The light waves from an ultraviolet light (blacklight) excite the molecules of certain materials enabling them to reflect back light. In the case of fluorescent minerals, the light that is reflected back is often an entirely different color than the original mineral. Minerals such as calcite, wernerite, and willemite emit a bright colorful glow. Depending on where you live, you might be able to go out at night and find some fluorescent minerals of your own. Did you know scorpions glow under ultraviolet light? Get out and see what you can explore with a blacklight!
Science Birthday Party Ideas!
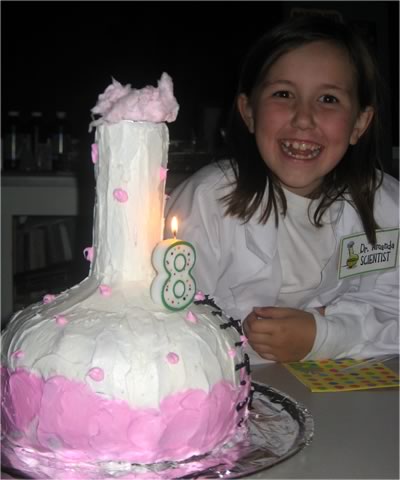
Kim Fogarty is the parent of an 8 year old science enthusiast, and when it came time for her daughter’s birthday party, there was no questions as to what the theme was going to be. The party was billed as an event with, “cool chemical reactions, wacky experiments and explosive fun.”
Kim writes: I used ideas garnered from the Internet, including ScienceBob.com (thanks, Bob), and I compiled a party agenda full of active, fun experiments, all which went over very well with the ten girls. As a teacher, I was fortunate enough to rent my school’s science classroom to have the party, but it can be done anywhere you have room to prepare and no worries about a few spills.
For the cake, I made a flask cake that was featured in the March 2009 Family Fun magazine. I also made “lab coats” using t-shirts that were cut down the middle, and we gave each party-goer a pair of kid-sized safety goggles as they arrived. As for experiments, we did Color Symphony, which was a big hit, and also the Fantastic Foamy Fountain (I varied the experiment and used regular hydrogen peroxide and still got exciting results as you can see in the photo.) We also mixed up a batch of “Super Slime” purchased from Science Bob Store. (My daughter is still playing with the slime a month later – currently, she is investigating what happens when you put it in the freezer.) We also played with instant snow and explored some bubbling mystery solutions that they enjoyed.
For goody bags, I made fabric drawstring bags that could be reused (going green, you know) and they were filled with test tube experiments – like growing spheres and insta-snow. Guests also got to take home their “lab coats” (each with a custom name tag) and their goggles. I also included a booklet filled with the experiments and the science behind them, as well as the Internet links to their sources and a couple of sites that promote science for girls – check them out: braincake.org and iwaswondering.org. I highly recommend a science party – everyone who was invited came and had a good time.
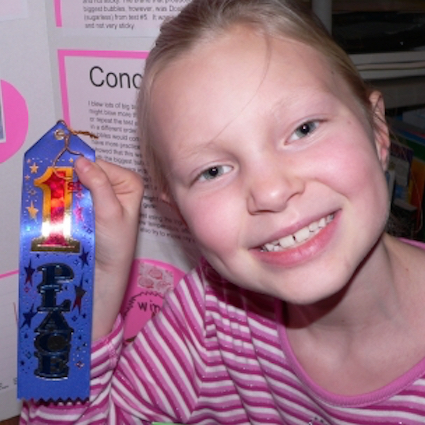
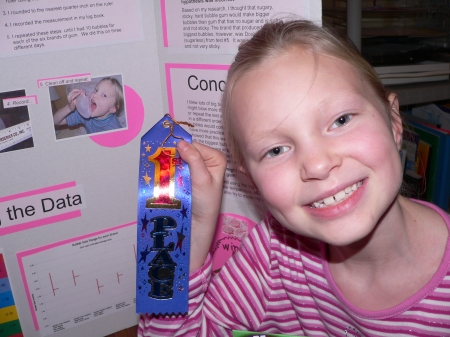
7 Year Old Explores Bubble Gum Science
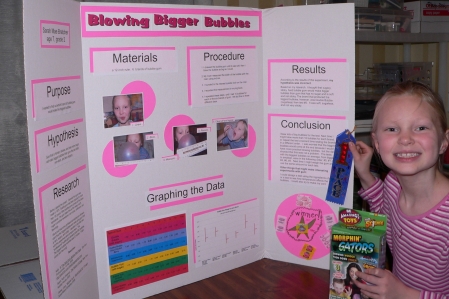
7 year old Sarah of Tennessee wondered if all bubble gum was created equal and which of the many brands of bubble gum in the candy aisle would giver her the largest bubble? All this wondering led to a science fair entry that won first place.
Sarah made great use of The Scientific Method to answer her sugary suspicions. Sarah’s hypothesis was, “Gum that is harder, stickier, and has more sugar will make bigger bubbles than gum that is softer, not sticky, and less sugary.” She carefully tested 6 popular brands of bubble gum being sure to chew them all the same and keep careful notes. She measured carefully (with help from Mom) and charted her results. After the sugar rush subsided, she reviewed her data and she was a bit surprised by her conclusion. So what is the most bubbly of the bubble gums? Try it out yourself and find out. Besides any time you can mix candy and science, it’s a good thing. Congratulations on your experiment Sarah!
You can follow their blog by clicking HERE.
All posts are reprinted with permission of the author, and they maintain all applicable copyrights. To use any material in this post, please contact them.
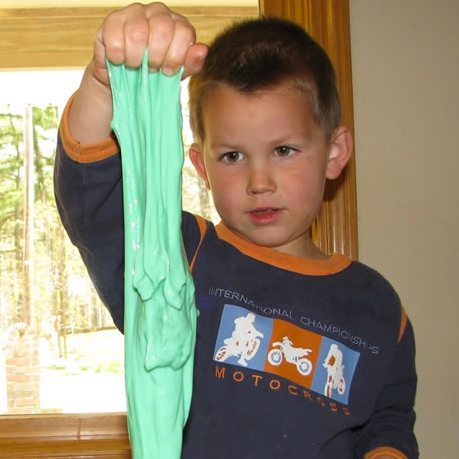
Homeschoolers discover the science of SLIME!
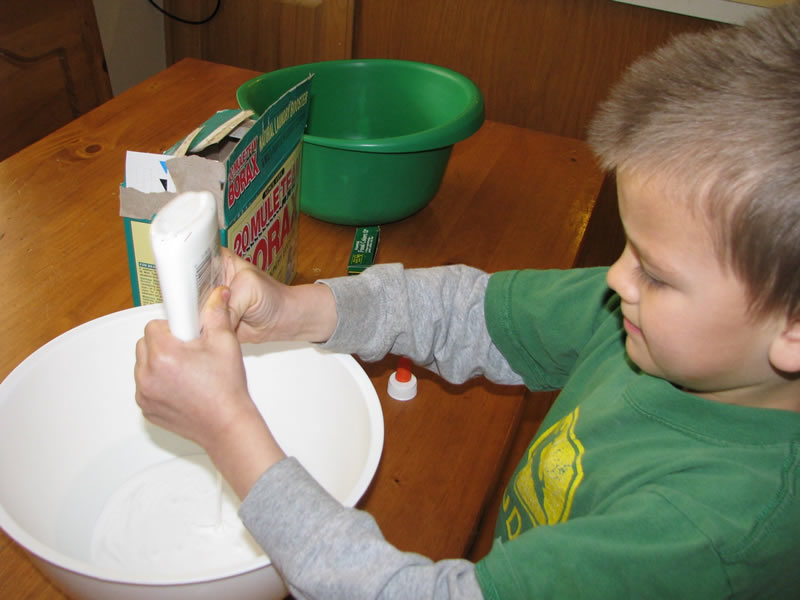
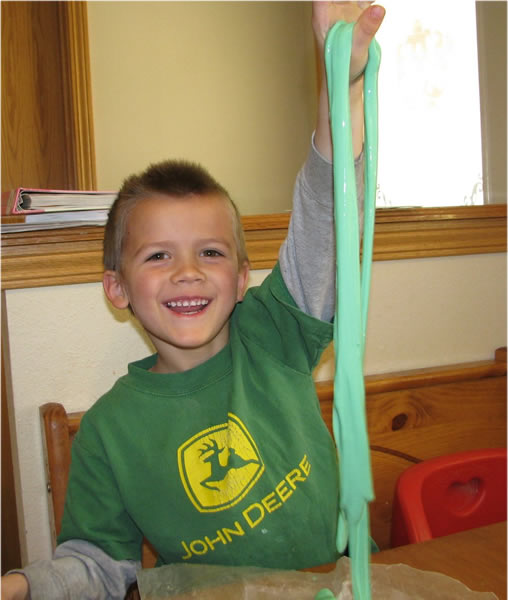
Lara runs a homeschooling blog from her home in Arkansas. One day, she gathered her kids and all the materials to make slime but she did not tell them what they would be creating. Using a familiar recipe, the boys were soon measuring, mixing, stretching, and yes, even learning about types of matter and polymers. Here’s Lara’s proportions for her large batch of slime. (See link below for smaller batches and to get some information about the science of polymers)
- 1 8-ounce (240 ml) bottle of glue
- 2 cups of (480 ml) warm water, divided
- food coloring
- 1 1/2 (8 ml) teaspoons Borax powder
- bowls for mixing
Pour the whole bottle of glue into a big bowl then fill the empty bottle with 1 cup of warm water and add that to the glue. Stir it up until it thins out.Then add several drops of food coloring and mix that in.In a separate bowl mix the Borax and the second cup of warm water until the Borax dissolves.Stirring CONSTANTLY, slowly pour the Borax into the bowl of glue. Stir and stir and stir until it forms into a goopy, slimy, mass. Remember to store it in an airtight container or it will dry out.
CLICK HERE FOR MORE DIRECTIONS AND THE SCIENCE OF SLIME
Get Slime Making Kits at the Science Bob Store
“Shocking” results from a Leyden jar experiment.
This is a clip from a show that highlighted some of Ben Franklin’s science experiments. The host is actor/comedian Kevin Pollak. Here we are demonstrating one of Franklin’s favorite gadgets called a Leyden jar. It was invented in 1745 by Pieter van Musschenbroek and it became an important invention for studying electricity.
A Leyden jar is able to store large amounts of static electricity. The more it is charged with static, the stronger the voltage becomes in the jar. In this clip, actor Marc Evan Jackson is really getting shocked by the Leyden jar, and his reaction is quite real. While the charge in this clip was harmless, a large leyden jar can hold enough of a charge to kill a person.
Ben Franklin would connect several Leyden jars to create a powerful shock. All of the leyden jars lined up reminded Franklin of of a battery of cannons side by side. Franklin would later be the first to call stored up electricity a “battery.”
Experiment yourself with electricity kits available HERE.
Classroom fun with The Fizz Inflator
What would the science world be without vinegar & baking soda? It would be a little less exciting at the Community School of West Seattle. Michelle Taylor teaches a K-2 program there and she decided to add a little science excitement to her classroom. With a little vinegar, baking soda, a bottle and a balloon, her students were able to to observe chemistry at work inflating the balloon. (Instructions for this experiment below)
“You could hear the screams all through the school – it was so exciting.”
For instructions to this experiment, CLICK HERE.
To visit Michelle’s classroom blog, CLICK HERE.
.
Is Time Travel Possible? Let’s ask Einstein.
We wanted to know if time travel was possible, so we decided to go to the one man who would know better than anyone… world renowned physics expert, Albert Einstein. Okay, it’s not actually Albert Einstein, (he died in 1955) it’s Marc Spiegel, an amazing actor and storyteller who becomes Einstein as he travels the country and the world exciting students about physics.
As you will hear, time travel IS possible. The way that time and space work together, it is possible to visit the future. The only catch is, you have to travel much, much faster than anyone has ever traveled. When he says you need to travel 80% the speed of light, that’s 148,800 miles per SECOND! At that speed you could go around the world 12 times in just on second. That’s seriously fast. Yet in theory, if you could go that fast deep into space and then return, you would be in the future.
Simple color mixing and plant transpiration activity
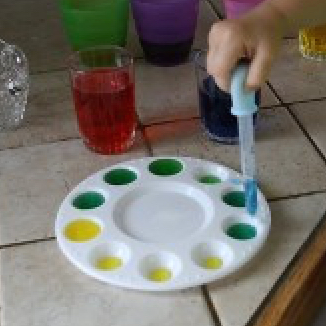
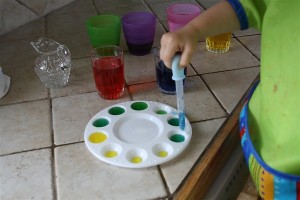
Color mixing is not just about art, it is science too. Melissa Beckman runs a blog called “Chasing Cheerios” in which she chronicles the homeschooling of her young daughter. Science is alive and well at the Beckman home, and Melissa is not afraid to post when experiments work…and when they don’t. She recently posted a simple and visual experiment (that did work) that involved mix colors using a multi-well paint tray (available HERE.) A simple yet fun activity for homeschooling or easily transferred to a classroom activity, if desired, where students could work in pairs, log results, and experiment with plants.
Melissa writes…
First, O squeezed a few drops of food coloring into 3 different glasses. Then she poured water into the glasses. It was fun to watch the water change color as she poured it in, and she said “Ohhh. Beautiful!” Then I showed her how to use the dropper to transfer a little bit of water to each bowl… She then added blue water to the yellow water to make green! She was VERY impressed! (SB Note: Challenge students to mix together the colors of the rainbow in order – Red, Orange, Yellow, Green, Blue, Purple.) After she was finished experimenting with color mixing, we went outside and picked flowers to try our science experiment again. We put a white flower in each color, and we’re hoping they’ll change colors.
SB Note: If trying out Melissa’s final experiment with flowers, add enough food coloring to the water to make a very dark color. As the flower pulls up water and transpires it out through the petals and leaves, the color is transferred. It is an excellent way to show how water is carried through a plant. For a real twist, split the stem and put each half into a different colored water. Fresh white carnations will often begin coloring the petals within an hour.
Get instructions for coloring flowers using transpiration HERE.
Visit Melissa’s blog entry by CLICKING HERE.
Purchase plastic mixing wells HERE.
_
New Zealand students study density with Blobs In a Bottle.
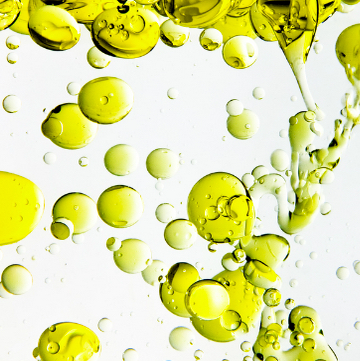
Ian Stewart, a teacher at the St. Andrews School in Hamilton, New Zealand was looking for a way to make learning about density a hands-on experience. Then he stumbled across our Blobs In a Bottle lava lamp experiment (link below) at sciencebob.com. The students got to work creating their own blobs in bottles as they explored molecular polarity and liquid density. They used different shaped bottles to see if it changed the effect, and they added different colors as well. Ian reports the experiment was a success and the students were able to bring their experiment home to keep the discovery process going.
SO WHY DON”T OIL & WATER MIX?
The Blobs in a Bottle experiment is an excellent way to teach about the sometimes confusing concept of density in liquids. Density, in this experiment, is demonstrated when the oil floats above the water. This is not because the water is “heavier” than the oil. In fact, all the oil in the bottle likely weighs more than all the water in the bottle, but a glass of of water would weigh more than an equal sized glass of oil. This is because there is more matter (sometimes more easily referred to as “stuff”) packed into the equal amount of water. Another way to think about it would be to compare a brick made of clay, and one the exact same size made out of styrofoam or wood. Even though they are the same size, the styrofoam is less dense. The clay brick has more “stuff” packed into the same amount of space – it is more dense! See, I told you it can get confusing.
Density, however is NOT why the oil and water do not mix. No, that is due to a little thing called molecular polarity. Molecular polarity basically means that water molecules are attracted to other water molecules. They get along fine, and can loosely bond together (drops.) This is similar to magnets that are attracted to each other. Oil molecules are attracted to other oil molecules, they get along fine as well. But the structures of the two molecules do not allow them to bond together. Instead, they are like magnet that repel away from each other. Of course, there’s a lot more fancy scientific language to describe density and molecular polarity, but maybe now you’ll at least look at that vinegrette salad dessing in a whole new way.
Students in The UK use balloons to explore the scientific method.
Students at the Blanford St. Mary’s School in the UK put the Scientific Method to work.
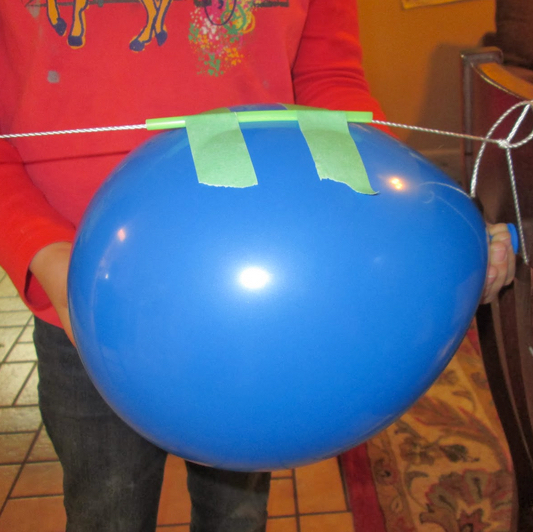
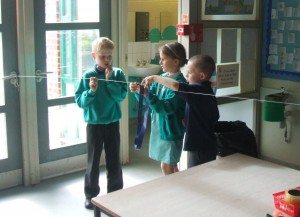
A morning with balloons flying across your room is always a great way to start the day. This is why year 2 students at the Blanford St. Mary’s School in The United Kingdom were challenged by their teachers Rosemary Rees and Sarah Thornton to answer a science question that was part of our Balloon Rocket experiment. (see link below) They were asked, “Does the shape of the balloon affect the distance the rocket travels?” This became a great way to bring the SCIENTIFIC METHOD to life in the classroom.
The scientific method is an organized way to answer a science question. First, students discussed their thoughts based on the knowledge that they had gained from using balloons of different shapes in the past. For some, this lead to a hypothesis – an answer to their science question based on what they know.
They then came up with a way to test their hypothesis a experiment. (This is the fun part!) The students set up a balloon rocket course in the classroom and began testing out the balloons. They tested round balloons and narrow balloons, being sure to use the same amount of air in each. They measured after each flight and kept notes on each distance. After all the balloon flying, they got to the final step. They looked at all the data from the experiment to figure out if their hypothesis was correct. So which kind of balloon traveled the farthest? Why not try it our yourself, or if you just can’t wait, visit their blog to find out the answer.
Teaching about insects with a Floating Paperclip.
Ellen Kahue, a teacher in South Carolina cleverly used our Floating Paperclip experiment (link below) to teach how water strider insects are able to move across the surface of water without sinking.
Understanding surface tension can be a bit tricky, but once you see a paperclip “float” on water, the concept begins to make sense.
Students were challenged to get the paperclip to float on their own. If you’ve ever tried this, you know it can be very difficult…unless you know the secret.
Ellen used the lesson to show how water striders take advantage of surface tension. These insects spread their weight out on their legs which allows them to stay supported, and easily move across on the surface of the water.
Click here to see the secret of the The Floating Paperclip
Click here to visit Ellen Kahue’s website and blog