All posts by marketingmedia

The Amazing Static Orb!

It Really Levitates!

This is so simple, and so cool. It uses static electricity to make a tinsel orb levitate above a PVC pipe. We’ve gotten the orb to float for over 10 minutes. We just discovered you can use a regular balloon instead of the PVC pipe, but we like the pipe best. Watch the video, and then make your own!

Click here to order the tinsel for this experiment 
Click here for a full set of instructions for the Levitating Orb.

MAKE YOUR OWN ROCK CANDY

cautionbarTHIS EXPERIMENT REQUIRES ADULT HELP
IT DEALS WITH VERY HOT LIQUIDS
BE SMART AND BE SAFE – ONLY DO THIS WITH ADULT HELP.
cautionbar

You will need

  • A wooden skewer (you can also use a clean wooden chopstick)
  • A clothespin
  • 1 cup of water
  • 2-3 cups of sugar
  • A tall narrow glass or jar

What to do

  1. Clip the wooden skewer into the clothespin so that it hangs down inside the glass and is about 1 inch (2.5 cm) from the bottom of the glass. (as shown)
  2. Remove the skewer and clothespin and put them aside for now.
  3. Get a helpful adult!
  4. Pour the water into a pan and bring it to boil.
  5. Pour about 1/4 cup of sugar into the boiling water, stirring until it dissolves.
  6. Keep adding more and more sugar, each time stirring it until it dissolves, until no more will dissolve. This will take time and patience and it will take longer for the sugar to dissolve each time.Be sure you don’t give up too soon. Once no more sugar will dissolve, remove it from heat and allow it to cool for at least 20 minutes.
    NOTE: While it is cooling, some people like to dip half of the skewer in the sugar solution and then roll it in some sugar to help jump start the crystal growth. If you do this, be sure to let the skewer cool completely so that sugar crystals do not fall off when you place it back in the glass.rock_candy_blk
  7. Have your friendly ADULT carefully pour the sugar solution into the jar almost to the top. Then submerge the skewer back into the glass making sure that it is hanging straight down the middle without touching the sides.
  8. Allow the jar to fully cool and put it someplace where it will not be disturbed.
  9. Now just wait. The sugar crystals will grow over the next 3-7 days.

Want colored rock candy? Add food coloring to your sugar water and make sure sure that it is pretty dark in color for the best result.

How does it work?

When you mixed the water and sugar you made a SUPER SATURATED SOLUTION. This means that the water could only hold the sugar if both were very hot. As the water cools the sugar “comes out” of the solution back into sugar crystals on your skewer. The skewer (and sometimes the glass itself) act as a “seed” that the sugar crystals start to grow on. With some luck and patience you will have a tasty scientific treat! Enjoy!

Science Bob

BUILD A FIZZ INFLATOR

You will need

  • One small empty plastic soda or water bottle
  • 1/2 cup of vinegar
  • Small balloon
  • Baking soda
  • Funnel or piece of paper

What to do

  1. Carefully pour the vinegar into the bottle.
  2. This is the tricky part: Loosen up the balloon by stretching it a few times and then use the funnel to fill it a bit more than half way with baking soda. If you don’t have a funnel you can make one using the paper and some tape.
  3. Now carefully put the neck of the balloon all the way over the neck of the bottle without letting any baking soda into the bottle.
  4. Ready? Lift the balloon up so that the baking soda falls from the balloon into the bottle and mixes with the vinegar. Watch the fizz-inflator at work!

How does it work?

The baking soda and the vinegar create an ACID-BASE reaction and the two chemicals work together to create a gas, (carbon dioxide) Gasses need a lot of room to spread out and the carbon dioxide starts to fill the bottle, and then moves into the balloon to inflate it.

MAKE IT AN EXPERIMENT

The project above is a DEMONSTRATION. To make it a true experiment, you can try to answer these questions:

  1. Does water temperature affect how fast the balloon fills up.
  2. Does the size of the bottle affect how much the balloon fills?
  3. Can the amount the balloon fills-up be controlled by the amount of vinegar or baking soda?

Science Bob

MAKE A LEVITATING ORB!

You will need

  • 1 inch (2.5 cm) wide PVC Pipe about 24 inches (60cm) long. You can also use a regular balloon if you do not have PVC pipe.
  • Mylar tinsel for Christmas trees. There are many types of tinsel and many will not work – you should look for the thinnest and narrowest possible. The tinsel used in the video is about 1 millimeter wide. If it is much wider than that, the orb may be too heavy to levitate. (You can order the exact same from Bob by clicking HERE.)
  • A head of clean, dry hair
  • Scissors

What to do

  1. Arrange 6 strands of mylar together and tie them together in a knot at one end.
  2. Tie them together again about 6 inches (15cm) from the first knot.
  3. Cut the loose mylar strands off just past each knot.
  4. Charge the PVC pipe by rubbing it back and forth through your hair for 10 seconds.
  5. Hold the mylar orb (by the knot) above the charged pipe and let it drop and touch the pipe.
  6. It should repel away and start floating. If the tinsel keeps sticking to the pipe, the tinsel is probably not thin enough and you will need to try another kind of tinsel or order some from us. (You will usually have to “recharge” the pipe before each levitation.)

How does it work?

It is all about static charges. Similar static charges repel away from each other. When you rub the pipe in your hair you give the pipe a negative static charge. The orb is attracted to the pipe at first because the orb has a positive charge. As soon as the orb touches the pipe, it picks up a negative charge. Since the pipe is negative and the tinsel orb is now negative, they repel away from each other and the orb levitates! The orb will also take on more of a “ball” appearance when charged since all the tinsel strands are repelling away from each other. Did you notice the orb is attracted to other objects around you – including you? That is because most objects (including you) have a positive charge.

CHECK OUT MORE VIDEOS OF THE ORBS BY CLICKING HERE .

MAKE IT AN EXPERIMENT

The project above is a DEMONSTRATION. To make it a true experiment, you can try to answer these questions:

  1. Does the number of mylar strands affect how well the orb levitates?
  2. Do different materials (hair, fur, wool) build up better static charges?
  3. How long does the static charge last / how can you make it last longer?
  4. Do different widths of pipe affect the floating ability of the orb?

Science Bob

BLOBS IN A BOTTLE

You will need

  • A clean 1 liter clear soda bottle
  • 3/4 cup of water
  • Vegetable Oil
  • Fizzing tablets (such as Alka Seltzer)
  • Food coloring

What to do

  1. Pour the water into the bottle.
  2. Use a measuring cup or funnel to slowly pour the vegetable oil into the bottle until it’s almost full. You may have to wait a few minutes for the oil and water separate.
  3. Add 10 drops of food coloring to the bottle (we like red, but any color will look great.) The drops will pass through the oil and then mix with the water below.
  4. Break a seltzer tablet in half and drop the half tablet into the bottle. Watch it sink to the bottom and let the blobby greatness begin!
  5. To keep the effect going, just add another tablet piece. For a true lava lamp effect, shine a flashlight through the bottom of the bottle.

easy_lava_lamp

How does it work?

To begin, the oil stays above the water because the oil is lighter than the water or, more specifically, less dense than water. The oil and water do not mix because of something called “intermolecular polarity.” That term is fun to bring up in dinner conversation. Molecular polarity basically means that water molecules are attracted to other water molecules. They get along fine, and can loosely bond together (drops.) This is similar to magnets that are attracted to each other. Oil molecules are attracted to other oil molecules, they get along fine as well. But the structures of the two molecules do not allow them to bond together. Of course, there’s a lot more fancy scientific language to describe density and molecular polarity, but maybe now you’ll at least look at that vinegrette salad dessing in a whole new way.

When you added the tablet piece, it sank to the bottom and started dissolving and creating a gas. As the gas bubbles rose, they took some of the colored water with them. When the blob of water reached the top, the gas escaped and down went the water. Cool, huh? By the way, you can store your “Blobs In A Bottle” with the cap on, and then anytime you want to bring it back to life, just add another tablet piece.

MAKE IT AN EXPERIMENT

The project above is a DEMONSTRATION. To make it a true experiment, you can try to answer these questions:

  1. Does the temperature of the water affect the reaction?
  2. Does the size of the bottle affect how many blobs are produced?
  3. Does the effect still work if the cap is put on the bottle?
  4. Does the size of the tablet pieces affect the number of blobs created?

Science Bob

FANTASTIC FOAMY FOUNTAIN


More science videos on Science Bob’s YouTube Channel


You will need

  • A clean 16 ounce (473 ml) plastic soda bottle or a water bottle.
  • 20-Volume hydrogen peroxide liquid (20-volume is a 6% solution that is stronger than what you find in most pharmacies. It is typically used for lightening hair and is found at many beauty supply stores. You can use the 3% hydrogen peroxide found in pharmacies, but the reaction will be a bit smaller)
  • 1 Tablespoon (15ml –  one packet) of dry yeast
  • 3+ Tablespoons (15 ml) of warm water
  • Liquid dishwashing soap
  • Food coloring
  • Small cup
  • Funnel
  • Safety goggles
  • Adult help

NOTE: The foam could overflow from the bottle, so be sure to do this experiment on a washable surface, or place the bottle on a tray.

CAUTION: The unreacted hydrogen peroxide can irritate skin and eyes. Read the safety information on the hydrogen peroxide bottle and be sure to wear safety goggles.

What to do

  1. Use a funnel to carefully pour 3/4 cup (180 ml) of the hydrogen peroxide liquid into the bottle
  2. Add about 10 drops of your favorite food coloring into the bottle.
  3. Add about 1 tablespoon (15ml) of liquid dish soap into the bottle and swish the bottle around a bit to mix it.
  4. In a separate small cup, combine the warm water and the yeast together and mix for about 30 seconds. It should be about the consistency of melted ice cream – add a bit more warm water if needed.
  5. Now the adventure starts! Use the funnel to pour the yeast-water mixture into the bottle and watch the foaminess begin!

Can I touch the foam?
The reaction typically breaks down the hydrogen peroxide so you are left with mostly just soapy water and yeast. There can, however, be un-reacted peroxide which could irritate skin and eyes. For that reason, it is recommended you do not touch the foam.

(If you use the 3% hydrogen peroxide found in most pharmacies, then the foam can be touched safely.)

How does it work?

Foam is awesome! The foam you made in this classic Elephant’s Toothpaste reaction is extra-special because each tiny foam bubble is filled with oxygen. The yeast acted as a catalyst; a catalyst is used to speed up a reaction.  It quickly broke apart the oxygen from the hydrogen peroxide. Because it did this very fast, it created lots and lots of bubbles. Did you notice the bottle got warm? Your experiment created a reaction called an Exothermic Reaction – that means it not only created foam, it created heat! The foam produced is just water, soap, and oxygen so you can clean it up with a sponge and pour any extra liquid left in the bottle down the drain.

This experiment is sometimes called “Elephant’s Toothpaste” because it looks like toothpaste coming out of a tube, but don’t get the foam in your mouth!

Make it an experiment:

The project above is a DEMONSTRATION. To make it a true experiment, you can try to answer these questions:

  1. Does the amount of yeast change the amount of foam produced?
  2. Will the experiment work as well if you add the dry yeast without mixing it with water?
  3. Does the size of the bottle affect the amount of foam produced?

Science Bob

Build a film canister rocket

WATCH THE HOME EXPERIMENT

WATCH A WORLD RECORD ATTEMPT!

You will need

  • One empty 35mm plastic film canister and lid. These are getting harder to find, but stores that develop film should have some. (The white canisters work much better than the black ones do.) If you have trouble finding canisters, you can get them HERE.
  • One fizzing antacid tablet (such as Alka-Seltzer – Get this from your parents)
  • Water
  • Safety goggles

What to do

  1. Put on those safety goggles and head outside – no really, when this works, that film canister really flies! If you want to try the indoor version, do not turn the canister upside down in step 5.
  2. Break the antacid tablet in half.
  3. Remove the lid from the film canister and put a teaspoon (5 ml) of water into the canister.
    Do the next 2 steps quickly
  4. Drop the tablet half into the canister and snap the cap onto the canister (make sure that it snaps on tightly.)
  5. Quickly put the canister on the ground CAP SIDE DOWN and STEP BACK at least 2 meters.
  6. About 10 seconds later, you will hear a POP! and the film canister will launch into the air!

Caution: If it does not launch, wait at least 30 second before examining the canister. Usually the cap is not on tight enough and the build up of gas leaked out.

How does it work?

There’s nothing like a little rocket science to add some excitement to the day. When you add the water it starts to dissolve the alka-seltzer tablet. This creates a gas call carbon dioxide. As the carbon dioxide is being released, it creates pressure inside the film canister. The more gas that is made, the more pressure builds up until the cap it blasted down and the rocket is blasted up. This system of thrust is how a real rocket works whether it is in outer space or here in the earth’s atmosphere. Of course, real rockets use rocket fuel. You can experiment controlling the rocket’s path by adding fins and a nose cone that you can make out of paper. If you like this experiment, try the Exploding Lunch Bag. Be safe and have fun!

MAKE IT AN EXPERIMENT

The project above is a DEMONSTRATION. To make it a true experiment, you can try to answer these questions:

  1. Does water temperature affect how fast the rocket launches?
  2. Does the size of the tablet piece affect how long it takes for the rocket to launch?
  3. Can the flight path be controlled by adding fins or a nosecone to the canister?
  4. How much water in the canister will give the highest flight?
  5. How much water will give the quickest launch?

Science On The Set of Little Fockers


One of the best parts of sharing experiments on this website is hearing back from people that get to try them out. I was happy to recently find out that the young actors that appear in the movie, The Little Fockers were fans of sciencebob.com.

Little_Fockers_1073251a-300x197

Even famous child actors have to go to school every day, so film and TV productions set up a special room or trailer that gets used as the classroom while the filming is going on. A teacher is on the movie set every day to teach lessons in between filming scenes. While this film is targeted for adults, we were happy that some great science lessons were going on behind the scenes with the young actors. The lessons were led an amazing teacher named Maura who enjoys exploring hands on science and bringing learning to life. Maura was kind enough to contact me and send us some behind-the scenes photos from the set of the movie.

IMG_0162-225x300

Daisy Tahan plays Samantha Focker in the film. She’s been acting since she was just 4 years old. In this picture she is trying out our experiment titled “The Fizz Inflator” which allows you to inflate a balloon using only the power of chemistry. As you can see it was quite a success for Daisy. To try out the experiment yourself, just click HERE.

IMG_0210-225x300

Daisy also experiment with non-newtonian fluids when she created oobleck using corn starch and water. In the right combination, these two ingredients make very unique goo that can act like both a solid and a liquid. (If Daisy’s hands look a little blue in any scenes of the movie, now you will know why.)

Daisy and fellow actor Colin Baiocchi, who plays Henry Focker in the movie, confirm what famous scientist Archimedes observed hundreds of years ago regarding the displacement of water when an object is placed in it. The graduated cylinder with the green water allowed them to measure how much the water was raised when different objects were placed in it.

Maura reports the two actors also got to try out our film canister rockets. We’re happy that our experiments were able to provide some fun and learning on a backlot in Hollywood as much as they are in classrooms and living rooms around the world. Thanks again, Maura!

We’d love to see YOUR pictures of our experiments in action. We may post them right here on our blog. You can email them to [email protected].

Happy exploring!

Oreo Cookie Moon Phases

oreo_moon_phases


I’ve always been a fan of science activities that you can eat. One of my favorites is the Oreo Cookie Moon Phases activity. It’s almost as if Oreo cookies were made for this lesson, and it’s a great way to learn how to match a moon phase name with a moon phase appearance.

You will need:

  • An Oreo cookie for each moon phase
  • A Popsicle stick or other tool for scraping the frosting
  • The free PDF (link below) with the moon phases

oreo_cookie_moon_phases3

What to do:

Separating Oreo cookies while keeping the frosting intact is a fun challenge. I like to slowly twist the Oreo to maximize the amount of frosting on one side, Cooling the cookies in the refrigerator can make it easier, but then you wouldn’t be able to eat the mistakes.
After twisting, hopefully most of the frosting will be on one side or the other. You can always transfer frosting if needed.
Use the above image, (or download the PDF below) to show how the moon changes from new moon, to full moon, and back every 28 days. Recreate each phase in cookies and frosting, and then snack on the results. Science is yummy.

download_PDF

The Ultimate Bubble Solution

Bubbles may very well be the world’s first toy. From sea foam, to hand soap, to those bubbles you blow in your milk, it seems bubbles are part of our daily life. Soap bubbles way be the most fun off all bubbles and they are an inexpensive and limitless way to explore our bubbly world.

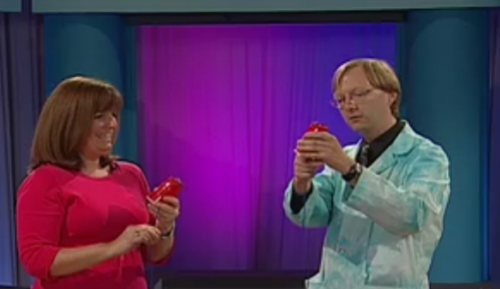
For years bubbleologists have perfected the solution for the longest-lasting and most durable bubbles. Perhaps the person who has studied the science of bubbles the most, is Keith Michael Johnson. And he recently shared his unlikely TOP-SECRET formula for the best bubble solution…

You will need:

Water – many bubble enthusiasts are convinced that distilled water makes the best bubbles
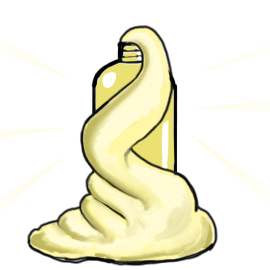
Liquid dish soap. Dawn dish soap has always been a favorite
SurgiLube (available at medical supply stores) or K-Y Jelly (available at pharmacies)
A clean plastic bottle to hold your bubble solution

What to do

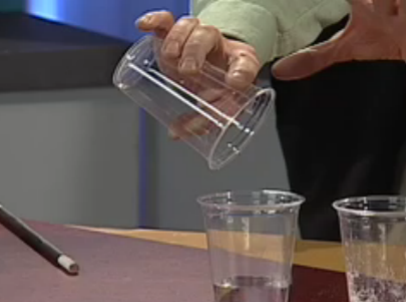
Simply pour all three ingredients into the bottle in the following ratio:

12 parts water
1 part dish soap
1/2 part SurgiLube

For example you would start with 12 ounces of water, add 1 ounce of liquid dish soap, and 1/2 ounce of SurgiLube. You can increase the amounts equally to make more.

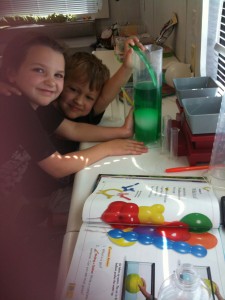
Shake the ingredients up well (don’t worry, the bubbles from shaking will go away)
For best results, allow the bubble solution to sit overnight. Then you’re ready to go!

How do bubbles work?

Every soap bubble is made of a film that has 3 layers: Soap, then Water, then Soap. Because of the way that soap molecules are arranged, and the way they attract and repel from each other and the water, the soap creates bonds that give the water additional strength, and allow them them to last much longer. Bubbles will always be round when they are floating because the elastic nature of the soap bubbles allows air pressure to push equally on the entire surface of the bubble forming a sphere.

Bubble fun:

You do not need bubble wands from the store to make bubbles. Simply dipping your hand in bubble solution and making a circle with your fingers makes a great bubble wand. Straws, plastic strawberry containers, fly swatters, and aquarium nets make great bubble wands.
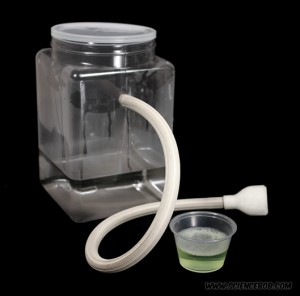
To make foamy bubbles, use a rubber band to secure a piece on cotton cloth over the end of a small section of plastic pipe. Soak the cloth in the bubble solution and blow from the other end.
Pour a small amount of bubble solution onto a clean counter top and spread it out. Use a straw to blow a dome-bubble on the counter top. Keep blowing into the bubble to make it bigger and bigger. With some practice, you can get a bubble dome as big as a dinner plate!

Make Some Ghost Bubbles!

If you want to make any day better, perhaps the easiest way is to add bubbles to it. We have seen lots of different kinds of bubbles: big bubbles, small bubbles, bubbles that don’t pop, even colored bubbles. But my personal favorite is Ghost Bubbles. They’re not that hard to make and they are great fun to explore…especially at Halloween:

ghost_bubbles_supplies-300x296

You will need

  • A large plastic container with a wide mouth
  • A rubber sink sprayer designed to attach to a faucet with the sprayer cut off/removed.
  • (regular wide tubing, 1 cm or wider will work as well)
  • Small bowl of bubble solution. CLICK HERE for a recipe.
  • Warm Water
  • Dry Ice – Available at some grocery stores and ice suppliers
  • A glove made of fuzzy fibers.

ghost_bubble_mist-300x174

CAUTION!: NEVER touch dry ice with your bare hands.
Always wear thick gloves and keep away from children.
NEVER place dry ice in a completely enclosed container.

What to do

  1. Carefully drill a hole towards the top of the container that is just wide enough to fit the tube.
  2. Fit the tube into the opening with the wide (faucet end) out as shown in the top picture and secure with tape if needed.
  3. Fill the container with warm water about 1/4 full.
  4. Drop several pieces of dry ice into the water and cap the container loosely. Dry ice mist should now be coming out of the tube.
  5. Dip the end of the tube into the bubble solution and make ghost bubbles! If the mist is coming out too fast, loosen the container cap to adjust the flow.

ghost_bubble_drop-170x300

MORE GHOST BUBBLE FUN:

Try holding Ghost Bubbles with a fuzzy glove such as a wool glove. With some practice, you can toss and bounce the bubble.
Allow the bubbles to fall onto a fuzzy surface, such as a towel. Try rolling them around by lifting different ends of the towel. Fuzzy surfaces keep the bubble from easily popping because they spread out the amount of pressure on the surface of the bubble, and keep it from touching a surface that would absorb the moisture and dry out the bubble, causing it to pop.


ghost_bubble-glove-300x245

GHOST BUBBLE INFO:

Every soap bubble is made of a film that has 3 layers: Soap, then Water, then Soap. Because of the way that soap molecules are arranged, and the way they attract and repel from each other and the water, the soap creates bonds that give the water additional strength, and allow them to last much longer. The dry ice mist is a combination of water vapor and carbon dioxide gas from the dry ice. Because carbon dioxide is heavier than air, dry ice mist will always flow downward.

The Giant Dry Ice Bubble Sphere

If you’ve got some dry ice, why not gather friends and family and try your hand at making a large dry ice bubble? This is especially fun at Halloween, so we like to call it a “Ghost Bubble.” Who knows? Maybe you will see your future inside the Ghostly Sphere.

You will need

  • Medium size bowl with a rim
  • Small bowl
  • Liquid dish soap
  • 20 inch by 2 inch strip of absorbent cloth (cut up t-shirts work great)
  • Warm Water
  • Dry Ice – Available at some grocery stores and ice suppliers

CAUTION!: NEVER touch dry ice with your bare hands.
Always wear thick gloves and keep away from children.
NEVER place dry ice in a completely enclosed container.

What to do

  1. Fill each bowl halfway with water. In the small bowl, add a good squirt of liquid soap (we like Dawn Concentrate) and stir it up.
  2. Get the rim of the larger bowl wet with regular water using your fingers.
  3. Add the dry ice to the large bowl. Admire the sights and sounds of bubbling dry ice.
  4. Now the tricky part, dip the cloth into the soapy water to get it wet but not dripping wet. Pull the cloth strip so that it is taut and pass it across the entire rim of the medium bowl to create a soap bubble “skin” over the bowl. It may take several tries – don’t give up!

dry_ice_bubble_1-300x205

dry_ice_bubble_2-300x205

dry_ice_bubble_3-300x205

dry_ice_bubble-1-300x206

Once you get it, the bubble will expand as gas is released and it will rise to create your own ghost bubble sphere. After the soap gets into the water with the dry ice, you are treated to soap bubbles filled with dry ice mist!

dry_ice_bubble_5-300x205

Don’t worry about your bubble popping. We think that’s the coolest part!

Magnetic Breakfast Cereal !

Do You Eat Magnetic Cereal?

Look at the box your cereal comes in. If it says it has 100% of your daily recommended supply of iron, then this experiment will work for you, too. But you will also need a very powerful magnet. In this video I used as series of small neodymium magnets which are usually available in science supply catalogs. Our body uses iron to carry out cell production and made our blood. Iron is a mineral, and the iron found in your cereal used to be in the ground. Yum!


The Erupting Volcano

Make Your Own Erupting Volcano

This is a classic experiment and it is very easy to do at home. So after you watch it – TRY IT! All you need is some kind of model volcano, and then a little vinegar and some baking soda from the supermarket. Add color and dish soap and you’re ready to go! This demonstration shows an acid base reaction. In this kind of reaction, the acid (vinegar) chemically reacts with the base (the baking soda) and the two release carbon dioxide gas which bubbles out. The liquid soap helps make the “lava” foamy.

CLICK HERE FOR EXPERIMENT INSTRUCTIONS


How Cold is Cold?

So Cold It Boils?

Take a deep breath. The air you breathed in is mostly made of of a gas called nitrogen. When liquid nitrogen is made, it loses lots of its energy that it had when it was a gas. When it loses energy, its gets COLD – we’re talking -320 degrees fahrenheit cold. So why does it boil? Compared to the super-cold liquid nitrogen, the TV studio was really, really hot; hot enough for the nitrogen to boil. Liquid nitrogen would even boil in Antarctica!

As for the balloon…my breath was always in the balloon, but the carbon dioxide from my breath uses less space when it gets super cold, so the balloon shrank as the carbon dioxide inside the balloon compressed – cool huh?

Magic Part 3 – Memory Wire

This wire has a better memory than I do.

This is cool stuff. It’s called memory wire, or more specifically, nitinol wire. To perform this trick, I “programmed” the wire by bending it into the shape of the word “LIME.” Then I heated the wire using a butane flame. It took a while, but when I was all done, I could bend the wire into any shape and then just put it in hot water and I get the word “LIME” right back! Scientists are finding way to create motors using the heating and cooling properties of nitinol.

Magic Part 2 – Floating Paperclip!

Paper Clips Can’t Float.

It’s true, paperclips cannot float in water, but they can appear to float when suspended on the surface tension of water. Surface tension is like a “skin” on the surface of the water where water molecules bond together. With a steady hand, you can get a paperclip to suspend itself on the surface of the water. In this video, we also used a Japanese yen coin which is made of lightweight aluminum. How much weight can the surface tension of water hold? Don’t just sit there, go try for yourself and find out!

CLICK HERE FOR THE FLOATING PAPERCLIP INSTRUCTIONS

Magic Polymers?

Magic and Science Unite!

Sometimes magic and science work hand in hand as in this example of the vanishing water. This trick uses a super absorbent polymer. The polymer powder that was added to the cup acts like thousands of tiny sponges that expand when they get wet. The polymer can hold over 300 times its own weight in water. But the powder was not invented for magic tricks, it was invented for diapers! When super absorbent polymers are in use, no more leaky diapers

 Want to purchase polymer powder? You can get it HERE.